Difference between revisions of "Enchanting"
(Minor fix) |
(Researching Table Clarity.) |
||
| Line 738: | Line 738: | ||
|<img src="https://play.idlescape.com/images/combat/equipment/black_med_helm_icon.png" alt="" height="42" width="42"> | |<img src="https://play.idlescape.com/images/combat/equipment/black_med_helm_icon.png" alt="" height="42" width="42"> | ||
|[[Obsidian Helm]] | |[[Obsidian Helm]] | ||
| − | |{{?}}<br>(Any | + | |{{?}}<br>(Any Research) |
|<img src="https://play.idlescape.com/images/combat/equipment/gargoyle_helm_icon.png" alt="" height="42" width="42"> | |<img src="https://play.idlescape.com/images/combat/equipment/gargoyle_helm_icon.png" alt="" height="42" width="42"> | ||
|[[Gargoyle Helm]] | |[[Gargoyle Helm]] | ||
| Line 744: | Line 744: | ||
|<img src="https://play.idlescape.com/images/combat/equipment/black_med_helm_icon.png" alt="" height="42" width="42"> | |<img src="https://play.idlescape.com/images/combat/equipment/black_med_helm_icon.png" alt="" height="42" width="42"> | ||
|[[Obsidian Helm]] | |[[Obsidian Helm]] | ||
| − | |0.05 (5%)<br>( | + | |0.05 (5%)<br>(Any Research) |
|<img src="https://play.idlescape.com/images/combat/equipment/crest_of_chaos_icon.png" alt="Crest of Chaos" height="42" width="42"> | |<img src="https://play.idlescape.com/images/combat/equipment/crest_of_chaos_icon.png" alt="Crest of Chaos" height="42" width="42"> | ||
|[[Crest of Chaos]] | |[[Crest of Chaos]] | ||
| Line 750: | Line 750: | ||
|<img src="https://play.idlescape.com/images/combat/equipment/black_full_helm.png" alt="" height="55" width="42"> | |<img src="https://play.idlescape.com/images/combat/equipment/black_full_helm.png" alt="" height="55" width="42"> | ||
|[[Obsidian Full Helm]] | |[[Obsidian Full Helm]] | ||
| − | |{{?}}<br>(Any | + | |{{?}}<br>(Any Research) |
|<img src="https://play.idlescape.com/images/combat/equipment/black_black_knight_great_helm_icon.png" alt="" height="42" width="42"> | |<img src="https://play.idlescape.com/images/combat/equipment/black_black_knight_great_helm_icon.png" alt="" height="42" width="42"> | ||
|[[Black Knight Great Helm]] | |[[Black Knight Great Helm]] | ||
| Line 756: | Line 756: | ||
|<img src="https://play.idlescape.com/images/combat/equipment/black_chainbody.png" alt="" height="62" width="42"> | |<img src="https://play.idlescape.com/images/combat/equipment/black_chainbody.png" alt="" height="62" width="42"> | ||
|[[Obsidian Chainmail]] | |[[Obsidian Chainmail]] | ||
| − | |{{?}}<br>(Any | + | |{{?}}<br>(Any Research) |
|<img src="https://play.idlescape.com/images/combat/equipment/gargoyle_chain.png" alt="" height="64" width="42"> | |<img src="https://play.idlescape.com/images/combat/equipment/gargoyle_chain.png" alt="" height="64" width="42"> | ||
|[[Gargoyle Chainmail]] | |[[Gargoyle Chainmail]] | ||
| Line 762: | Line 762: | ||
|<img src="https://play.idlescape.com/images/combat/equipment/black_platelegs.png" alt="" height="55" width="42"> | |<img src="https://play.idlescape.com/images/combat/equipment/black_platelegs.png" alt="" height="55" width="42"> | ||
|[[Obsidian Plate Leggings]] | |[[Obsidian Plate Leggings]] | ||
| − | |{{?}}<br>(Any | + | |{{?}}<br>(Any Research) |
|<img src="https://play.idlescape.com/images/combat/equipment/gargoyle_pants.png" alt="" height="52" width="42"> | |<img src="https://play.idlescape.com/images/combat/equipment/gargoyle_pants.png" alt="" height="52" width="42"> | ||
|[[Gargoyle Legs]] | |[[Gargoyle Legs]] | ||
| Line 768: | Line 768: | ||
|<img src="https://play.idlescape.com/images/combat/equipment/black_boots_icon.png" alt="" height="34" width="42"> | |<img src="https://play.idlescape.com/images/combat/equipment/black_boots_icon.png" alt="" height="34" width="42"> | ||
|[[Obsidian Boots]] | |[[Obsidian Boots]] | ||
| − | |{{?}}<br>(Any | + | |{{?}}<br>(Any Research) |
|<img src="https://play.idlescape.com/images/combat/equipment/gargoyle_boots_icon.png" alt="" height="42" width="42"> | |<img src="https://play.idlescape.com/images/combat/equipment/gargoyle_boots_icon.png" alt="" height="42" width="42"> | ||
|[[Gargoyle Boots]] | |[[Gargoyle Boots]] | ||
| Line 774: | Line 774: | ||
|<img src="https://play.idlescape.com/images/combat/equipment/black_scimitar_icon.png" alt="" height="63" width="42"> | |<img src="https://play.idlescape.com/images/combat/equipment/black_scimitar_icon.png" alt="" height="63" width="42"> | ||
|[[Obsidian Scimitar]] | |[[Obsidian Scimitar]] | ||
| − | |{{?}}<br>(Any | + | |{{?}}<br>(Any Research) |
|<img src="https://play.idlescape.com/images/combat/equipment/gargoyle_falcion_icon.png" alt="" height="42" width="42"> | |<img src="https://play.idlescape.com/images/combat/equipment/gargoyle_falcion_icon.png" alt="" height="42" width="42"> | ||
|[[Gargoyle Falchion]] | |[[Gargoyle Falchion]] | ||
| Line 780: | Line 780: | ||
|<img src="https://play.idlescape.com/images/combat/equipment/black_daggers_icon.png" alt="" height="42" width="42"> | |<img src="https://play.idlescape.com/images/combat/equipment/black_daggers_icon.png" alt="" height="42" width="42"> | ||
|[[Obsidian Daggers]] | |[[Obsidian Daggers]] | ||
| − | |{{?}}<br>(Any | + | |{{?}}<br>(Any Research) |
|<img src="https://play.idlescape.com/images/combat/equipment/dagger_gargoyle_icon.png" alt="" height="42" width="42"> | |<img src="https://play.idlescape.com/images/combat/equipment/dagger_gargoyle_icon.png" alt="" height="42" width="42"> | ||
|[[Gargoyle Daggers]] | |[[Gargoyle Daggers]] | ||
| Line 786: | Line 786: | ||
|<img src="https://play.idlescape.com/images/combat/equipment/black_2h_sword_icon.png" alt="" height="50" width="42"> | |<img src="https://play.idlescape.com/images/combat/equipment/black_2h_sword_icon.png" alt="" height="50" width="42"> | ||
|[[Obsidian Greatsword]] | |[[Obsidian Greatsword]] | ||
| − | |{{?}}<br>(Any | + | |{{?}}<br>(Any Research) |
|<img src="https://play.idlescape.com/images/combat/equipment/gargoyle_glaive_icon.png" alt="" height="42" width="42"> | |<img src="https://play.idlescape.com/images/combat/equipment/gargoyle_glaive_icon.png" alt="" height="42" width="42"> | ||
|[[Gargoyle Glaive]] | |[[Gargoyle Glaive]] | ||
| Line 792: | Line 792: | ||
|<img src="https://play.idlescape.com/images/combat/equipment/black_shield_icon.png" alt="" height="52" width="42"> | |<img src="https://play.idlescape.com/images/combat/equipment/black_shield_icon.png" alt="" height="52" width="42"> | ||
|[[Obsidian Shield]] | |[[Obsidian Shield]] | ||
| − | |{{?}}<br>(Any | + | |{{?}}<br>(Any Research) |
|<img src="https://play.idlescape.com/images/combat/equipment/gargoyle_shield_1.png" alt="" height="78" width="42"> | |<img src="https://play.idlescape.com/images/combat/equipment/gargoyle_shield_1.png" alt="" height="78" width="42"> | ||
|[[Gargoyle Shield]] | |[[Gargoyle Shield]] | ||
| Line 798: | Line 798: | ||
|<img src="https://play.idlescape.com/images/combat/equipment/gargoyle_glaive_icon.png" alt="" height="42" width="42"> | |<img src="https://play.idlescape.com/images/combat/equipment/gargoyle_glaive_icon.png" alt="" height="42" width="42"> | ||
|[[Gargoyle Glaive]] | |[[Gargoyle Glaive]] | ||
| − | |{{?}}<br>(Any | + | |{{?}}<br>(Any Research) |
|<img src="https://play.idlescape.com/images/combat/equipment/infernal_lance_icon.png" alt="" height="42" width="42"> | |<img src="https://play.idlescape.com/images/combat/equipment/infernal_lance_icon.png" alt="" height="42" width="42"> | ||
|[[Infernal Lance]] | |[[Infernal Lance]] | ||
| Line 804: | Line 804: | ||
|<img src="https://play.idlescape.com/images/combat/equipment/rune_scimitar_icon.png" alt="" height="63" width="42"> | |<img src="https://play.idlescape.com/images/combat/equipment/rune_scimitar_icon.png" alt="" height="63" width="42"> | ||
|[[Runite Scimitar]] | |[[Runite Scimitar]] | ||
| − | |0.05 (5%)<br>( | + | |0.05 (5%)<br>(Any Research) |
|<img src="https://play.idlescape.com/images/combat/equipment/zero_edge_icon.png" alt="" height="42" width="42"> | |<img src="https://play.idlescape.com/images/combat/equipment/zero_edge_icon.png" alt="" height="42" width="42"> | ||
|[[Zero Edge]] | |[[Zero Edge]] | ||
| Line 810: | Line 810: | ||
|<img src="https://play.idlescape.com/images/jewellery/sapphire_ring.png" alt="" height="60" width="60"> | |<img src="https://play.idlescape.com/images/jewellery/sapphire_ring.png" alt="" height="60" width="60"> | ||
|[[Sapphire Ring]] | |[[Sapphire Ring]] | ||
| − | |{{?}}<br>(Any | + | |{{?}}<br>(Any Research) |
|<img src="https://play.idlescape.com/images/jewellery/emerald_ring.png" alt="" height="60" width="60"> | |<img src="https://play.idlescape.com/images/jewellery/emerald_ring.png" alt="" height="60" width="60"> | ||
|[[Emerald Ring]] | |[[Emerald Ring]] | ||
| Line 816: | Line 816: | ||
|<img src="https://play.idlescape.com/images/jewellery/sapphire_necklace.png" alt="" height="60" width="60"> | |<img src="https://play.idlescape.com/images/jewellery/sapphire_necklace.png" alt="" height="60" width="60"> | ||
|[[Sapphire Necklace]] | |[[Sapphire Necklace]] | ||
| − | |{{?}}<br>(Any | + | |{{?}}<br>(Any Research) |
|<img src="https://play.idlescape.com/images/jewellery/emerald_necklace.png" alt="" height="60" width="60"> | |<img src="https://play.idlescape.com/images/jewellery/emerald_necklace.png" alt="" height="60" width="60"> | ||
|[[Emerald Necklace]] | |[[Emerald Necklace]] | ||
| Line 822: | Line 822: | ||
|<img src="https://play.idlescape.com/images/jewellery/emerald_ring.png" alt="" height="60" width="60"> | |<img src="https://play.idlescape.com/images/jewellery/emerald_ring.png" alt="" height="60" width="60"> | ||
|[[Emerald Ring]] | |[[Emerald Ring]] | ||
| − | |{{?}}<br>(Any | + | |{{?}}<br>(Any Research) |
|<img src="https://play.idlescape.com/images/jewellery/ruby_ring.png" alt="" height="60" width="60"> | |<img src="https://play.idlescape.com/images/jewellery/ruby_ring.png" alt="" height="60" width="60"> | ||
|[[Ruby Ring]] | |[[Ruby Ring]] | ||
| Line 828: | Line 828: | ||
|<img src="https://play.idlescape.com/images/jewellery/emerald_necklace.png" alt="" height="60" width="60"> | |<img src="https://play.idlescape.com/images/jewellery/emerald_necklace.png" alt="" height="60" width="60"> | ||
|[[Emerald Necklace]] | |[[Emerald Necklace]] | ||
| − | |{{?}}<br>(Any | + | |{{?}}<br>(Any Research) |
|<img src="https://play.idlescape.com/images/jewellery/ruby_necklace.png" alt="" height="60" width="60"> | |<img src="https://play.idlescape.com/images/jewellery/ruby_necklace.png" alt="" height="60" width="60"> | ||
|[[Ruby Necklace]] | |[[Ruby Necklace]] | ||
| Line 834: | Line 834: | ||
|<img src="https://play.idlescape.com/images/jewellery/ruby_ring.png" alt="" height="60" width="60"> | |<img src="https://play.idlescape.com/images/jewellery/ruby_ring.png" alt="" height="60" width="60"> | ||
|[[Ruby Ring]] | |[[Ruby Ring]] | ||
| − | |{{?}}<br>(Any | + | |{{?}}<br>(Any Research) |
|<img src="https://play.idlescape.com/images/jewellery/diamond_ring.png" alt="" height="60" width="60"> | |<img src="https://play.idlescape.com/images/jewellery/diamond_ring.png" alt="" height="60" width="60"> | ||
|[[Diamond Ring]] | |[[Diamond Ring]] | ||
| Line 840: | Line 840: | ||
|<img src="https://play.idlescape.com/images/jewellery/ruby_necklace.png" alt="" height="60" width="60"> | |<img src="https://play.idlescape.com/images/jewellery/ruby_necklace.png" alt="" height="60" width="60"> | ||
|[[Ruby Necklace]] | |[[Ruby Necklace]] | ||
| − | |{{?}}<br>(Any | + | |{{?}}<br>(Any Research) |
|<img src="https://play.idlescape.com/images/jewellery/diamond_necklace.png" alt="" height="60" width="60"> | |<img src="https://play.idlescape.com/images/jewellery/diamond_necklace.png" alt="" height="60" width="60"> | ||
|[[Diamond Necklace]] | |[[Diamond Necklace]] | ||
| Line 846: | Line 846: | ||
|<img src="https://play.idlescape.com/images/jewellery/diamond_ring.png" alt="" height="60" width="60"> | |<img src="https://play.idlescape.com/images/jewellery/diamond_ring.png" alt="" height="60" width="60"> | ||
|[[Diamond Ring]] | |[[Diamond Ring]] | ||
| − | |{{?}}<br>(Any | + | |{{?}}<br>(Any Research) |
|<img src="https://play.idlescape.com/images/jewellery/black_opal_ring.png" alt="" height="60" width="60"> | |<img src="https://play.idlescape.com/images/jewellery/black_opal_ring.png" alt="" height="60" width="60"> | ||
|[[Black Opal Ring]] | |[[Black Opal Ring]] | ||
| Line 852: | Line 852: | ||
|<img src="https://play.idlescape.com/images/jewellery/diamond_necklace.png" alt="" height="60" width="60"> | |<img src="https://play.idlescape.com/images/jewellery/diamond_necklace.png" alt="" height="60" width="60"> | ||
|[[Diamond Necklace]] | |[[Diamond Necklace]] | ||
| − | |{{?}}<br>(Any | + | |{{?}}<br>(Any Research) |
|<img src="https://play.idlescape.com/images/jewellery/black_opal_necklace.png" alt="" height="60" width="60"> | |<img src="https://play.idlescape.com/images/jewellery/black_opal_necklace.png" alt="" height="60" width="60"> | ||
|[[Black Opal Necklace]] | |[[Black Opal Necklace]] | ||
| Line 858: | Line 858: | ||
|<img src="https://play.idlescape.com/images/jewellery/black_opal_ring.png" alt="" height="60" width="60"> | |<img src="https://play.idlescape.com/images/jewellery/black_opal_ring.png" alt="" height="60" width="60"> | ||
|[[Black Opal Ring]] | |[[Black Opal Ring]] | ||
| − | |{{?}}<br>(Any | + | |{{?}}<br>(Any Research) |
|<img src="https://play.idlescape.com/images/jewellery/prismatic_ring.png" alt="" height="60" width="60"> | |<img src="https://play.idlescape.com/images/jewellery/prismatic_ring.png" alt="" height="60" width="60"> | ||
|[[Prismatic Ring]] | |[[Prismatic Ring]] | ||
| Line 864: | Line 864: | ||
|<img src="https://play.idlescape.com/images/jewellery/black_opal_necklace.png" alt="" height="60" width="60"> | |<img src="https://play.idlescape.com/images/jewellery/black_opal_necklace.png" alt="" height="60" width="60"> | ||
|[[Black Opal Necklace]] | |[[Black Opal Necklace]] | ||
| − | |{{?}}<br>(Any | + | |{{?}}<br>(Any Research) |
|<img src="https://play.idlescape.com/images/jewellery/prismatic_necklace.png" alt="" height="60" width="60"> | |<img src="https://play.idlescape.com/images/jewellery/prismatic_necklace.png" alt="" height="60" width="60"> | ||
|[[Prismatic Necklace]] | |[[Prismatic Necklace]] | ||
| Line 870: | Line 870: | ||
|<img src="https://play.idlescape.com/images/combat/equipment/decayed_cloak_hood.png" alt="" height="60" width="60"> | |<img src="https://play.idlescape.com/images/combat/equipment/decayed_cloak_hood.png" alt="" height="60" width="60"> | ||
|[[Decayed Cloak]] | |[[Decayed Cloak]] | ||
| − | |{{?}}<br>(Any | + | |{{?}}<br>(Any Research) |
|<img src="https://play.idlescape.com/images/christmas/festive_shroud.png" alt="" height="60" width="60"> | |<img src="https://play.idlescape.com/images/christmas/festive_shroud.png" alt="" height="60" width="60"> | ||
|[[Festive Shroud]] | |[[Festive Shroud]] | ||
| Line 876: | Line 876: | ||
|<img src="https://play.idlescape.com/images/misc/schfftph_fzzglgl.png" alt="" height="60" width="60"> | |<img src="https://play.idlescape.com/images/misc/schfftph_fzzglgl.png" alt="" height="60" width="60"> | ||
|[[Shrimp]] | |[[Shrimp]] | ||
| − | |{{?}}<br>(Any | + | |{{?}}<br>(Any Research) |
|<img src="https://play.idlescape.com/images/misc/schfftph_fzzglgl_kakfzz.png" alt="" height="60" width="60"> | |<img src="https://play.idlescape.com/images/misc/schfftph_fzzglgl_kakfzz.png" alt="" height="60" width="60"> | ||
|[[Shrimp Ascendant]] | |[[Shrimp Ascendant]] | ||
| Line 882: | Line 882: | ||
|<img src="https://play.idlescape.com/images/misc/schfftph_fzzglgl_kakfzz.png" alt="" height="60" width="60"> | |<img src="https://play.idlescape.com/images/misc/schfftph_fzzglgl_kakfzz.png" alt="" height="60" width="60"> | ||
|[[Shrimp Ascendant]] | |[[Shrimp Ascendant]] | ||
| − | |{{?}}<br>(Any | + | |{{?}}<br>(Any Research) |
|<img src="https://play.idlescape.com/images/misc/shrimp_bauble.png" alt="" height="60" width="60"> | |<img src="https://play.idlescape.com/images/misc/shrimp_bauble.png" alt="" height="60" width="60"> | ||
|[[Shrimp Bauble]] | |[[Shrimp Bauble]] | ||
| Line 888: | Line 888: | ||
|<img src="https://play.idlescape.com/images/combat/equipment/titanic_gauntlet.png" alt="" height="60" width="60"> | |<img src="https://play.idlescape.com/images/combat/equipment/titanic_gauntlet.png" alt="" height="60" width="60"> | ||
|[[Titanic Gauntlet]] | |[[Titanic Gauntlet]] | ||
| − | |1 (100%)<br>( | + | |1 (100%)<br>(Augmenting from +0 to +1) |
|<img src="https://play.idlescape.com/images/combat/equipment/awakened_world_shaper.png" alt="" height="60" width="60"> | |<img src="https://play.idlescape.com/images/combat/equipment/awakened_world_shaper.png" alt="" height="60" width="60"> | ||
|[[Awakened World Shaper]] | |[[Awakened World Shaper]] | ||
| Line 894: | Line 894: | ||
|<img src="https://play.idlescape.com/images/combat/equipment/ladle.png" alt="" height="60" width="60"> | |<img src="https://play.idlescape.com/images/combat/equipment/ladle.png" alt="" height="60" width="60"> | ||
|Any ladle | |Any ladle | ||
| − | |{{?}}<br>(Any | + | |{{?}}<br>(Any Research) |
|<img src="https://play.idlescape.com/images/combat/equipment/searing_ladle.png" alt="" height="60" width="60"> | |<img src="https://play.idlescape.com/images/combat/equipment/searing_ladle.png" alt="" height="60" width="60"> | ||
|[[Searing Ladle]] | |[[Searing Ladle]] | ||
| Line 900: | Line 900: | ||
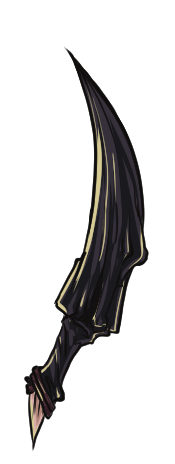
|{{img|bestial dagger|auto|60}} | |{{img|bestial dagger|auto|60}} | ||
|[[Bestial Dagger]] | |[[Bestial Dagger]] | ||
| − | | | + | |Augmenting from +10 to +11 |
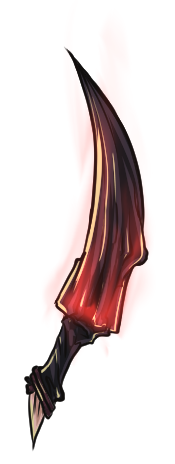
|{{img|empowered bestial dagger|auto|60}} | |{{img|empowered bestial dagger|auto|60}} | ||
|[[Empowered Bestial Dagger]] | |[[Empowered Bestial Dagger]] | ||
| Line 906: | Line 906: | ||
|{{img|bestial defender|auto|60}} | |{{img|bestial defender|auto|60}} | ||
|[[Bestial Defender]] | |[[Bestial Defender]] | ||
| − | | | + | |Augmenting from +10 to +11 |
|{{img|empowered bestial defender|auto|60}} | |{{img|empowered bestial defender|auto|60}} | ||
|[[Empowered Bestial Defender]] | |[[Empowered Bestial Defender]] | ||
| Line 912: | Line 912: | ||
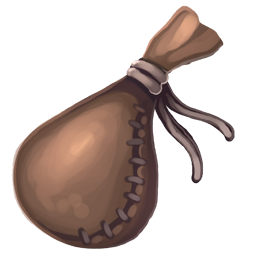
|{{img|small bag of holding|auto|60}} | |{{img|small bag of holding|auto|60}} | ||
|[[Small Bag of Holding]] | |[[Small Bag of Holding]] | ||
| − | | | + | |Augmenting from +4 to +5 |
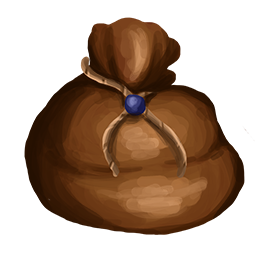
|{{img|bag of holding|auto|60}} | |{{img|bag of holding|auto|60}} | ||
|[[Bag of Holding]] | |[[Bag of Holding]] | ||
| Line 918: | Line 918: | ||
|{{img|bag of holding|auto|60}} | |{{img|bag of holding|auto|60}} | ||
|[[Bag of Holding]] | |[[Bag of Holding]] | ||
| − | | | + | |Augmenting from +9 to +10 |
|{{img|large bag of holding|auto|60}} | |{{img|large bag of holding|auto|60}} | ||
|[[Large Bag of Holding]] | |[[Large Bag of Holding]] | ||
Revision as of 20:15, 16 June 2024
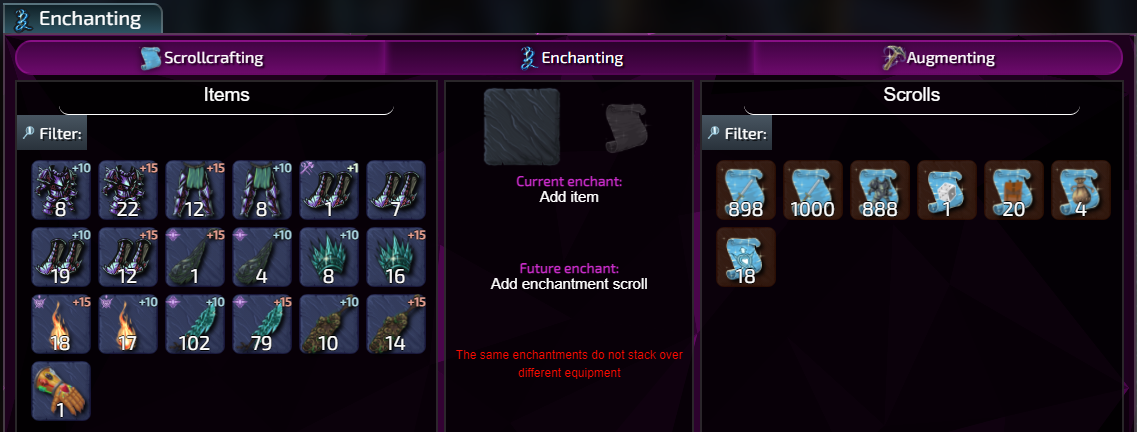
Enchanting is a powerful skill which is divided into the following sections within the skill page:
- Scrollcrafting - used to create enchantment scrolls.
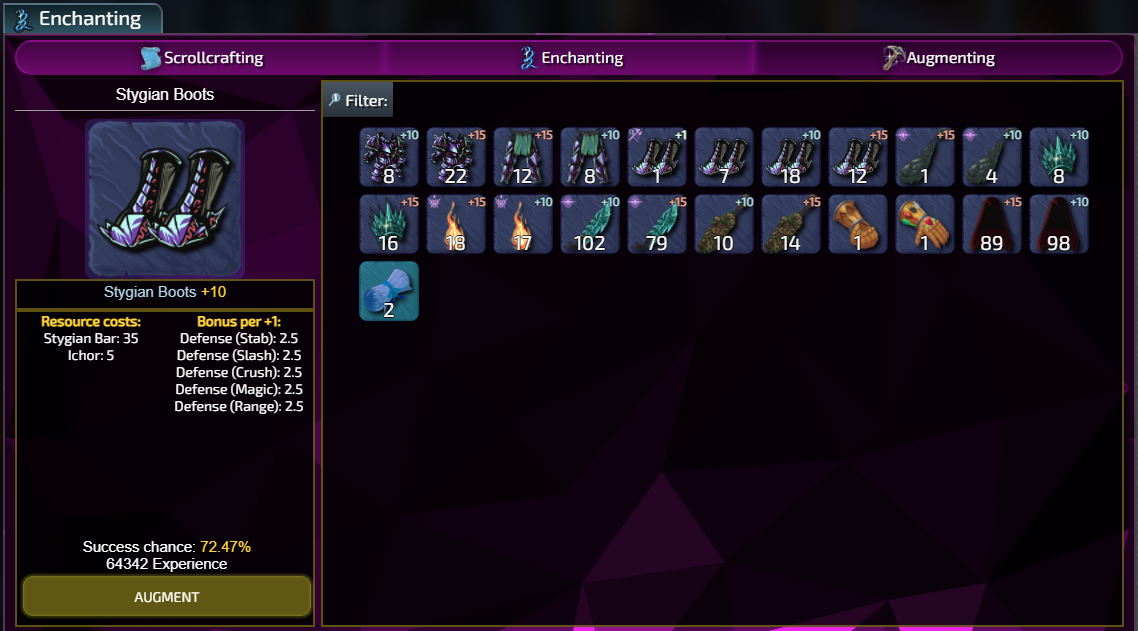
- Augmenting - used to improve gear stats.
- Item Research -used to research items into dust or scrap.
- Enchanting - used to apply enchantment scrolls.
Contents
Scrollcrafting
Enchantment scrolls are created via scrollcrafting using a scroll, silver, and a variety of runes. Enchantment scrolls can be applied to a piece of gear to provide passive buffs/effects.
You can filter the list of creatable scrolls by applicable gear type by clicking on the various gear icons in the textbox at the top of the Scrollcrafting page.
List of Enchantments
 Scroll Scroll
|
Area Affected | Slot | Level | Exp | Silver Amount | Rune Amount | Runes | Effect per scroll |
|---|---|---|---|---|---|---|---|---|
 Scroll of the Shrimp Lord Scroll of the Shrimp Lord
|
Cooking | Gloves, Boots | 1 | 80 | 100 | 10 | Air, Water, Chaos, Nature | Gain a 5% chance per Cooking action to gain one Raw Shrimp. |
 Scroll of Overly Well Done Scroll of Overly Well Done
|
Cooking | Ladle | 2 | 120 | 100 | 10 | Water, Fire, Earth | Increases chance to burn food and reduces burn XP penalty (caps at no penalty) while cooking by 20% |
 Scroll of Weakening Scroll of Weakening
|
Combat Equipment | Helm, Body, Legs, Weapon, Shield | 4 | 300 | 100 | 20 | Air, Fire, Mind | Decreases the level requirements of the item by 1. |
 Scroll of Pyromancy Scroll of Pyromancy
|
Cooking, Smithing | Ring, Necklace | 7 | 600 | 100 | 30 | Fire, Water, Nature | Use 5% less heat when Cooking and Smithing. Caps at 80% reduction. |
 Scroll of Healing Scroll of Healing
|
Combat | Shield, Combat-Talisman | 10 | 700 | 200 | 30 | Blood, Nature, Cosmic | Passive heal per tick is increased by 20%, healing from food is increased by 10%. |
 Scroll of Overhealing Scroll of Overhealing
|
Combat | Weapon | 11 | 700 | 200 | 30 | Air, Water, Death | Heal for 1% of overkill damage on a target. |
 Scroll of Cultivation Scroll of Cultivation
|
Farming | Hoe | 12 | 800 | 200 | 30 | Air, Water, Blood | Gain a 2% chance to get a seed back when harvesting. |
 Scroll of Reinforcement Scroll of Reinforcement
|
Combat | Helm, Body, Legs | 13 | 800 | 200 | 30 | Death, Chaos, Mind | Increases agility by 12. |
 Scroll of Pungent Bait Scroll of Pungent Bait
|
Fishing | Tacklebox, Fishing Set | 14 | 850 | 200 | 30 | Nature, Water | Increase bait power by 3. |
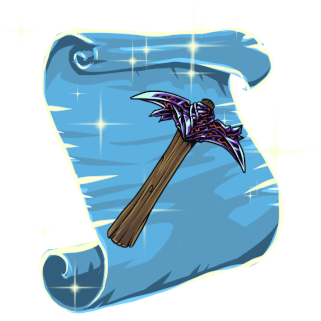 Scroll of Destructive Testing Scroll of Destructive Testing
|
Mining | Pickaxe, Mining Set | 16 | 900 | 200 | 30 | Earth, Fire, Chaos, Mind | Sand, Stone and Clay mined will be destroyed and provide 5 mining experience per piece. Scholar rolls first and does not stack. |
 Scroll of Nature Scroll of Nature
|
Foraging | Hatchet | 19 | 1000 | 300 | 30 | Earth, Water, Nature, Cosmic | Access hidden tree nodes and greatly increase your chance to find a tree related node while Foraging. |
 Scroll of Root Digging Scroll of Root Digging
|
Foraging | Hatchet, Foraging Set | 22 | 1000 | 300 | 30 | Earth, Nature, Cosmic | Gain a chance to find gems while Foraging. Stronger enchantments are stronger chances. Has a 10% chance to consume an Earth Rune on success. Attempts to pull rune from your stockpile then ammo pouch if none found. |
 Scroll of Reinforced Line Scroll of Reinforced Line
|
Fishing | Tacklebox, Fishing Set | 23 | 1250 | 300 | 40 | Water, Earth | Increases reel power by 3. |
 Scroll of the Prospector Scroll of the Prospector
|
Mining | Pickaxe, Mining Set | 25 | 1500 | 300 | 40 | Air, Fire, Cosmic | Increase your chance to find gems or silver while gathering by 50%. Has a 10% chance to consume an Earth Rune on success. Attempts to pull the rune from your stockpile then ammo pouch if none found. |
 Scroll of Taunting Scroll of Taunting
|
Combat | Helm, Body, Legs, Shield, Shield, Combat-talisman | 26 | 1600 | 400 | 40 | Chaos, Blood, Earth | Increases your threat by 20%. |
 Scroll of Accuracy Scroll of Accuracy
|
Combat | Weapon | 28 | 1600 | 400 | 40 | Blood, Death, Mind | Increases accuracy for all 3 styles by 3% multiplicativey. |
 Scroll of Endless Ammo Scroll of Endless Ammo
|
Combat | Cape, Weapon | 29 | 1650 | 400 | 40 | Mind, Nature, Chaos | Gain a 17% chance to not consume ammo (resulting in 20% more uses from each ammo piece on average). Works on ranged projectiles, melee whetstones, and magic charms. |
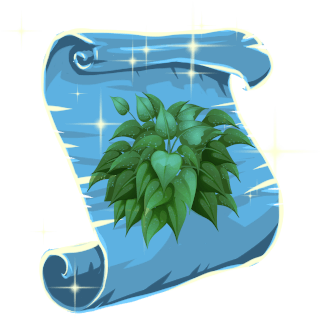 Scroll of Seed Harvesting Scroll of Seed Harvesting
|
Combat | Weapon | 30 | 1650 | 400 | 40 | Nature, Blood, Earth | Access hidden seed nodes and greatly increase your chance to find a seed related node while Foraging. |
 Scroll of Protection Scroll of Protection
|
Combat | Helm, Body, Legs | 31 | 1700 | 400 | 40 | Air, Earth, Cosmic | Increases protection by 10. |
 Scroll of Resistance Scroll of Resistance
|
Combat | Helm, Body, Legs | 32 | 1750 | 400 | 40 | Cosmic, Fire, Air | Increases resistance by 10. |
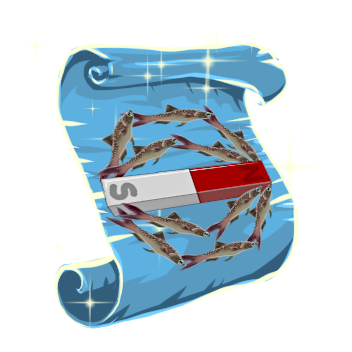 Scroll of Fishing Magnetism Scroll of Fishing Magnetism
|
Fishing | Tacklebox | 33 | 1750 | 400 | 40 | Cosmic, Water, Earth | Increase bonus rarity by 2 and decreases bait and reel power by the same amount. Increases chance to find known rare nodes. |
 Scroll of Refining Scroll of Refining
|
Smithing | Gloves, Boots, Tongs, smithingset | 34 | 1800 | 400 | 40 | Air, Earth, Fire, Cosmic | Gain a mysterious chance to find gems and other rare materials while Smithing. Each forge is designed to extract different materials. The rarest of materials requires the hottest of forges and highest tier ores to be smelted. |
 Scroll of Rune Reserves Scroll of Rune Reserves
|
Combat | Cape, Weapon | 35 | 2100 | 500 | 50 | Mind, Chaos, Water | Gain a 33% chance to not consume runes when using abilities (resulting in 50% more ability uses for the same rune cost). |
 Scroll of the Gold Digger Scroll of the Gold Digger
|
Farming | Hoe | 36 | 2300 | 500 | 50 | Earth, Nature, Cosmic | Gain a fixed 10% chance per harvested plant to get 2000 Gold Coins. |
 Scroll of Wealth Scroll of Wealth
|
Gathering and Production skills | Ring, Necklace | 37 | 2300 | 500 | 50 | Nature, Mind, Cosmic | Automatically sell resources for 20% more gold than their vendor value. Does not affect Crafting or stack with Scholar. |
 Scroll of Metallurgy Scroll of Metallurgy
|
Smithing | Tongs, smithingset | 38 | 2350 | 500 | 40 | Mind, Fire, Air | Increases the forge's max heat intensity by 0.5 (rounded down). |
 Scroll of Engraving Scroll of Engraving
|
Runecrafting | Chisel | 39 | 2400 | 500 | 50 | Cosmic, Mind, Nature | Gives a 2% chance to not consume rune slates while Runecrafting. |
 Scroll of Cooking Scroll of Cooking
|
Cooking | Gloves, Boots, Ladle | 40 | 2400 | 500 | 50 | Earth, Fire, Water | Decreases chance to burn food while Cooking by 4%. |
 Scroll of Archaeology Scroll of Archaeology
|
Gathering Skills | Tacklebox, Fishing Set, Pickaxe, Hatchet, Mining Set, Foraging Set | 41 | 2400 | 500 | 50 | Nature, Water, Earth | Gives access to a secondary drop table while gathering with rewards and chances heavily scaling on enchantment strength. The best finds are only found in the hardest to reach zones! |
 Scroll of the Herbalist Scroll of the Herbalist
|
Foraging | Hatchet, Foraging Set | 42 | 2450 | 500 | 50 | Nature, Death, Fire | Access hidden plant nodes and greatly increase your chance to find a plant related node while Foraging. |
 Scroll of Runecrafting Scroll of Runecrafting
|
Runecrafting | Gloves, Boots, Chisel | 43 | 2500 | 500 | 50 | Nature, Mind, Cosmic | Reduces essence used in Runecrafting by 5%. |
 Scroll of Inferno Scroll of Inferno
|
Smithing | Gloves, Boots | 46 | 2600 | 600 | 50 | Earth, Fire, Chaos | Gain a 4% chance per Smithing/Cooking action to complete another Smithing/Cooking action. Caps at 80% strength and 5 consecutive procs. |
 Scroll of Bait Preservation Scroll of Bait Preservation
|
Fishing | Tacklebox, Fishing Set | 47 | 2800 | 600 | 60 | Chaos, Water, Earth | Increases chance to preserve bait by 4%. |
 Scroll of the Soul Wisdom Scroll of the Soul Wisdom
|
All Skills* | pickaxe, hatchet, hoe, helm, body, legs, gloves, boots, weapon, shield, ring, necklace, tacklebox, ladle, tongs, cape, chisel, arrows, tome, combat-talisman, mining set, foraging set, fishing set, cooking set, smithing set, runecrafting set | 48 | 3000 | 600 | 60 | Cosmic, Mind, Chaos | ONLY APPLIES TO THE ITEM THIS ENCHANTMENT IS ON. Increases soulbound item XP gain by 6%. |
 Scroll of Naturalist Scroll of Naturalist
|
Gathering Skills | Gloves, Boots | 49 | 3200 | 600 | 60 | Air, Water, Nature, Cosmic | Increase your chance to gain chests as well as convert standard chests to their greater variants while gathering by 20%. |
 Scroll of the Fiber Finder Scroll of the Fiber Finder
|
Fishing | Tacklebox, Fishing Set | 50 | 3300 | 600 | 60 | Mind, Water, Earth | Increases chance of find aquatic fibers by 25%. |
 Scroll of Critical Strike Scroll of Critical Strike
|
Combat | Weapon | 52 | 3300 | 600 | 60 | Blood, Death, Chaos, Cosmic | Increases critical chance and damage multiplier by 2.5%. |
 Scroll of Fishing Scroll of Fishing
|
Fishing | Gloves, Boots | 55 | 3400 | 700 | 60 | Earth, Water, Mind | Increases the fish catch chance by 2.5%. |
 Scroll of Prolonging Scroll of Prolonging
|
Consumables | Gloves, Boots | 58 | 3500 | 700 | 60 | Nature, Mind | Gain a 20% chance to not consume a buff stack (resulting in 25% more uses from a buff on average). |
 Scroll of Essence Concentration Scroll of Essence Concentration
|
Runecrafting | Gloves, Boots, Chisel | 59 | 4000 | 700 | 70 | Cosmic, Mind, Chaos | Increases the number of runes crafted per action by 1 as well as increases essence cost by 25%. |
 Scroll of Embers Scroll of Embers
|
Foraging | Hatchet, Foraging Set | 61 | 4200 | 700 | 70 | Fire, Nature | Gain a 10% chance to additionally gain the heat from a burnable when gathering it without burning the item. |
 Scroll of Gathering Scroll of Gathering
|
Gather Skills | Ring, Necklace | 64 | 4300 | 800 | 70 | Earth, Fire, Water, Mind, Cosmic | Gain a 10% chance to find an extra resource while gathering. There is a 15% chance that a Nature Rune is consumed when it procs. Attempts to pull the rune from your stockpile then ammo pouch if none found. |
 Scroll of Crafting Scroll of Crafting
|
Crafting | Gloves, Boots | 67 | 4400 | 800 | 70 | Air, Nature | Each crafted item costs 2% less ingredients. |
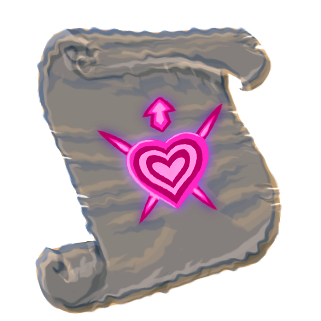 Scroll of Fortitude Scroll of Fortitude
|
Combat | Shield, Combat-Talisman | 68 | 4400 | 800 | 70 | Nature, Chaos, Blood | Increases stamina by 10. |
 Scroll of Oil Spill Scroll of Oil Spill
|
Fishing | Tacklebox | 69 | 4450 | 800 | 70 | Death, Water, Earth | Adds a 8% chance to try and extract fish oil from a fish based on the fish's size. There is a chance that fish oil may not be created if the fish is too small. |
 Scroll of Chances Scroll of Chances
|
Augumentation | Gloves, Boots | 70 | 4500 | 800 | 70 | Nature, Mind, Cosmic | Increase the chance of a successful augmentation by 1%. |
 Scroll of Deadliest Catch Scroll of Deadliest Catch
|
Fishing | Tacklebox, Fishing Set | 71 | 4550 | 900 | 70 | Blood, Water, Earth | Increase bonuses from bait by 5% but decreases the chance of bait preservation by 5%. |
 Scroll of Farming Scroll of Farming
|
Farming | Hoe | 72 | 4600 | 900 | 70 | Earth, Water, Nature | Gain a 2% chance to get double yield when harvesting. |
 Scroll of Enlightenment Scroll of Enlightenment
|
Runecrafting | Gloves, Boots | 73 | 4600 | 900 | 70 | Air, Water, Chaos, Mind | Gain 1 more essence per action where essence is acquired. |
 Scroll of Supercooling Scroll of Supercooling
|
Mining | Pickaxe, Mining Set | 76 | 5400 | 900 | 80 | Earth, Fire, Cosmic | Items with lower heat costs to process have an increased chance to be gathered. Has a 1% chance to consume a Water Rune every mining action. Attempts to pull from your stockpile then ammo pouch if none found. |
 Scroll of Superheating Scroll of Superheating
|
Mining | Pickaxe, Mining Set | 76 | 5400 | 900 | 80 | Earth, Fire, Cosmic | Items with higher heat costs to process have an increased chance to be gathered. Has a 1% chance to consume a Fire Rune every mining action. Attempts to pull from your stockpile then ammo pouch if none found. |
 Scroll of Force Scroll of Force
|
Combat, Equipment | Shield | 79 | 5500 | 900 | 80 | Blood, Death, Chaos | Gain 1% of your protection as strength. |
 Scroll of Recklessness Scroll of Recklessness
|
Combat | Helm, Body, Legs | 81 | 5600 | 1000 | 80 | Blood, Death, Chaos | Additively increases offensive magic, range and melee affinities by 2%, but reduces the respective defensive affinities by the same amount. |
 Scroll of False Equilibrium Scroll of False Equilibrium
|
Combat | Helm, Body, Legs | 81 | 5600 | 1000 | 80 | Chaos, Death, Blood | Increase maximum damage and decreases minimum damage by 1.5%. |
 Scroll of Patience Scroll of Patience
|
Combat | Body, Legs | 82 | 5600 | 1000 | 80 | Air, Water, Death | Slower abilities and attacks receive a maximum damage bonus scaling based on attack speed. Scales off of ability speed, capping at 50% increase or decrease. |
 Scroll of Dwarven Engineering Scroll of Dwarven Engineering
|
Mining | Pickaxe, Mining Set | 83 | 5600 | 1000 | 90 | Mind, Nature, Air | Gives a 0.20% chance to massively boost amount gathered. |
 Scroll of the Master Chef Scroll of the Master Chef
|
Cooking | Ladle | 84 | 5650 | 1000 | 80 | Water, Fire, Earth | Decrease chance to burn food while cooking by 4% of your effective cooking level. (level 99 * 4% = -3.96% burn chance) |
 Scroll of the Treasure Hunter Scroll of the Treasure Hunter
|
Combat | Gloves, Boots | 85 | 5700 | 1000 | 80 | Chaos, Nature, Cosmic | Increases your chance of finding items from slain enemies by 3%. |
 Scroll of Pure Metals Scroll of Pure Metals
|
Smithing | Tongs, smithingset | 87 | 6400 | 1200 | 100 | Mind, Fire, Earth | Reduces the amount of materials required to smelt a bar by 2%. |
 Scroll of the Scholar Scroll of the Scholar
|
All Skills* | Ring, Necklace | 88 | 6500 | 1000 | 90 | Chaos, Mind, Cosmic | Increases experience gained from gathering and production by 20% but destroys the item in process. Does not affect Crafting or stack with Wealth. Only active for mastery experience when a skill is at level 99. |
 Scroll of Fertilizing Scroll of Fertilizing
|
Farming | Hoe | 90 | 6600 | 1100 | 90 | Air, Earth, Water, Nature, Cosmic | Increase minimum harvest yield by 6%. |
 Scroll of Efficiency Scroll of Efficiency
|
Cooking, Smithing | Gloves, Boots | 91 | 6600 | 1100 | 90 | Air, Earth, Fire, Water, Nature | Gain a 1% chance to produce an extra item during Cooking, Smithing, Scrollcrafting, and Weaving fibers. |
 Scroll of Haste Scroll of Haste
|
All Skill except Combat | Ring, Necklace | 94 | 7500 | 1100 | 100 | Air, Chaos, Mind, Cosmic | Increases non-combat action speed by 4%. Caps at halving action time. Stacks with Empowered Haste. |
 Scroll of Crucible Scroll of Crucible
|
Smithing | Tongs, smithingset | 62 | 4200 | 700 | 70 | Mind, Fire, Earth | Increases input and output of materials in Smithing by 2%. Heat cost is instead increased by 3%. |
 Scroll of Forge Maintenance Scroll of Forge Maintenance
|
Smithing | Tongs, smithingset | 77 | 5500 | 900 | 90 | Cosmic, Nature, Fire | Decreases negative forge effects by 1%. |
 Scroll of Forge Enhancement Scroll of Forge Enhancement
|
Smithing | Tongs, smithingset | 78 | 5400 | 900 | 90 | Cosmic, Water, Fire | Increases positive forge effects by 1%. |
Entries marked with an * have a special condition to them, read scroll tool tip to find out more
Notes
There are some important things to keep in mind before enchanting equipment:
- Only one kind of enchantment can be active per equipment piece. Adding a new enchantment of a different type will overwrite the previous enchantment.
- Overwriting an enchantment does not refund the previous enchantment scroll.
- The same enchantments do not stack over different equipment.
- Multiple scrolls of the same enchantment can be added to a single piece of equipment to increase its effect.
- Adding enchantments to gear will give you mind essence based on how many scrolls you add.
- See Skilling Efficiency for a table on gold to exp efficiency.
Enchanting
Enchanting allows you to use your enchantment scrolls to give your item new properties.
This process has a 100% success rate and cannot fail. Applying new scrolls with a different effect to an item with an existing enchantment overwrites the old one.
Not all enchantments can be applied to all equipment; enchantments exclusively related to farming, for example, can only be applied to a hoe. In addition, only a single type of enchantment can be applied to any piece of gear at any time; a helm's enchantment slots cannot have some attributed to reckless and others attributed to protection.
Different tiers of equipment have a different number of enchantment slots available; from bronze with only a single slot, to stygian with six. Exceedingly rare items, such as the moss maul, can hold up to eight enchantments. To see how many slots any given item has, check the Equipment page.
Augmenting
Augmenting allows players to increase the base stats of a piece of gear. This process cannot fail and on every action will increase the augment counter by one (two if critical augmentation happens). Once the counter is full, the item will upgrade by one level and reset and increase the next counter requirements.
Almost all items have no limit to the number of augmentations. However, the time of augmenting will progressively increase with each level of augmentation. After level five, it will start to require base copies of the item you are augmenting, progressively scaling every five levels there after.
Exceptions to the above include Dungeon Keys and Elite Scrolls, which cap at +20.
Exactly which stats are improved depends on the item. Augmenting bronze armor, for example, increases all defensive stats per augmentation level, while augmenting pickaxes increases their mining level bonus, and subsequently their mining speed. To see a full augmentation bonus list, check the equipment page.
Augmenting an item has a material cost. This is generally about 1% of the item's crafting cost, but it varies from item to item.
Augmenting critically starts at a static 10% chance, but can be increase with Enchantment Scrolls and Talents.
Researching
Researching is a new mechanic introduced in season 2.
Researching an item will produce dust on a successful action or scrap on an unsuccessful action at a base rate of 90% success.
These chances can be increase or decreased with Enchantment Scrolls or Talents capping at either 98% or 10% chance of success.
Researching has a chance of transforming items into a different item. Check the table below for more information. (This has replaced augmenting transformations, unless otherwise stated.)
List of Research Upgrades (Needs updating)
Augment experience per tier/+
This table is accurate for all equipment in their respective tier.
| Tier | Slots | EXP | ||
|---|---|---|---|---|
| Bronze | 1 | 20 | ||
| Iron | 2 | 20 | ||
| Obsidian | 5 | 180 | ||
| Mithril | 3 | 180 | ||
| Adamantite | 4 | 320 | ||
| Runite | 5 | 500 | ||
| Stygian | 6 | 720 | ||
| 7 slots | 7 | 980 | ||
| 8 slots | 8 | ? |
The experience gained from augmentation is calculated by the items tier, no longer by its enchantment slots. Special cases do exist.
Soulbinding
Soulbinding was a mechanic that was removed during season two in favor of the new augmenting system. Any soulbound items players had at the time were un-soulbound and kept their levels.
Changes
- 20 July - Update v0.6.6.2 - adjusted the acquisition rate of some augmenting secrets
