Difference between revisions of "Fishing Guide"
m (remove bad advice) |
(→Enchantments: Use Template:ScrollList) |
||
| (28 intermediate revisions by 3 users not shown) | |||
| Line 1: | Line 1: | ||
[[File:FishingUI.png|alt=|thumb|753x753px|Fishing UI]] | [[File:FishingUI.png|alt=|thumb|753x753px|Fishing UI]] | ||
| − | This guide is intended to | + | This guide is intended to give advice on effectively reaching level 99 in [[Fishing]], as well as a detailed explanation of the mechanics involved in the skill along with advice on gear, enchantments, and affixes in regards to different specialisations. A brief summary of how to max fishing is included directly underneath this paragraph, the guide is split into sections in the contents table below for those who are only interested in certain parts. |
| − | Any questions, feedback, or parts that are not clear? Feel free to | + | Any questions, feedback, or parts of this guide that are not clear? Feel free to post in the wiki channel in discord and I'll try to answer and update the guide. |
| − | + | Guide last updated: Version 0.22.1 | |
| − | |||
| − | While mining and foraging are pretty easy to level up and gather resources without using any gear, fishing is the | + | ==TL:DR give me the summary for maxing fast== |
| + | |||
| + | *Prioritize getting 100% node search and node gather chance in the following priority: potions (if you want to spend) > gear > affixes > enchantments. | ||
| + | *Use 1 piece of [[Jewelry]] with [[Haste|haste enchantments]] and the [[Cloak of Many Pockets]] / [[Cloak of the Void|the Void]] (Use [[Camo Cloak]] in Stormy Seas). | ||
| + | *Always use the bait that provides the most reel power, if it doesn't reduce your success chances below 100%. (don't use tentacle bait until late game when equipping it does not reduce your overall sub-stats). | ||
| + | *Keep using the highest tier [[:Category:Tacklebox|Tacklebox]] you can and augment it to at least +5. Try to enchant with [[Reinforced Line]] unless you absolutely need [[Pungent Bait]] to reach 100% chance. | ||
| + | **Affix priorities for an XP focus (if they are available for your tier of TB) are: Speedster Fishing > Prepared > Fishing Node Size > Reeling > Fisher > Instant Node Finding. If you still need to reach 100% prioritise Successful Fisher. | ||
| + | *Fish in the highest zone you can where failed attempts (or combat encounters in Stormy Seas) do not outweigh the XP gained per hour (This is hard to quantify for the guide but you can check this by resetting your loot log and toggling "rate" to check each zone for about 5 minutes). Don't fish in Stormy Seas without a [[Camo Cloak]]. | ||
| + | *Get the full [[:Category:Fisherman_Set|fishing set]] as soon as you can (and augment it where possible to +5). If you're lucky you might get one off the market for cheap, otherwise complete its related [[Quests|quest]] at level 50 to get a prototype set. This gives you the set bonus stat increase (very good!) and 1/3 enchantments on the pieces. | ||
| + | *You will not be able to make the [[Ocean's Embrace|Ocean’s Embrace]] before maxing the skill unless you run a lot of [[Abandoned Academy Base]] dungeons, but if you want to keep fishing you will want to aim for it after getting to +5 on your gear | ||
| + | |||
| + | If you already know / don’t care about how fishing works you can skip to a relevant section using the contents menu on the top left of the page. If you’re new to fishing or just want to be a nerd and read about the mechanics more here’s… | ||
| + | |||
| + | ==A not so brief overview of fishing== | ||
| + | Fishing is designed to be the most complex of the three gathering skills in game and is intended to require more investment than [[mining]] or [[foraging]]. It was the first skill to receive the node system that has been adapted for foraging, and has five sub-stats that influence the skill compared to mining and foraging only caring for effective skill level. On top of this, fishing is the only gathering skill in which you can fail an action, resulting in 0 items and 0 XP gained. | ||
| + | |||
| + | While mining and foraging are pretty easy to level up and gather resources without using any gear, fishing is the gathering skill where gear, [[Fishing Guide#Buffs|buffs]], and [[Fishing Guide#Bait|bait]] have the largest impact. | ||
'''But why fish?''' | '''But why fish?''' | ||
| − | Apart from just wanting to max out | + | Apart from just wanting to max out another skill, fishing provides: |
| + | |||
| + | *Fish - (obviously) for use in [[cooking]]. | ||
| + | *[[Fiber|Fibers]] - The raw materials used in [[Runecrafting#Cloth Weaving|cloth weaving]] for crafting and augmenting [[magic]] gear. As well as augmenting your [[:Category:Fisherman Set|fishing equipment]]. | ||
| + | *[[Driftwood]] and [[Aquamarine|Aquamarines]] - Components used in crafting and augmenting high tier [[magic]] gear, [[Dungeon Keys]], and [[:Category:Tacklebox|Tackleboxes]]. | ||
| + | *[[Fish Oil]] - Provided you have the [[Oil Spill|oil spill]] enchantment, this makes fishing actions have a chance to also give you Fish Oil which is used when crafting [[Pyre Log|Pyre Logs]] for heat. Skipping the need to [[Cooking|Prepare]] caught fish for Fish Oil. | ||
| − | |||
| − | |||
| − | |||
| − | |||
| − | '''What makes fishing different?''' In short, the node system and | + | '''What makes fishing so different?''' In short, the node system and sub-stats. In long: |
===The node system=== | ===The node system=== | ||
| − | The node system has been confusing | + | The node system has been confusing players ever since it was released. An easy way to think of it is that when you start fishing your player gets on a boat and sails for a certain amount of time to find a school of fish (a [[Fishing Guide#Areas|node]]). Then takes a different amount of time to catch one of those fish (a resource). After your player has caught everything in the area they have to sail onward to find another school of fish to catch (a new node). Available nodes in an area can be seen by clicking the i icon and then the nodes tab. |
| + | |||
| + | ===Bait Power=== | ||
| + | Bait power is used to calculate the time it takes you to find these nodes, the chance of succeeding in doing so, and the size of the node you find. Failing a search results in the biggest time losses in fishing and it is important to increase your bait power to reduce this. Luckily your chance to search will increase alongside your level and gear as well as with affixes and enchantments. | ||
| + | |||
| + | '''How to Increase Bait Power:''' | ||
| + | *Certain types of bait. (See the [[Fishing Guide#Bait |bait table]]). | ||
| + | *[[:Category:Fisherman Set|Fishing equipment]] / [[:Category:Tacklebox|Tackleboxes]] and [[Enchanting#Augmenting|augmenting]] both of these. | ||
| + | It can also be supplemented with the following [[Fishing Guide#Buffs|buffs]] and [[Fishing Guide#Enchantments|enchantments]]: [[Pungent Bait]] and to a lesser extent [[Deadliest Catch]] if your current bait is providing Bait Power. | ||
| + | |||
| + | ===Reel Power=== | ||
| + | Reel power is used to calculate the time it takes you to gather a resource from a node as well as the chance of succeeding in doing so. Reel power comes into play multiple times per node. | ||
| + | |||
| + | '''How to Increase Reel Power:''' | ||
| + | *Certain types of bait. (See the [[Fishing Guide#Bait |bait table]]). | ||
| + | *[[:Category:Fisherman Set|Fishing equipment]] / [[:Category:Tacklebox|Tackleboxes]] and [[Enchanting#Augmenting|augmenting]] both of these. | ||
| + | It can also be supplemented with the following [[Fishing Guide#Buffs|buffs]] and [[Fishing Guide#Enchantments|enchantments]]: [[Reinforced Line]] and to a lesser extent [[Deadliest Catch]] if your bait is providing Reel Power. | ||
| − | + | ===Bonus Rarity=== | |
| + | Bonus rarity affects the type of [[Fishing Guide#Areas|node]] you can find as well as the type of resources gathered within that node. Meeting the minimum requirement for a node type / resource only unlocks it's chance to appear and doesn't make it a common find. If you are aiming for specific drops in the loot table from fishing you should try to increase your rarity above the minimum required as much as you are able to as well as equipping related enchantments, such as [[Fiber Finder]]. | ||
| + | Being around 50 rarity over the minimum is a good point for semi-decent drop frequency. | ||
| − | ''' | + | '''How to Increase Bonus Rarity:''' |
| + | *Certain types of bait. (See the [[Fishing Guide#Bait |bait table]]). | ||
| + | *[[:Category:Fisherman Set|Fishing equipment]] / [[:Category:Tacklebox|Tackleboxes]] and [[Enchanting#Augmenting|augmenting]] both of these. | ||
| + | It can also be supplemented with the following [[Fishing Guide#Buffs|buffs]] and [[Fishing Guide#Enchantments|enchantments]]: [[Fishing Magnetism]] and to a lesser extent [[Deadliest Catch]] if your bait is providing Bonus Rarity. | ||
| − | The | + | ==The UI== |
| + | Opening the fishing tab will show you three key sections: | ||
| − | ''' | + | '''Info Panel:''' |
| − | + | The box on the left of the screen. This shows you all of your current fishing related stats, such as your: | |
| − | + | '''Effective Fishing Level:''' | |
| − | + | This is what the game treats as your fishing level. [[:Category:Tacklebox|Tackleboxes]], [[:Category:Fisherman Set|fishing gear]], and bait can increase this, slightly reducing the time needed to search and gather and increasing your success chance and bait preservation. | |
| − | + | '''Bait Preservation Chance:''' | |
| − | + | The chance that bait will not be removed from your tacklebox on a gathering action. Can be increased with the [[Bait Preservation]] enchantment, by using metal hook baits, and slightly by leveling Fishing. | |
| − | ''' | + | '''Bait Power:''' |
| − | + | The strength of your bait, used to calculate the speed and chance of searching for a fishing node as well as it's size. | |
| − | + | '''Reel Power:''' | |
| − | + | Your fishing strength, used to calculate the speed and chance of gathering a resource out of the node. | |
| − | |||
| − | + | '''Bonus Rarity:''' | |
| − | |||
| − | + | This is used to calculate your chance of finding rarer fishing nodes and rarer resources from inside them. | |
| − | |||
| − | + | '''Tacklebox''' | |
| − | |||
| − | + | In the middle of the screen. Annoyingly and confusingly different from an equippable [[:Category:Tacklebox|tacklebox]]. This is where you store your bait for use in fishing. There is no limit to the amount of bait you can store here and it is consumed from the top left slot first. You can click on bait inside to remove it as well as move the bait to the front of the tacklebox to be consumed first. | |
| − | + | There is also a useful [[Setting|setting]] you can change to automatically move new bait you craft/acquire into the tacklebox if some is already inside. | |
| − | ' | + | You should always be using bait to fish. It's the main way to boost all fishing stats before you have late-game fishing gear, and as a result increases the XP and items you get per hour. |
| − | + | '''Fishing Zones:''' | |
| − | + | On the right side of the screen. This is where you select a zone to fish in. Clicking the i icons in the top right will show what nodes you can find, what resources you can find inside them, what rarities they unlock at, and how big the nodes can be. The rarity shown is the minimum rarity, increasing it increases the odds of getting rarer nodes and items. | |
| − | The | + | The icons and numbers at the bottom of each fishing location on the fishing screen will tell you the following information from left to right: |
| − | ''' | + | '''Level Required:''' |
| − | The | + | The fishing level required to unlock the fishing location. This does not include effective levels given to the player by fishing gear and bait. |
| − | ''' | + | '''Searching Time and Gathering Time:''' |
| − | + | Searching time is how long it takes your player to find a fishing node. | |
| − | + | Gathering time is the time it takes for your player to gather one resource from that node. | |
| − | + | '''Base Find Chance and Base Gather Chance:''' | |
| − | + | Base Find Chance is your chance to find a fishing node after completing a search. | |
| − | + | Base Gather Chance is your chance to fish up a resource from a node. | |
| − | ''' | + | '''Experience per action:''' |
| − | This is | + | This is the base amount of fishing experience you receive per catch. Rarer fishing nodes have XP multipliers that can award you up to 1.3x the shown amount, more information regarding this can be later on in the [[Fishing Guide#Areas|Areas]] section. |
==Bait== | ==Bait== | ||
| − | You will always want to use bait while fishing. | + | You will always want to use bait while fishing, especially so in the early game. Bait is easy to acquire compared to equipment upgrades and gives significant stat increases. Use bait while fishing by clicking on it in your inventory and selecting the option that says "move to tacklebox". You can have multiple types of bait in your tacklebox, however you will only use the first type. You can reorder bait in your tacklebox by clicking on it and selecting "Move to Front". |
| + | |||
| + | Bait is not consumed while searching for a node but its stats do affect the node you find. Bait is consumed with gather actions after finding a node, this includes failed attempts. Failing also reduces the node size by one, the fish got away... | ||
| + | |||
| + | The "best bait" to use is a hard question to answer, the short answer is it depends on what you are aiming for. | ||
| + | |||
| + | The slightly longer answer: If your node search chance is less than 100% go for bait power, otherwise you should go for reel. If you want to try and get the rarer drops from a zone, go for higher bonus rarity. If you want bait that lasts longer try and get metal hook baits. | ||
| − | + | Do not use Tentacle Bait until you are in late-game fishing, before then the 1.3 stat multiplier does not outscale the -30 bait and reel penalty. If when you equip it to the first slot in your tacklebox your stats go down its too early for you to use. | |
| − | Nightcrawler, Glowbug, and Shrimp Tail are the early options. I think it's not worth spending the money on Earthworm. My recommendation would be | + | Nightcrawler, Glowbug, and Shrimp Tail are the early options, and are fairly easy to acquire thanks to the addition of [[Worm Composting Bin|worm bins]]. I think it's not worth spending the money on Earthworm from the general shop unless you're unable to get any other bait at all. My recommendation would be nightcrawler early on due to the higher bait power having the largest impact on fishing speed/success chance. If you can afford it (in terms of money and success chance), Smelly Meat as a nice all rounder with a slight boost to effective fishing level. If you have the crafting level and resources for it the 2 Fish Guts baits are also nice to use due to it being easy to craft more of with the fish you catch. |
| − | There are | + | There are 13 types of bait available for fishing, these are: |
{| class="wikitable sortable" | {| class="wikitable sortable" | ||
|- | |- | ||
| Line 106: | Line 146: | ||
!Reel Power | !Reel Power | ||
!Bonus Rarity | !Bonus Rarity | ||
| + | !Bait Preservation | ||
|- | |- | ||
|{{img|Earthworm Bait|35|35|word=1}} | |{{img|Earthworm Bait|35|35|word=1}} | ||
| − | |[[ | + | |[[General Shop]] |
| + | |{{n/a}} | ||
| + | |align="center" | 5 | ||
| + | |align="center" | 5 | ||
|{{n/a}} | |{{n/a}} | ||
|{{n/a}} | |{{n/a}} | ||
| − | |||
| − | |||
|- | |- | ||
|{{img|Fat Nightcrawler Bait|35|35|word=1}} | |{{img|Fat Nightcrawler Bait|35|35|word=1}} | ||
| − | |[[Mining]] | + | |[[Mining]]<br /> |
| − | |1 | + | [[Farming]] ([[Worm Composting Bin]]) |
| − | |15 | + | |align="center" | 1 |
| − | |10 | + | |align="center" | 15 |
| − | |5 | + | |align="center" | 10 |
| + | |align="center" | 5 | ||
| + | |{{n/a}} | ||
|- | |- | ||
|{{img|Glowbug Bait|35|35|word=1}} | |{{img|Glowbug Bait|35|35|word=1}} | ||
| − | |[[Foraging]] | + | |[[Foraging]]<br /> |
| − | |1 | + | [[Farming]] ([[Worm Composting Bin]]) |
| − | |10 | + | |align="center" | 1 |
| − | |15 | + | |align="center" | 10 |
| − | |5 | + | |align="center" | 15 |
| + | |align="center" | 5 | ||
| + | |{{n/a}} | ||
|- | |- | ||
|{{img|Shrimp Tail Bait|35|35|word=1}} | |{{img|Shrimp Tail Bait|35|35|word=1}} | ||
|[[Crafting]] ([[Raw Shrimp]]) | |[[Crafting]] ([[Raw Shrimp]]) | ||
| − | |1 | + | |align="center" | 1 |
| − | |20 | + | |align="center" | 20 |
| − | |5 | + | |align="center" | 10 |
| − | |5 | + | |align="center" | 5 |
| + | |{{n/a}} | ||
| + | |- | ||
| + | |{{img|Improved Hook Bait|35|35|word=1}} | ||
| + | |[[Crafting]] ([[Bronze Bar]], [[Iron Bar]]) | ||
| + | |align="center" | 2 | ||
| + | |align="center" data-sort-value="10.5" | (+10) * 1.05 | ||
| + | |align="center" data-sort-value="10.5" | (+10) * 1.05 | ||
| + | |align="center" | 10 | ||
| + | |align="center" | +15% | ||
|- | |- | ||
|{{img|Fish Guts Bait|35|35|word=1}} | |{{img|Fish Guts Bait|35|35|word=1}} | ||
| − | |[[Crafting]] (Anchovy, Trout, or | + | |[[Crafting]] ([[Raw Anchovy|Anchovy]], [[Raw Trout|Trout]], [[Raw Salmon|Salmon]], [[Raw Tuna|Tuna]], or [[Raw Shark|Shark]]) |
| − | |2 | + | |align="center" | 2 |
| − | |25 | + | |align="center" | 25 |
| − | |5 | + | |align="center" | 5 |
| − | |10 | + | |align="center" | 10 |
| + | |{{n/a}} | ||
| + | |- | ||
| + | |{{img|Smelly Fish Guts Bait|35|35|word=1}} | ||
| + | |[[Crafting]] ([[Raw Magnetic Minnow|Minnow]], [[Raw Tigerfish|Tigerfish]], [[Raw Slippery Eel|Eel]], [[Raw Great White Shark|Great White Shark]]) | ||
| + | |align="center" | 3 | ||
| + | |align="center" | 15 | ||
| + | |align="center" data-sort-value="22" | (+20) * 1.1 | ||
| + | |align="center" | 10 | ||
| + | |{{n/a}} | ||
|- | |- | ||
|{{img|Smelly Meat Bait|35|35|word=1}} | |{{img|Smelly Meat Bait|35|35|word=1}} | ||
| − | |[[Combat]] | + | |[[Combat]] ([[Rat|Rats]], [[Goblin|Goblins]], [[Swordfish]], [[Ascended]]) |
| − | |2 | + | |align="center" | 2 |
| − | |10 | + | |align="center" | 15 |
| − | |20 | + | |align="center" | 15 |
| − | | | + | |align="center" | 5 |
| + | |{{n/a}} | ||
| + | |- | ||
| + | |{{img|Crustacean Meat Bait|35|35|word=1}} | ||
| + | |[[Crafting]] ([[Raw Lobster|Lobster]], [[Raw Crab|Crab]], [[Raw Ancient Lobster|Ancient Lobster]]) | ||
| + | |align="center" | 3 | ||
| + | |align="center" | 15 | ||
| + | |align="center" | 10 | ||
| + | |align="center" data-sort-value="22" | (+20) * 1.1 | ||
| + | |{{n/a}} | ||
|- | |- | ||
|{{img|Hardened Hook Bait|35|35|word=1}} | |{{img|Hardened Hook Bait|35|35|word=1}} | ||
|[[Crafting]] ([[Adamantite Bar]]) | |[[Crafting]] ([[Adamantite Bar]]) | ||
| − | |3 | + | |align="center" | 3 |
|{{n/a}} | |{{n/a}} | ||
| − | |35 | + | |align="center" data-sort-value="45.5" | (+35) * 1.3 |
| − | |20 | + | |align="center" data-sort-value="22" | (+20) * 1.1 |
| + | |align="center" | +15% | ||
|- | |- | ||
|{{img|Alluring Lure Bait|35|35|word=1}} | |{{img|Alluring Lure Bait|35|35|word=1}} | ||
| − | |[[Crafting]] ([[Adamantite Bar|Adamantite]] | + | |[[Crafting]] ([[Adamantite Bar|Adamantite]] + [[Gold Bar]]) |
| − | |3 | + | |align="center" | 3 |
| − | | | + | |align="center" data-sort-value="24" | (+20) * 1.2 |
|{{n/a}} | |{{n/a}} | ||
| − | | | + | |align="center" data-sort-value="33" | (+30) * 1.1 |
| + | |align="center" | +15% | ||
|- | |- | ||
|{{img|Writhing Tentacle Bait|35|35|word=1}} | |{{img|Writhing Tentacle Bait|35|35|word=1}} | ||
|[[Crafting]] ([[Writhing Tentacle Bait]]) | |[[Crafting]] ([[Writhing Tentacle Bait]]) | ||
| − | |5 | + | |align="center" | 5 |
| − | |(-30) * 1.3 | + | |align="center" data-sort-value="-30" | (-30) * 1.3 |
| − | |(-30) * 1.3 | + | |align="center" data-sort-value="-30" | (-30) * 1.3 |
| − | |(60) * 1.3 | + | |align="center" data-sort-value="78" | (60) * 1.3 |
| + | |{{n/a}} | ||
|- | |- | ||
|{{img|Mysterious Bait|35|35|word=1}} | |{{img|Mysterious Bait|35|35|word=1}} | ||
| − | |[[Bird's Nest]], [[Mysterious Seed]] | + | |[[Bird's Nest]], [[Mysterious Seed]]<br /> |
| − | | | + | [[Farming]] ([[Worm Composting Bin]]) |
| − | | | + | |align="center" | 50 to 200 |
| − | | | + | |align="center" | 50 to 200 |
| − | | | + | |align="center" | 50 to 200 |
| + | |align="center" | 50 to 200 | ||
| + | |{{n/a}} | ||
|} | |} | ||
==Areas== | ==Areas== | ||
| − | + | Nodes without a minimum rarity can be found at any time in differing rates. In a few cases some resources shown as fishable inside a node will require a higher rarity to be gathered than needed to discover that node. If a specific item you want isn't dropping from a node you are not fishing with enough bonus rarity. Try to get around 50 rarity above the minimum if you are trying to farm a specific resource. | |
| + | |||
| + | The rate of some nodes appearing is also increased by a multiplicative 10%-25% by the following enchantments: [[Fiber Finder]], [[Junk Snagging]], and [[Fishy Fortune]]. | ||
| + | |||
| + | Bonus Rarity must be above the minimum rarity shown below for nodes to start appearing, the higher above the minimum rarity you are the higher your chances are of finding the nodes. Nodes also have internal limits so even with 1,000,000 rarity you will still get the "worse" nodes appearing. | ||
| − | + | The first node in any zone will always be the one named after it. For example, the first node in Shallow Pond will always be "The Shallow Pond" to prevent actively switching between zones until a good node rolls. | |
| − | It is | + | It is not currently stated in game, but fishing in rarer nodes gives you up to a 1.3x bonus XP multiplier per action depending on the zone/node. |
{| class="wikitable" | {| class="wikitable" | ||
| Line 193: | Line 275: | ||
!'''Node''' | !'''Node''' | ||
!'''Possible Loot''' | !'''Possible Loot''' | ||
| + | !'''XP Mult''' | ||
| + | !'''Enchantment''' | ||
|- | |- | ||
| − | | rowspan=" | + | | rowspan="5" |1 |
| − | | rowspan=" | + | | rowspan="5" |[[Shallow Pond]] |
| − | | rowspan=" | + | | rowspan="5" |20 |
| − | | rowspan=" | + | | rowspan="5" |[[Novice Tacklebox]] |
| − | | rowspan= | + | |rowspan=5{{n/a}} |
| − | | | + | |The Shallow Pond |
| − | |{{img|raw anchovy|25|25}}{{img|seaweed|25|25}}{{img|rotten driftwood|25|25}} | + | |{{img|raw shrimp|25|25}}{{img|raw anchovy|25|25}}{{img|raw magnetic minnow|25|25}}{{img|seaweed|25|25}}{{img|rotten driftwood|25|25}}{{img|aqueous grass|25|25}} |
| + | | {{n/a|1}} | ||
| + | | | ||
|- | |- | ||
|Oop, All Shrimp! | |Oop, All Shrimp! | ||
|{{img|raw shrimp|25|25}} | |{{img|raw shrimp|25|25}} | ||
| + | | {{n/a|1}} | ||
| + | | | ||
|- | |- | ||
|Small Schools of Fish | |Small Schools of Fish | ||
| − | |{{img|raw anchovy|25|25}}{{img|raw magnetic minnow|25|25}}{{img|seaweed|25|25}}{{img|rotten driftwood|25|25}} | + | |{{img|raw anchovy|25|25}}{{img|raw magnetic minnow|25|25}}{{img|seaweed|25|25}}{{img|rotten driftwood|25|25}}{{img|aqueous grass|25|25}} |
| + | | {{n/a|1.1}} | ||
| + | | {{img|Fishy Fortune|20|20|word=1}} | ||
|- | |- | ||
| − | | | + | |Drifting Around |
| − | |{{img|raw | + | |{{img|raw anchovy|25|25}}{{img|seaweed|25|25}}{{img|rotten driftwood|25|25}}{{img|aqueous grass|25|25}} |
| + | | {{n/a|1.1}} | ||
| + | | {{img|Junk Snagging|20|20|word=1}} | ||
| + | |- | ||
| + | |Shallow Flora | ||
| + | |{{img|seaweed|25|25}}{{img|aqueous grass|25|25}}{{img|water weeds|25|25}} | ||
| + | | {{n/a|1.2}} | ||
| + | | {{img|Fiber Finder|20|20|word=1}} | ||
|- | |- | ||
| − | | rowspan=" | + | | rowspan="5" |20 |
| − | | rowspan=" | + | | rowspan="5" |[[Lazy River]] |
| − | | rowspan=" | + | | rowspan="5" |30 |
| − | | rowspan=" | + | | rowspan="5" |[[Basic Tacklebox]] |
| − | | | + | |rowspan=4{{n/a}} |
| − | | | + | |The Lazy River |
| − | |{{img|raw trout|25|25}}{{img|raw salmon|25|25}}{{img|raw tigerfish|25|25}}{{img|seaweed|25|25}}{{img|rotten driftwood|25|25}}{{img|sturdy driftwood|25|25}}{{img| | + | |{{img|raw trout|25|25}}{{img|raw salmon|25|25}}{{img|raw magnetic minnow|25|25}}{{img|raw tigerfish|25|25}}{{img|seaweed|25|25}}{{img|rotten driftwood|25|25}}{{img|sturdy driftwood|25|25}}{{img|aqueous grass|25|25}}{{img|water weeds|25|25}} |
| + | | {{n/a|1}} | ||
| + | | | ||
|- | |- | ||
| − | |||
|Migrating Schools | |Migrating Schools | ||
| − | |{{img|raw trout|25|25}}{{img|raw salmon|25|25}}{{img|raw | + | |{{img|raw trout|25|25}}{{img|raw salmon|25|25}}{{img|raw magnetic minnow|25|25}}{{img|raw tigerfish|25|25}}{{img|seaweed|25|25}}{{img|rotten driftwood|25|25}}{{img|sturdy driftwood|25|25}}{{img|aqueous grass|25|25}}{{img|water weeds|25|25}} |
| + | | {{n/a|1}} | ||
| + | | {{img|Fishy Fortune|20|20|word=1}} | ||
|- | |- | ||
| − | | | + | |Riverbed Flora |
| − | |{{img| | + | |{{img|seaweed|25|25}}{{img|aqueous grass|25|25}}{{img|water weeds|25|25}}{{img|river vines|25|25}} |
| + | | {{n/a|1.3}} | ||
| + | | {{img|Fiber Finder|20|20|word=1}} | ||
|- | |- | ||
| − | | | + | |Drifting Debris |
| − | + | |{{img|rotten driftwood|25|25}}{{img|sturdy driftwood|25|25}} | |
| − | + | | {{n/a|1.3}} | |
| − | + | | {{img|Junk Snagging|20|20|word=1}} | |
| − | |||
| − | |||
| − | |{{img| | ||
|- | |- | ||
| − | | | + | |{{n/a|25}} |
| − | | | + | |ANGY Bois |
| − | |{{img|raw | + | |{{img|raw trout|25|25}}{{img|raw salmon|25|25}}{{img|raw tigerfish|25|25}}{{img|rotten driftwood|25|25}}{{img|sturdy driftwood|25|25}}{{img|aquamarine|25|25}} |
| + | | {{n/a|1.2}} | ||
| + | | {{img|Fishy Fortune|20|20|word=1}} | ||
|- | |- | ||
| + | | rowspan="6" |50 | ||
| + | | rowspan="6" |[[Still Lake]] | ||
| + | | rowspan="6" |60 | ||
| + | | rowspan="6" |[[Advanced Tacklebox]]<br>[[:Category:Fisherman_Set|Fishing equipment]] | ||
| + | |rowspan=4{{n/a}} | ||
|The Still Lake | |The Still Lake | ||
| − | |{{img|raw lobster|25|25}}{{img|raw crab|25|25}}{{img|raw | + | |{{img|raw lobster|25|25}}{{img|raw crab|25|25}}{{img|raw magnetic minnow|25|25}}{{img|raw tigerfish|25|25}}{{img|raw slippery eel|25|25}}{{img|seaweed|25|25}}{{img|rotten driftwood|25|25}}{{img|sturdy driftwood|25|25}}{{img|water weeds|25|25}}{{img|river vines|25|25}} |
| + | | {{n/a|1}} | ||
| + | | | ||
|- | |- | ||
| − | | | + | |Cage Match |
| − | + | |{{img|raw lobster|25|25}}{{img|raw crab|25|25}}{{img|raw ancient lobster|25|25}} | |
| − | |{{img|raw | + | | {{n/a|1.1}} |
| + | | {{img|Fishy Fortune|20|20|word=1}} | ||
|- | |- | ||
| − | | | + | |Lake Flora |
| − | + | |{{img|seaweed|25|25}}{{img|aqueous grass|25|25}}{{img|water weeds|25|25}}{{img|river vines|25|25}}{{img|violet ribbons|25|25}} | |
| − | + | | {{n/a|1.2}} | |
| − | + | | {{img|Fiber Finder|20|20|word=1}} | |
| − | |||
| − | |||
| − | |{{img| | ||
|- | |- | ||
| − | | | + | |Capsized Boat |
| − | + | |{{img|rotten driftwood|25|25}}{{img|sturdy driftwood|25|25}}{{img|aquamarine|25|25}} | |
| − | |{{img| | + | | {{n/a|1.2}} |
| + | | {{img|Junk Snagging|20|20|word=1}} | ||
|- | |- | ||
| − | | | + | |{{n/a|30}} |
| − | | | + | |Big Catch! |
| − | |{{img|raw | + | |{{img|raw lobster|25|25}}{{img|raw crab|25|25}}{{img|raw ancient lobster|25|25}}{{img|raw tigerfish|25|25}}{{img|raw slippery eel|25|25}}{{img|aquamarine|25|25}} |
| + | | {{n/a|1.2}} | ||
| + | | | ||
|- | |- | ||
| − | | | + | |{{n/a|75}} |
| − | | | + | |Yedyod’s Cove |
| − | |{{img|raw | + | |{{img|raw ancient lobster|25|25}}{{img|raw crab|25|25}}{{img|raw tigerfish|25|25}}{{img|raw slippery eel|25|25}}{{img|seaweed|25|25}}{{img|rotten driftwood|25|25}}{{img|sturdy driftwood|25|25}}{{img|aqueous grass|25|25}}{{img|water weeds|25|25}}{{img|river vines|25|25}}{{img|aquamarine|25|25}} |
| + | | {{n/a|1.3}} | ||
| + | | {{img|Fishy Fortune|20|20|word=1}} | ||
|- | |- | ||
| − | | | + | | rowspan="9" |65 |
| − | | | + | | rowspan="9" |[[Open Ocean]] |
| − | |{{img|raw hammerhead shark|25|25}}{{img|raw great white shark|25|25}}{{img| | + | | rowspan="9" |90 |
| + | | rowspan="9" |[[Pro Tacklebox]] /<br>[[Supreme Tacklebox]],<br>[[:Category:Fisherman_Set|Fishing equipment]] | ||
| + | | rowspan="4"{{n/a}} | ||
| + | |The Open Ocean | ||
| + | |{{img|raw tuna|25|25}}{{img|raw shark|25|25}}{{img|raw hammerhead shark|25|25}}{{img|raw huge tuna|25|25}}{{img|raw megalodon|25|25}}{{img|raw great white shark|25|25}}{{img|seaweed|25|25}}{{img|rotten driftwood|25|25}}{{img|sturdy driftwood|25|25}}{{img|river vines|25|25}}{{img|violet ribbons|25|25}}{{img|aquamarine|25|25}} | ||
| + | | {{n/a|1}} | ||
| + | | | ||
|- | |- | ||
| − | |||
|Sharks Ate All The Tuna | |Sharks Ate All The Tuna | ||
| − | |{{img|raw tuna|25|25}}{{img|raw shark|25|25}}{{img|raw hammerhead shark|25|25}}{{img|raw great white shark|25|25}}{{img|raw | + | |{{img|raw tuna|25|25}}{{img|raw shark|25|25}}{{img|raw hammerhead shark|25|25}}{{img|raw megalodon|25|25}}{{img|raw great white shark|25|25}}{{img|seaweed|25|25}}{{img|rotten driftwood|25|25}}{{img|sturdy driftwood|25|25}}{{img|river vines|25|25}}{{img|violet ribbons|25|25}} |
| + | | {{n/a|1}} | ||
| + | | | ||
| + | |- | ||
| + | |Carefree Day | ||
| + | |{{img|raw tuna|25|25}}{{img|raw huge tuna|25|25}}{{img|seaweed|25|25}}{{img|rotten driftwood|25|25}}{{img|sturdy driftwood|25|25}}{{img|mystical driftwood|25|25}}{{img|river vines|25|25}}{{img|violet ribbons|25|25}}{{img|aquamarine|25|25}} | ||
| + | | {{n/a|1.1}} | ||
| + | | | ||
|- | |- | ||
| − | |25 | + | |Ocean Flora |
| + | |{{img|seaweed|25|25}}{{img|aqueous grass|25|25}}{{img|water weeds|25|25}}{{img|river vines|25|25}}{{img|violet ribbons|25|25}}{{img|white reeds|25|25}} | ||
| + | | {{n/a|1.1}} | ||
| + | | {{img|Fiber Finder|20|20|word=1}} | ||
| + | |- | ||
| + | |{{n/a|25}} | ||
|Shipwreck Bay | |Shipwreck Bay | ||
| − | |{{img|raw shark|25|25}}{{img|seaweed|25|25}}{{img|rotten driftwood|25|25}}{{img|sturdy driftwood|25|25}}{{img| | + | |{{img|raw shark|25|25}}{{img|raw hammerhead shark|25|25}}{{img|raw megalodon|25|25}}{{img|raw great white shark|25|25}}{{img|seaweed|25|25}}{{img|rotten driftwood|25|25}}{{img|sturdy driftwood|25|25}}{{img|mystical driftwood|25|25}}{{img|river vines|25|25}}{{img|violet ribbons|25|25}}{{img|aquamarine|25|25}} |
| + | | {{n/a|1.1}} | ||
| + | | {{img|Junk Snagging|20|20|word=1}} | ||
|- | |- | ||
| − | |{{n/a}} | + | | rowspan="2"{{n/a|50}} |
| − | | | + | |Almost Jurassic |
| − | |{{img|raw | + | |{{img|raw hammerhead shark|25|25}}{{img|raw huge tuna|25|25}}{{img|raw megalodon|25|25}}{{img|raw tentacle meat|25|25}}{{img|raw great white shark|25|25}}{{img|aquamarine|25|25}} |
| + | | {{n/a|1.2}} | ||
| + | | | ||
|- | |- | ||
| − | | | + | |Playtester’s Paradise |
| − | | | + | |{{img|raw hammerhead shark|25|25}}{{img|raw megalodon|25|25}}{{img|raw great white shark|25|25}}{{img|mystical driftwood|25|25}}{{img|violet ribbons|25|25}}{{img|white reeds|25|25}}{{img|aquamarine|25|25}} |
| − | | | + | | {{n/a|1.2}} |
| − | | | + | | |
| − | |||
| − | |||
| − | |{{img| | ||
|- | |- | ||
| − | |{{n/a}} | + | |{{n/a|75}} |
| − | | | + | |Ghost Ship |
| − | |{{img|raw | + | |{{img|raw shark|25|25}}{{img|raw hammerhead shark|25|25}}{{img|raw megalodon|25|25}}{{img|raw great white shark|25|25}}{{img|sturdy driftwood|25|25}}{{img|mystical driftwood|25|25}}{{img|aquamarine|25|25}} |
| + | | {{n/a|1.2}} | ||
| + | | {{img|Junk Snagging|20|20|word=1}} | ||
|- | |- | ||
| − | |100 | + | |{{n/a|100}} |
| − | | | + | |Is that a tentacle? |
| − | |{{img|raw tentacle meat|25|25}}{{img| | + | |{{img|raw hammerhead shark|25|25}}{{img|raw megalodon|25|25}}{{img|raw tentacle meat|25|25}}{{img|raw great white shark|25|25}}{{img|mystical driftwood|25|25}}{{img|aquamarine|25|25}} |
| + | | {{n/a|1.3}} | ||
| + | | {{img|Fishy Fortune|20|20|word=1}} | ||
|- | |- | ||
| − | |{{n/a}} | + | | rowspan="8" |85 |
| + | | rowspan="8" |[[Stormy Seas]] | ||
| + | | rowspan="8" |100 | ||
| + | | rowspan="8" |[[Supreme Tacklebox]] /<br>[[Ocean's Embrace]], <br>[[:Category:Fisherman_Set|Fishing equipment]] | ||
| + | | rowspan="3"{{n/a}} | ||
|The Stormy Seas | |The Stormy Seas | ||
| − | |{{img|raw tuna|25|25}}{{img|raw shark|25|25}}{{img|raw hammerhead shark|25|25}}{{img|raw great white shark|25|25}}{{img|raw huge tuna|25|25}}{{img|raw megalodon|25|25}}{{img|seaweed|25|25}}{{img|rotten driftwood|25|25}}{{img|sturdy driftwood|25|25}}{{img|aquamarine|25|25}}{{img| | + | |{{img|raw tuna|25|25}}{{img|raw shark|25|25}}{{img|raw hammerhead shark|25|25}}{{img|raw huge tuna|25|25}}{{img|raw megalodon|25|25}}{{img|raw great white shark|25|25}}{{img|seaweed|25|25}}{{img|rotten driftwood|25|25}}{{img|sturdy driftwood|25|25}}{{img|mystical driftwood|25|25}}{{img|violet ribbons|25|25}}{{img|white reeds|25|25}}{{img|aquamarine|25|25}} |
| + | | {{n/a|1}} | ||
| + | | | ||
| + | |- | ||
| + | |Eye of the Storm | ||
| + | |{{img|raw tuna|25|25}}{{img|raw shark|25|25}}{{img|raw hammerhead shark|25|25}}{{img|raw huge tuna|25|25}}{{img|raw megalodon|25|25}}{{img|raw great white shark|25|25}}{{img|seaweed|25|25}}{{img|rotten driftwood|25|25}}{{img|sturdy driftwood|25|25}}{{img|violet ribbons|25|25}}{{img|white reeds|25|25}}{{img|aquamarine|25|25}} | ||
| + | | {{n/a|1}} | ||
| + | | | ||
| + | |- | ||
| + | |Deep Sea Flora | ||
| + | |{{img|seaweed|25|25}}{{img|aqueous grass|25|25}}{{img|water weeds|25|25}}{{img|river vines|25|25}}{{img|violet ribbons|25|25}}{{img|white reeds|25|25}}{{img|ancient kelp|25|25}} | ||
| + | | {{n/a|1.1}} | ||
| + | | {{img|Fiber Finder|20|20|word=1}} | ||
|- | |- | ||
| − | |50 | + | |{{n/a|50}} |
|World’s End | |World’s End | ||
| − | |{{img|raw tuna|25|25}}{{img|raw shark|25|25}}{{img|raw hammerhead shark|25|25}}{{img|raw | + | |{{img|raw tuna|25|25}}{{img|raw shark|25|25}}{{img|raw hammerhead shark|25|25}}{{img|raw huge tuna|25|25}}{{img|raw megalodon|25|25}}{{img|raw great white shark|25|25}}{{img|seaweed|25|25}}{{img|rotten driftwood|25|25}}{{img|sturdy driftwood|25|25}}{{img|mystical driftwood|25|25}}{{img|violet ribbons|25|25}}{{img|white reeds|25|25}}{{img|ancient kelp|25|25}}{{img|aquamarine|25|25}} |
| + | | {{n/a|1.2}} | ||
| + | | | ||
| + | |- | ||
| + | |{{n/a|75}} | ||
| + | |Endless Vortex | ||
| + | |{{img|raw megalodon|25|25}}{{img|raw tentacle meat|25|25}}{{img|mystical driftwood|25|25}}{{img|aquamarine|25|25}} | ||
| + | | {{n/a|1.2}} | ||
| + | | | ||
|- | |- | ||
| − | + | |{{n/a|100}} | |
| − | |{{ | + | |INFO’s Stand |
| − | |{{img| | + | |{{img|raw tentacle meat|25|25}}{{img|mystical driftwood|25|25}}{{img|aquamarine|25|25}} |
| + | | {{n/a|1.3}} | ||
| + | | {{img|Junk Snagging|20|20|word=1}} <br> {{img|Fishy Fortune|20|20|word=1}} | ||
|- | |- | ||
| − | |Common Encounter | + | |{{n/a|Common Encounter}} |
|{{img|Swordfish|25|word=1}} | |{{img|Swordfish|25|word=1}} | ||
| − | |{{img|fish guts bait|25|25}}{{img|smelly meat bait|25|25}}{{img|mysterious seed|25|25}}{{img|raw tigerfish|25|25}}{{img|seaweed|25|25}}{{img|rotten driftwood|25|25}}{{img|sturdy driftwood|25|25}}{{img|mystical driftwood|25|25}}{{img|satchel|25|25}}{{img|stormy sea scroll|25|25}} | + | |{{img|fish guts bait|25|25}}{{img|smelly meat bait|25|25}}{{img|mysterious seed|25|25}}{{img|raw tigerfish|25|25}}{{img|seaweed|25|25}}{{img|rotten driftwood|25|25}}{{img|sturdy driftwood|25|25}}{{img|mystical driftwood|25|25}}{{img|satchel|25|25}}{{img|stormy sea scroll|25|25}}{{?}} |
| + | | {{n/a}} | ||
| + | | | ||
| + | |- | ||
| + | |{{n/a|Rare Encounter}} | ||
| + | |{{img|Ascended|25|word=1}} | ||
| + | |{{img|shrimp tail bait|25|25}}{{img|fish guts bait|25|25}}{{img|smelly meat bait|25|25}}{{img|mysterious seed|25|25}}{{img|sunken treasure|25|25}}{{img|ancient treasure|25|25}}{{img|stormy sea scroll|25|25}}{{?}} | ||
| + | | {{n/a}} | ||
| + | | | ||
|} | |} | ||
| − | + | ===Dangerous Encounters=== | |
| + | [[Stormy Seas]] is a dangerous location. While fishing there, a fight with a [[Swordfish]] or [[Ascended]] will occasionally be simulated and appear as a "Danger Simulation" node. This will delay you from searching for the next node from anywhere between 12 to 90 seconds depending on your fishing set bonus and equipped weapons [[Melee|Strength]] / [[Magic|Intellect]] / [[Range|Dexterity]] (offhand and other equipment slots are ignored for this purpose). This penalty persists even if you swap to another zone to try and escape it. The [[Camo Cloak]] can be used to reduce this delay by 20% and also reduce the chance of one occurring by 50%. For more information on the mechanics of these encounters check out the [[Dangerous Encounters]] page. | ||
==Chests== | ==Chests== | ||
| − | While fishing there is a low chance for one of two treasure | + | While fishing there is a low chance for one of two types of treasure chests to be gathered at the same time as any item. These are the {{img|sunken treasure|25|25|word=1}} and {{img|ancient treasure|25|25|word=1}}. By wearing gear with the [[naturalist]] enchantment you can increase the rate in which you get chests and greatly increase the chance that it is the ancient variant. |
| − | |||
| − | |||
| − | |||
| − | |||
| − | |||
| − | + | Chests can give [[fiber|fibers]], [[gems]], [[Soul Fragment|Soul Fragments]], and [[talismans]]. In the early game these are especially useful. | |
| − | + | The {{img|ancient treasure|25|25|word=1}} is always worth opening if you care about augmenting the [[Ocean's Embrace]]. This is because there is around a 3% chance for each legendary tool piece to drop per ancient treasure, an item needed for crafting the additional copies of the [[Ocean's Embrace]]. The greater chest can also rarely give {{img|ancient cloth fragment|25|25|word=1}}, the material needed to craft the [[Abandoned Academy Base]] key that gives [[Fishing Shard|fishing shards]] upon completion. | |
| − | + | The quest to get your first [[Ocean's Embrace]] requires 9000 [[Fishing Shard|fishing shards]], and also unlocks the crafting recipe to make more for augmenting (as past +5 augmenting requires base versions of the item). If you are lucky and get a gear piece out of an ancient treasure you have saved yourself around 75 hours of fishing due to the base cost of these pieces being 900 [[Fishing_Shard|shards]]. | |
==Fishing Gear== | ==Fishing Gear== | ||
| Line 334: | Line 497: | ||
===Fisherman's set=== | ===Fisherman's set=== | ||
| − | The Fisherman's Set recipe is locked behind the quest "Fishing Set Quest". You will need to be level | + | The Fisherman's Set's crafting recipe is locked behind the [[Quests|quest]] "Fishing Set Quest". You will need to be level 50 before you can start this quest and upon completion you will receive 1000 [[Fishing_Shard|shards]] and a prototype fisherman's set. |
| + | |||
| + | The prototype set has the same set bonus as the craftable version and has the same enchantments but at level 1 instead of level 3. You can craft the scrolls needed to fill the missing slots and make the enchantments level 3 or replace them with different enchantments entirely (if they can be applied to the fishing set). You can also reset the name of the items so they are not called prototypes. As of the time of writing this they are treated in game as the same item. | ||
| + | |||
| + | Additionally, only the recipe is level locked. If you have the cash, and someone is selling one, you can purchase a set from the market and wear it at level 1. | ||
| + | |||
{| class="wikitable sortable" | {| class="wikitable sortable" | ||
|- | |- | ||
| Line 348: | Line 516: | ||
|{{img|Fisherman's Waders|35|35|word=1}} | |{{img|Fisherman's Waders|35|35|word=1}} | ||
|[[Pungent Bait]] 3 | |[[Pungent Bait]] 3 | ||
| + | |- | ||
| + | |{{img|Prototype Fisherman's Bucket Hat|35|35|word=1}} | ||
| + | |[[Bait Preservation]] 1 | ||
| + | |- | ||
| + | |{{img|Prototype Fisherman's Smock|35|35|word=1}} | ||
| + | |[[Reinforced Line]] 1 | ||
| + | |- | ||
| + | |{{img|Prototype Fisherman's Waders|35|35|word=1}} | ||
| + | |[[Pungent Bait]] 1 | ||
|} | |} | ||
| − | The [[:Category:Fisherman Set|fisherman's set]] is a must have for | + | The [[:Category:Fisherman Set|fisherman's set]] is a must have item for fishing. The set bonus from wearing all 3 pieces, "Master Fisherman", increases all of your base fishing stats (before bait bonuses) by 15% and reduces the time delay of [[Dangerous Encounters]]. |
| + | |||
| + | The set bonus also states that it reduces the damage taken and increasing damage done in "dangerous gathering locations", this results in the reduced delay of dangerous encounters but also buffs your character when they are fighting in skilling dungeons such as the [[Abandoned Academy Base]] to deal 25% more damage and take 25% less damage. | ||
| + | |||
| + | Each piece can be augmented to give +1 to all fishing stats for the cost of some fibers and [[Fishing_Shard|fishing shards]]. | ||
| + | |||
| + | You can replace the enchantments on the gear. This is important to do if you have one of the same enchantments on your tacklebox as enchantments do not stack across gear and you are effectively wasting a level 3 enchantment if you do not replace it. | ||
| + | |||
| + | There is a fourth piece that adds to the set bonus, the legendary tacklebox [[Ocean's Embrace]]. We will cover this below in... | ||
===Tackleboxes=== | ===Tackleboxes=== | ||
| − | [[:Category:Tacklebox|Tackleboxes]] are | + | [[:Category:Tacklebox|Tackleboxes]] are the tool used for fishing. Like pickaxes and hatchets, tackleboxes can be equipped and will give the player stat boosts towards fishing. By doing the gathering tutorial quest, you can get the first tier of tacklebox for free. Due to how integral the substats of fishing are to the time taken and XP gained, you should be upgrading your tacklebox as soon as possible every time you reach the level requirements to equip the next tier, as well as affixing them if you want to progress quickly. If you want to save money at the lower levels, you can avoid enchantments. However, they are powerful bonuses to have on a tacklebox. |
| + | |||
| + | The highest tier of tacklebox you can craft is the legendary [[Ocean's Embrace]]. This is locked behind the Master difficulty [[Quests|quest]] "Legendary Tacklebox", and requires you to either clear or turn in a key for the [[Abandoned Academy Base]] Dungeon as well as turning in 9,000 [[Fishing_Shard|Shards]] to receive your first one. Like all legendary tools this is intended for end game skilling, as a result you will likely have maxed out fishing by the time you can acquire this. | ||
| − | + | [[Ocean's Embrace]] gives the highest increase to base fishing stats as well as unlocking a stronger version of the Fisherman's Set bonus buff, "Legendary Angler". This gives the player a 30% buff to all fishing stats (before bait bonuses) and reduces damage taken and increases damage done in [[Dangerous Encounters]] and skilling dungeons (such as the [[Abandoned Academy Base]]) by 50%. | |
{| class="wikitable sortable" | {| class="wikitable sortable" | ||
| Line 402: | Line 589: | ||
|} | |} | ||
| − | ===Other Gear=== | + | ===Other Useful Gear=== |
In addition to the above here are other pieces of gear that are useful when fishing: | In addition to the above here are other pieces of gear that are useful when fishing: | ||
| − | *[[Bag of Holding]]: depending on the | + | *[[Bag of Holding]]: depending on the version you have, this gives up to a 45% chance to force the max quantity of a resource when gathering. This only affects fibers and aquamarines by default as fish do not roll a range without any yield affixes. |
| − | *[[Newbie Adventurer's Backpack|Newbie]] / [[Dwarven Adventurer's Backpack]]: (for [[ | + | *[[Newbie Adventurer's Backpack|Newbie]] / [[Dwarven Adventurer's Backpack]]: (for [[Adventurer's Boon|Adventurers boon]]) Extra shards are very useful, using this in place of the bag of holding will allows you to gain more shards (at the cost of slower fishing and fewer resources) for augmenting fishing gear or getting shards for an [[Ocean's Embrace]] sooner. |
| − | *[[Cloak of Many Pockets]] / [[Cloak of the Void|the Void]]: 1-2 extra levels of [[haste]] depending on the cloak. Faster fishing = faster XP, no downsides to using these if you can afford them. | + | *[[Cloak of Many Pockets]] / [[Cloak of the Void|the Void]]: 1-2 extra levels of [[haste]] depending on the cloak. Faster fishing = faster XP, no downsides to using these outside of stormy seas if you can afford them. |
| − | *[[Camo Cloak]]: | + | *[[Camo Cloak]]: Only applicable to Stormy Seas, decreases the chance of a encounter by 50% and reduces delay by 20%. Works out as a better time save than the haste cloaks. Plus augmenting it gives you an extra +1 to fishing sub-stats. |
| − | *[[Flamboyant Cape]]: The opposite of the Camo Cloak, increases encounter chance by 50% and reduces delay by 10%. Not recommended for fishing, will result in more bait from fights in | + | *[[Flamboyant Cape]]: The opposite of the Camo Cloak, increases encounter chance by 50% and reduces delay by 10%. Not recommended for fishing, will result in more bait from more fights in Stormy Seas and some slightly better drops but not worth the time cost. Also gives fishing stats with augmenting. |
| − | *[[Prismatic Ring]]: (offers +1 fishing level, bait, reel, and rarity per aug) This can have [[Haste]] or [[ | + | *[[Prismatic Ring]]: (offers +1 fishing level, bait, reel, and rarity per aug) This can have [[Haste]], [[Gathering]], or [[Scholar]]. Haste is a must have. Gathering will help you get more items. Scholar will help you get more shards. |
| + | *A strong weapon: [[Dangerous Encounters]] delay is reduced based off your weapons [[Melee|Strength]] / [[Magic|Intellect]] / [[Range|Dexterity]] (among other things), if your delay with a Camo Cloak is above 12 seconds you should be able to reduce it with a better weapon. | ||
| + | |||
| + | ==Enchantments== | ||
| + | Listed below are some relevant enchantments for fishing that can go on your fishing set, tacklebox, jewelry or other gear. Enchantments, of course, do not stack across gear. | ||
| + | |||
| + | My recommendations, in order, are: | ||
| + | |||
| + | *Ring / Necklace: | ||
| + | **[[Haste]] - Faster fishing = more xp. Best enchantment you can get for ring/neck. | ||
| + | **[[Scholar]] - Increases the number of shards you get while fishing. Great for upgrading gear faster to progress. | ||
| + | **[[Gathering]] - Take instead of scholar if you want more items instead of shards. | ||
| + | |||
| + | *Gloves / Boots: | ||
| + | **[[Fishy Fortune]] - For increasing the amount of fish you get. Boosts nodes with good fish drops. | ||
| + | **[[Junk Snagging]] - Good for increasing driftwood and aquamarine drops. Works best with metal baits. Boosts nodes with driftwood and aquas | ||
| + | **[[Prolonging]] - If you frequently use potions you should get this to make them last longer. | ||
| + | **[[Naturalist]] - Chests are good mostly until you build up a decent stockpile of tool parts. | ||
| + | **[[Fiber Snagging]] - For more fiber at the cost of some fish. Better with metal hooks but only gives 1 random available fiber. | ||
| + | **[[Fishing (Enchantment)|fishing enchantment]] - If you don't have 100% success chance and want to free up affix/enchantment slots on your tacklebox then you can use this. | ||
| + | |||
| + | *Tacklebox: | ||
| + | **[[Reinforced Line]] - The best in slot if you only care about speed, more actions = more xp and resources. | ||
| + | **[[Fiber Finder]] - Great for people who want to gather more fiber. Boosts the rate of fiber nodes. | ||
| + | **[[Deadliest Catch]] - In some cases this may beat out Reinforced Line at the cost of higher bait usage | ||
| + | **[[Oil Spill]] - For people who want to get [[Fish Oil]] for heat/cooking without the annoying preparation. | ||
| + | **[[Bait Preservation]] - This can be helpful if your stats are low or you're using deadliest catch and you want to save bait. In my opinion its not worth the time loss you'd get from not taking reinforced line. | ||
| + | **[[Pungent Bait]] - Can be helpful if you're struggling to reach 100% chance | ||
| + | **[[Fishing Magnetism]] - Can be helpful if you're trying to gather a specific resource and cant make other upgrades yet. | ||
| + | **[[Archaeology]] - Only good if you hate fishing and want to get extra gold from other gathering skills. Put this on another tool! | ||
| + | *Fishing Set: | ||
| + | **[[Deadliest Catch]] - A good enchant to not have at full strength. Decent bait bonuses without too harsh of a bait preservation loss. At high levels this won't reduce it at all. | ||
| + | **[[Fishy Fortune]] - Take if not already on gloves/boots. Free fish. | ||
| + | **[[Oil Spill]] - Good if you're unsure of what else to take. Decent source of heat/money with a minor loss of fish. | ||
| + | **[[Junk Snagging]] - Great take if using metal baits. Aquamarines/Mystical Driftwood is a good source of money. | ||
| + | **[[Fiber Snagging]] - no matter what strength replacing a fish for 1 fiber is | ||
| + | **[[Archaeology]] - If not already on another tool the set is a decent place to put it if you don't need anything else more. | ||
| + | **[[Pungent Bait]] - Useful in early game, bait power becomes less useful the further you progress. | ||
| + | **[[Fishing Magnetism]] - Niche usecase, better off saving your reel power. | ||
| + | **[[Fiber Finder]] - Decent fiber boost but you'll either want this at full strength or not at all | ||
| + | **[[Bait Preservation]] - Useful in early game, eventually your stats make this irrelevant | ||
| + | **[[Reinforced Line]] - lowest priority because this should be on a larger slot item (tacklebox). | ||
| − | + | The default options for the fishing set are solid choices, especially when you get them at level 50. If you choose to add one of the fishing set's enchantments to your tacklebox make sure to replace the fishing set piece equivalent since they do not stack. (for example having reinforced line on a tacklebox makes the chest piece enchant worthless so you can swap it for fishy fortune or fiber finder instead). Towards the late game of fishing you will probably no longer need bait preservation. | |
| − | |||
| − | |||
| − | * | + | *Any Other Tool: Putting [[Archaeology]] on any tool that isn't the tacklebox still gives access to the enchantment. Doing this allows you to make some extra gold on the side whilst fishing. |
| − | |||
| − | |||
| − | |||
| − | |||
| − | {{ | + | {{ScrollList|skill=fishing}} |
==Buffs== | ==Buffs== | ||
| − | The following are buffs you can receive from | + | The following are fishing related buffs you can receive from potions. While not required to effectively fish they will speed up the process, especially in the early game where stats are at their weakest. Recommended buffs are: [[Intuition]] and [[Reinforced Line]]. If not reaching 100% chance [[Fishing (Enchantment)|Fishing]] and [[Pungent Bait]] are incredibly useful. |
| + | |||
{| class="wikitable hover-highlight" | {| class="wikitable hover-highlight" | ||
!Name | !Name | ||
| Line 476: | Line 699: | ||
==Affixes== | ==Affixes== | ||
| − | Be aware that affixes are | + | Be aware that [[affixes]] are costly to change once applied to an item. Look through the menus yourself or even hold off applying them to hard to acquire items until you understand what you want from them. Higher tier equipment have higher possible values for affixes than the lower tiers. This list is my opinions and based around late-game affixes, at lower levels its okay to only worry about affixing the tacklebox. |
| + | |||
| + | *'''Fishing Hat/Smock/Waders''': "Speedster Fishing" + "Fishing Yield" OR "Prepared" | ||
| + | Speedster Fishing is the best affix you can get for fishing gear. I personally think yield is more valuable than prepared in terms of getting more mats since it synergizes with [[Fishy Fortune]]. However if you want to min-max for speed/xp then prepared is the better pick. Even at lower levels I don't think its worthwhile to get other affixes as you will just have to replace them later. | ||
| + | |||
| + | *'''Cape''': "Sneaky Gatherer" + "Gathering Shards". | ||
| + | More shards = more augs = more stats. These are the only two relevant affixes you can get for fishing on capes and you should be putting them on a [[Camo Cloak]]. "Dangerous Gatherer" exists but all you will really get out of it is more delays while fishing for little to no benefit. | ||
| + | |||
| + | *'''Necklace''': "Quick Gatherer" (+ "Reeling" + "Fisher") | ||
| + | 7-10% additive speed is a no-brainer. If you really want to min-max you can also get Reeling and Fisher for more elvls and Reel Power at the cost of not being able to use the production skill related affixes. | ||
| + | |||
| + | *'''Ring''': "Ultimate Gatherer" + "Skillful" + "Gathering Yield" | ||
| + | Elvl multiplier and an XP multiplier are unquestionably the best for fishing. If you have a third slot I'd say "Gathering Yield" is more valuable than "Greater Chests". If you need more chests its better to run naturalist enchant and buff potions. | ||
| + | |||
| + | *'''Pendant''': "Gathering Doubling" + "Greater Archaeology" (+"Fisher") | ||
| + | 1-3% chance to double gathered item. "Greater Archaeology" is also nice to have as you should be fishing with archaeology on another tool for the bonus money. If you want to main fishing you can also add the Fisher affix for up to 2.5 elvls. | ||
| − | + | *'''Boots''' and Gloves: Only combat affixes available currently, not relevant for fishing but can be useful in skilling dungeons I guess. | |
| − | *''' | + | *'''Tacklebox''': "Speedster Fishing" > "Prepared" > "Fishing Yield" |
| + | Speedster Fishing and Prepared are must have picks for the tacklebox if they are available. "Fishing Yield" is great if you care more for resources and works with [[Fishy Fortune]]. If you don't have at least the "Supreme Tacklebox" and you also don't have 100% chance to search/gather through other means, you should prioritize getting "Successful Fisher" as the fastest time save you can get in the early game is lowering your chance to fail. | ||
| − | + | '''Why is Speedster Fishing the best affix?''' | |
| + | Speedster fishing gives you a chance after a search action (as long as it isn't your first node search of the zone) to set your gather speed to 0.33 seconds for the duration of that node, this results in more XP and items per hour overall. | ||
| − | + | ==Talents== | |
| + | There are currently 12 [[talents]] available for fishing, these are only usable after maxing fishing and some require other skills. Some don't even unlock until mastery 15. | ||
| − | + | *'''Gathering Master''' - Your mastery of gathering gives you a chance to gather more resources! | |
| + | *'''Gathering Grandmaster''' - Your mastery of gathering gives you a chance to gather more resources! | ||
| + | These two are great for gatherers in general, it's Empowered Gathering so it doesn't even require nature runes. | ||
| − | *''' | + | *'''Fishing Prodigy''' - You're a natural at fishing! Increases your fishing effective level by 10. |
| + | Simple +10 to fishing elevel, decent time save with no drawback. | ||
| − | *''' | + | *'''Shrimp Student''' - Deep study of the true rulers of the sea has given you an insight to the fickle nature of the waters. Increases your effective fishing level by 30 but decreases your mining and foraging levels by 10. |
| + | Similar to above with the trade-off being slower mining and foraging. Still worthwhile if you mainly do fishing. | ||
| − | *''' | + | *'''Fishing Grandmaster''' - You're the uncontested master of fishing. Increases your fishing effective level by 5%. |
| + | Another level boost with no drawback. This ones a multiplier so it becomes more valuable the higher you augment your equipment. | ||
| − | + | *'''Fantastic Fiber Finder''' - Increases your Fiber Finder by 3. | |
| + | *'''Oil Rig''' - Grants you 1 level of Oil Spill, giving you a 7.5% chance to try and extract fish oil from a caught fish. | ||
| + | These two will be dependent on what you want out of fishing. Fiber Finder is a decent boost to your fiber per hour but oil rig at level one is only a small amount of oil per hour. Even so it's a decent passive source without having to dedicate your tacklebox to it. | ||
| − | == | + | *'''It Belongs in a Museum''' - Grants you 1 level of Archaeology, giving you access to an additional loot table while Gathering. |
| − | There are | + | Not the biggest buff considering end game you can have arch 8 on another tool but if you have the points to spare its a little extra gold per hour on the side. |
| + | |||
| + | *'''Rough Seas Fishing''' - Grants you 1 level of Fishing, increasing your fish catch chance by 2.5%. | ||
| + | Not really worth getting. Catch chance cannot go above 100% and by the time you even have this unlocked you should have been at 100% chance for 40 levels. | ||
| + | |||
| + | *'''Fishing Shard Mastery I-III''' - Grants you +1-4 levels of Fishing Shard Master, giving you up to +120% chance to generate an additional shard. | ||
| + | If you're fishing for the long haul these talents are a must have to make auging your gear less painful. | ||
| + | |||
| + | ==Achievements== | ||
| + | There are a few achievements that give bonuses to fishing, listed below are the relevant achievements and how they benefit fishing. The majority of these are long term goals that give boosts, such as: | ||
| + | *'''Do Ya Membah''' - Plant or Harvest 10,000 Sageberry Bushes | ||
| + | ** Grants +1 Intuition, 5% increased XP gain | ||
| + | *'''Academy Archaeologist''' - Clear the [[Abandoned Academy Base]] 100 times | ||
| + | ** Grants +1 Archaeology and +1 Fishing Shard Master, more gold and +30% chance to gain an additional fishing shard. | ||
| + | *'''All Natural''' - Clear the [[Nature Atheneum]] 100 times | ||
| + | ** Grants +1 Naturalist, increases chance of chests while fishing | ||
| + | *'''Total Mastery 100, 200, 300, 400, 500''' | ||
| + | **Grants +1 Lesser Intuition per achievement, 1%-5% increased XP gain | ||
| + | *'''Fishing Mastery 10''' | ||
| + | ** Grants +1 Fishing Mastery, increases stats from boosts and equipment by 1% | ||
| + | *'''Fishing Mastery 25''' | ||
| + | ** Grants an additional +2 Fishing Mastery and +1 Fishy Fortune, increases stats from boosts and equipment by 2% and a 1% chance to double fish caught. | ||
| + | *'''Fishing Mastery 50''' | ||
| + | ** Grants an additional +4 Fishing Mastery and +1 additional Fishy Fortune, increases stats from boosts and equipment by 4%. For a total increase of 7% as well as a total 2% chance to double fish caught by this point. | ||
| + | |||
| + | ==Specializing== | ||
| + | This section exists as a rough guide of key enchants/talents to pick to focus on a specific resource, any missing slots can be filled with enchantments of your choice (Personally, I run a hybrid build that focuses on aquamarines and fish oil with prolonging) You will always want to use haste as well as the Camo Cloak in Stormy Seas and the Void Cloak everywhere else. | ||
| + | |||
| + | ===Fish=== | ||
| + | The default option, focusing on enchants that only buff sub-stats to increase your speed along with using [[gathering]] while fishing results in the same drop distribution as normal. | ||
| + | |||
| + | Fishing Gear: | ||
| + | *Deadliest catch (slight bonus at the cost of bait preservation, can also take bait pres to counteract) | ||
| + | *Pungent Bait (slight boost to node size and search speed) | ||
| + | |||
| + | Tacklebox: | ||
| + | *Reinforced Line | ||
| + | |||
| + | Gloves/Boots: | ||
| + | *Fishy Fortune | ||
| + | |||
| + | Necklace/Ring: | ||
| + | *Haste | ||
| + | *Gathering | ||
| + | |||
| + | Bait: | ||
| + | *Reel based - Hardened Hook / Tentacle / Smelly Fish Guts | ||
| + | |||
| + | Avoid: | ||
| + | *Enchantments that reduce your reel power - Fishing Magnetism. | ||
| + | *Enchantments that increase non fish nodes - Fiber Finder, Junk Snagging. | ||
| + | |||
| + | |||
| + | ===Driftwood / Aquamarines=== | ||
| + | The only real difference between this and fish is that you would want [[Junk Snagging]] on gloves or boots and to use metal hook bait. You can run [[Fishy Fortune]] as well for more fish alongside the increased wood/aquas and to increase the rate of nodes with aquamarines (INFO's Stand). | ||
| + | |||
| + | Fishing Gear: | ||
| + | *Deadliest catch (slight bonus at the cost of bait preservation, can also take bait pres to counteract) | ||
| + | *Pungent Bait (slight boost to node size and search speed) | ||
| + | |||
| + | Tacklebox: | ||
| + | *Reinforced Line | ||
| + | |||
| + | Gloves/Boots: | ||
| + | *Junk Snagging | ||
| + | *Fishy Fortune | ||
| + | |||
| + | Necklace/Ring: | ||
| + | *Haste | ||
| + | *Gathering | ||
| + | |||
| + | Bait: | ||
| + | *Metal Baits - Hardened Hook / Alluring Hook | ||
| + | |||
| + | Avoid: | ||
| + | *Enchantments that reduce your reel power - Fishing Magnetism. | ||
| + | *Enchantments that increase non fish nodes - Fiber Finder, Junk Snagging. | ||
| + | *Non-metal baits - they halve the chance of Junk Snagging | ||
| + | |||
| + | ===Oil=== | ||
| + | Equipping [[Oil Spill]] enchant gives a base 8% chance per enchant level to try and extract [[Fish Oil|fish oil]] from a fish based on the fish's size. On an [[Ocean's Embrace]] this equals a 60% chance. This chance is not guaranteed and is less likely the smaller the fish is. More information can be found on the [[Oil Spill]] page. | ||
| + | |||
| + | Fishing Gear: | ||
| + | *Deadliest catch (slight bonus at the cost of bait preservation, can also take bait pres to counteract) | ||
| + | *Pungent Bait (slight boost to node size and search speed) | ||
| + | *Reinforced Line | ||
| + | |||
| + | Tacklebox: | ||
| + | *Oil Spill | ||
| + | |||
| + | Gloves/Boots: | ||
| + | *Fishy Fortune | ||
| + | |||
| + | Necklace/Ring: | ||
| + | *Haste | ||
| + | *Gathering | ||
| + | |||
| + | Bait: | ||
| + | *Reel based - Hardened Hook / Tentacle / Smelly Fish Guts | ||
| + | |||
| + | Avoid: | ||
| + | *Enchantments that reduce your reel power - Fishing Magnetism. | ||
| + | *Enchantments that increase non fish nodes - Fiber Finder, Junk Snagging. | ||
| + | |||
| + | ===Fiber=== | ||
| + | Equipping Fiber Finder enchant increases chance to find fibers by 25% per enchant level, On an [[Ocean's Embrace]] this equals an increased 200% chance. Doing this does not replace all fish. You can also take this further by equipping boots or gloves with the [[Fiber Snagging]] enchantment to replace some fish with more fiber. | ||
| + | |||
| + | Fishing Gear: | ||
| + | *Deadliest catch (slight bonus at the cost of bait preservation, can also take bait pres to counteract) | ||
| + | *Pungent Bait (slight boost to node size and search speed) | ||
| + | *Reinforced Line | ||
| + | |||
| + | Tacklebox: | ||
| + | *Fiber Finder | ||
| + | |||
| + | Gloves/Boots: | ||
| + | *Fiber Snagging | ||
| + | |||
| + | Necklace/Ring: | ||
| + | *Haste | ||
| + | *Gathering | ||
| + | |||
| + | Bait: | ||
| + | *Metal Baits - Hardened Hook / Alluring Hook | ||
| + | |||
| + | Avoid: | ||
| + | *Enchantments that reduce your reel power - Fishing Magnetism. | ||
| + | *Enchantments that increase non fiber nodes - Fishy Fortune, Junk Snagging. | ||
| + | |||
| + | |||
| + | ===XP=== | ||
| + | For an XP focus there isn't really a lot you can do other than increasing your stats as much as possible. There is some merit to caring more about Bonus Rarity as rarer nodes have an XP multiplier but this is not worth chasing at the cost of Reel Power. Make sure to equip Junk Snagging and Fishy Fortune to increase the odds of the 1.3x zone in stormy seas. | ||
| + | There is a ring affix that gives you an XP multiplier, aside from that you will just want to use [[Intuition]] potions and fish in Stormy Seas. [[Scholar]] is a good enchantment to use over gathering in this case as the extra shard rate will mean you can upgrade your gear faster. | ||
| + | |||
| + | Fishing Gear: | ||
| + | *Deadliest catch (slight bonus at the cost of bait preservation, can also take bait pres to counteract) | ||
| + | *Pungent Bait (slight boost to node size and search speed) | ||
| + | *Fishy Fortune | ||
| + | |||
| + | Tacklebox: | ||
| + | *Reinforced Line | ||
| + | |||
| + | Gloves/Boots: | ||
| + | *Junk Snagging | ||
| + | *Prolonging | ||
| + | |||
| + | Necklace/Ring: | ||
| + | *Haste | ||
| + | *Scholar | ||
| + | |||
| + | Bait: | ||
| + | *Metal Baits - Hardened Hook / Alluring Hook | ||
| + | |||
| + | Avoid: | ||
| + | *Enchantments that reduce your reel power - Fishing Magnetism. | ||
| + | |||
| + | ===Shards=== | ||
| + | Pick one of the above and use scholar instead of gathering. As well as a Dwarven Backpack instead of a Bag of Holding. Shards are based on real time so action speed does not affect them, don't forget to get the bonus shard affix on your cape. | ||
| + | |||
| + | ===Chests=== | ||
| + | Pick one of the above and use a pair of Naturalist boots/gloves. Naturalist potions can also help you out. | ||
| + | |||
| + | ==Okay, I want to read the detailed guide== | ||
| + | |||
| + | ===Intro=== | ||
| + | |||
| + | This isn’t intended to be the best or the fastest route to maxing fishing. This is just a general guide that I wrote as I was fishing on a fresh account in the seasonal mode that was testing the new XP curve for 1.0. I will be making updates to this if I come across anything else or anything is changed for the launch of 1.0. Since writing this there are now new baits available as well as 2 new enchantments for boots / gloves. I will be revising this as I play through v1.0 | ||
| + | |||
| + | Doing nothing but fishing to 99 is entirely possible but not recommended. There are a lot of roadblocks in terms of gear progression you would have to grind skills or spend money for. This will of course be different if you are not playing on iron man or if the market is well stocked with items and gear. The optional sections in each section will typically be things you can achieve by spending money on the market to level faster. | ||
| + | |||
| + | The common theme you will see throughout this guide is increasing all 4 fishing stats where possible and boosting your success chance to 100%, which in turn reduces your action times and improves your chances to succeed. All this will improve the rate at which you get XP. | ||
| + | |||
| + | ===I have money to burn=== | ||
| + | |||
| + | I made this guide without using the market and there are a few steps you can take to progress even faster covered here. It all depends on how much money you want to sink into the skill to do so. | ||
| + | If the following suggestions are within your budget then you will want to: | ||
| + | |||
| + | *Buy the highest slot boots or gloves you can afford and wear and add the [[Fishing (Enchantment)|Fishing]] enchant to them. If you do this and you can reach 100% success chance without the tacklebox affix refer to the [[Fishing Guide#Affixes|affix section]] and affix your tacklebox accordingly. | ||
| + | |||
| + | *Buy the highest slot [[Jewelry|necklace or ring]] you can afford and add the [[Haste|haste enchantment]] to one, jewelry also has beneficial affixes. (see [[Fishing Guide#Affixes|affixes]])). | ||
| + | |||
| + | *Buy the [[Cloak of Many Pockets]] / [[Cloak of the Void|the Void]] ([[Camo Cloak]] in Stormy Seas). | ||
| + | |||
| + | *Keep buying smelly meat / hardened hook [[Fishing Guide#Bait|bait]] to use unless you need more bait power to reach 100% success chance. | ||
| + | |||
| + | *Buy the highest tier of [[Fishing Guide#Tackleboxes|tacklebox]] you have the fishing level to be able to equip and augment it to at least +5 and [[Fishing Guide#Affixes|affix.]] | ||
| + | |||
| + | *You can buy the [[:Category:Fisherman Set|fishing equipment]] to wear from the start and it will greatly help you if you can convince someone with the shards to sell you one. | ||
| + | |||
| + | I didn't really use [[Fishing Guide#Buffs|buffs]] in my play-through because I didn't want to bother managing them but you can buy / cook potions for [[Reinforced Line]] and [[Pungent Bait]]. The [[Fishing (Enchantment)|Fishing buff]] from [[Honey]] can also be useful for boosting your success chance but you will need so much of it that its an expensive way to improve your chances compared to just getting the affix/enchant. | ||
| + | |||
| + | ===Level 0=== | ||
| + | |||
| + | There are a few "side-quests" we can do to reduce the pain of early game fishing before we start. The biggest time sink involved in fishing is failing an action (especially a node search), which is fairly common early on. Increasing our success chance is the biggest time save we can make to improve our XP per hour. | ||
| + | |||
| + | '''Recommended:''' | ||
| + | |||
| + | The first thing you’re going to want to do is all the tutorial quests. These will give you the Tier 1 tools for skills as well as some XP to start off with. | ||
| + | |||
| + | You’re also going to want to make 25 [[Basic Runic Dust]] so that you can get the "Successful Fisher" affix on your [[Novice Tacklebox|Apprentice Tacklebox]] from the quest rewards. If you get a particularly bad roll you can make more dust and scrap to re-roll this once or twice but don’t obsess over getting a perfect roll. | ||
| + | |||
| + | Buy / Farm / Gather 100 or so [[Fishing Guide#Bait|bait]] of any type. | ||
| + | |||
| + | If possible you also want to try and get your crafting to at least level 5 first so that you are able to produce your own bait through either the [[Shrimp Tail Bait]] recipe or by [[Cooking|Preparing]] fish into [[Filleted Fish]] and crafting [[Worm Composting Bin|worm bins]]. I cannot understate the importance of having bait, especially in the first 40 levels or so. It is the easiest source of fishing stats and by extension the easiest way to boost your success chance to save time. | ||
| + | |||
| + | '''Optional:''' | ||
| + | |||
| + | Augmenting your tacklebox to +4/+5 isn’t hard to do and gives a nice buff to your stats/chances/times. | ||
| + | |||
| + | You likely won’t have the enchanting level or materials to do so but putting [[Pungent Bait]] on the tacklebox will bump up the success chance too. Personally I’d save doing this for the second tacklebox. | ||
| + | |||
| + | Getting gloves / boots with [[Naturalist]] on them is a nice way to build up fibers early on by opening [[Fishing Guide#Chests|chests]] on the way to level 85 but can be a bit pricey for little pay off in the skill before 85. | ||
| + | |||
| + | ===Level 1 - 10=== | ||
| + | |||
| + | If you have no bait at this point the first thing you’ll want to do is get an initial buffer going (see [[Fishing Guide#Bait|bait section]]). If nothing else the bare minimum you want is the earthworm bait from the [[General Shop]] to reduce the chance of wasting time failing a search / gather. | ||
| + | |||
| + | The core loop you do at this stage is pretty simple since there's only one fishing zone. Fish in the Shallow Pond > turn shrimp into [[Shrimp Tail Bait]] > use shrimp bait to fish in the shallow pond. | ||
| + | Shrimp bait also gives bonus rarity which improves your chances of finding better [[Fishing Guide#Areas|nodes]] such as the "oops! All shrimp!" node which helps feed into this loop. | ||
| + | |||
| + | You can also prepare caught [[Anchovies]] into [[Filleted Fish]] and make [[Worm Composting Bin|worm bins]] to [[Farming|farm]] for more bait. Anchovies can also be crafted into [[Fish Guts Bait]] but it's very expensive to turn 9 of them into 3 bait compared to a worm bin and requires a much higher crafting level. | ||
| + | |||
| + | If possible you want to try and always have at least 3/4 [[Worm Composting Bin|worm bins]] on your farm at this stage while you are fishing to make bait. | ||
| + | |||
| + | '''Recommended:''' | ||
| + | Fish in Shallow pond | ||
| + | Turn shrimp into shrimp tail bait | ||
| + | Prepare anchovies and craft into worm bins | ||
| + | |||
| + | '''Optional:''' | ||
| + | Save anchovies for quests that can accept them | ||
| + | |||
| + | ===Level 11 - 20=== | ||
| + | See level 1-10. The only thing you need to think about after reaching level 10 is whether you want to invest time / money into the next tier of [[:Category:Tacklebox|tacklebox]]. If you do, try to augment it to at least the point where it has more stats than your previous one (typically +2/3). Augmenting to +5 would be best. Don’t forget to get the success chance affix. | ||
| + | |||
| + | '''Optional:''' | ||
| + | Craft a [[Basic Tacklebox]], affix with success chance, enchant with [[Pungent Bait]] at some point, augment to +5 | ||
| + | |||
| + | ===Level 21 - 30=== | ||
| + | I found that even with a lower success chance moving up to the next zone immediately is more XP per hour. The only problem you run into at this stage is you no longer get shrimp or anchovies. If you level your cooking this isn't a huge problem and you can continue to make [[Worm Composting Bin|worm bins]] however the only other option that isn't the market is leveling crafting to make fish guts and doing so only gives 3 bait per craft which isn't great. If you don’t have a good surplus of [[Fishing Guide#Bait|bait]] / [[Worm Composting Bin|worm bins]] before switching zones you will run out. | ||
| + | Staying in Shallow Pond for a few levels is still a decent option and is what I did at this stage | ||
| + | |||
| + | '''Recommended:''' | ||
| + | Craft a Basic tacklebox, affix with success chance, enchant with pungent bait, augment to +5 | ||
| + | Fish in Shallow Pond to build bait before moving to Lazy River | ||
| + | |||
| + | '''Optional:''' | ||
| + | Equip a bag of holding to start stocking up on fibers for gear augments | ||
| + | Augmenting this to +4 will give you a +1 to all fishing stats | ||
| + | |||
| + | ===Level 31 - 40=== | ||
| + | At this point you do want to move on to Lazy River if you haven’t already. The next tier of tacklebox is available and is of course an upgrade for faster fishing however I used the second tacklebox until level 50 with no issues. | ||
| + | The Advanced Tacklebox comes with an additional enchant and affix slot. If you want to save dust you can randomly roll the second slot after getting the success chance affix again but I would recommend getting a + yield affix if you can so you can make more bait from more fish. | ||
| + | |||
| + | Even having a yield affix doesn’t guarantee extra resources though so a bag of holding at this point will help you out more. | ||
| + | |||
| + | There's only really one "bad" option for random rolling, the bonus rarity is the least impactful affix you can get at this stage but even that will still help you with getting better drops. | ||
| + | |||
| + | Optional: | ||
| + | Equip a [[Advanced Tacklebox]], affix with success chance if needed, augment to +5 and enchant with [[Pungent Bait]] if you still aren’t at 100% success chance otherwise take [[Reinforced Line]] for faster gather times. | ||
| + | If you have a yield affix equip a [[Bag of Holding]] | ||
| + | |||
| + | ===Level 40 - 49=== | ||
| + | Same core loop as in 31 - 40, still stuck in Lazy River. | ||
| + | |||
| + | '''Optional:''' | ||
| + | Equip a [[Pro Tacklebox]], around this tier you probably no longer need the success chance affix after you augment it. If this is the case refer to the [[Fishing Guide#Affixes|affix section]] Enchant with [[Reinforced Line]] if you only care for XP otherwise refer to the [[Fishing Guide#Enchantments|enchantments section]]. | ||
| + | |||
| + | ===Level 50=== | ||
| + | This is such a huge break-point for fishing that I made it an entire section. At level 50 you can start the fishing set quest. You should accept this as soon as you can and get started on the quest requirements (10,000 fishing actions) upon completion you receive 1000 fishing shards and if you have level 50 crafting you are now able to craft the fishing set. With the reward shards and time taken to reach this step you will easily have enough shards to make all 3 pieces and you should prioritize doing so. Just wearing it gives you +12% bait preservation and 3 levels of [[Pungent Bait]] and reinforced line. Also you receive a flat 15% stat bonus (before bait bonuses) which is nice but not as impactful as it is later in the skill. The main thing at this stage is the inherent enchants. | ||
| + | |||
| + | These enchants do not stack with the tacklebox so if you haven't made one with more than 3 slots yet bear in mind that enchanting it will achieve nothing unless you replace the same enchant on the fishing gear. You could at this stage replace the [[Reinforced Line]] piece enchant with oil spill or fiber finder if you keep putting [[Reinforced Line]] on your tacklebox but until level 90 or so it's honestly not worth the loss of fish per hour. | ||
| + | |||
| + | Farming 2 [[Worm Composting Bin|worm bins]] is enough to be roughly self sustaining with the fishing sets bait preservation | ||
| + | |||
| + | '''Recommended:''' | ||
| + | Level crafting to 50 and equip this set as soon as possible | ||
| + | |||
| + | ===Level 51 - 65=== | ||
| + | At level 50 you unlock the lake, this zone is double the XP per action with a minimal time increase and you should move into it as soon as you can. At this point you should be working towards making an [[Advanced Tacklebox]] at minimum if you haven’t already. | ||
| + | |||
| + | The issue with this zone is that the only catchable fish are not currently usable in crafting bait without preparing them into worm bins. Without relying on the market the only option you have is to level your cooking high enough to prepare them (lv38 min) bait sustainability really starts to struggle the most in this zone but the increase in XP is so large that you want to fish here regardless for faster leveling to the level 65 zone. | ||
| + | |||
| + | Depending on your gear you may even be able to reach 100% chance at this stage without using bait at all, while obviously slower than fishing with bait if you are reaching 100% the lost time is not as significant as the XP hit from fishing in a lower zone with bait and you can power through to 65 to get tuna and sharks that you can craft into fish guts. | ||
| + | |||
| + | '''Recommended:''' | ||
| + | Equip an [[Advanced Tacklebox]], affix with success chance if needed, enchant with [[Pungent Bait]] / [[Reinforced Line]] if you don't have the fishing set yet, augment to +5 | ||
| − | ''' | + | '''Optional:''' |
| + | Equip a [[Supreme Tacklebox]], affixing this is expensive even if you randomly roll. You shouldn't need the success chance affix at this tier. I would randomly roll it and hope for the best, maybe even try a few randoms before augmenting if you feel like it. | ||
| − | '' | + | ===Level 65 - 85=== |
| + | Open Ocean is available. You're able to craft [[Fish Guts Bait]] again in this zone but it's a bad amount compared to [[Worm Composting Bin|worm bins]]. Luckily at this stage you start to have enough [[Bait Preservation]] that crafting it doesn’t result in a net loss. | ||
| − | ' | + | If you somehow have high bonus rarity at this point or use [[Mysterious Bait]] you can get tentacle meat from this zone but it's not really a resource worth aiming for at this stage. It’s not a great source of crafting XP with the rate you get it at and you are still at a stats disadvantage fishing with tent bait at this stage. |
| − | ' | + | I did this stage with a t3 Tacklebox with no real issues because I didn't want to spend time grinding elsewhere but I would recommend making the [[Pro Tacklebox]]. |
| − | ''' | + | '''Recommended:''' |
| + | Equip a [[Pro Tacklebox]], enchant with [[Reinforced Line]], augment to +5. | ||
| − | + | ===Level 85 - 99=== | |
| + | The Stormy Seas zone is now unlocked. Basically the same as open ocean with a 10XP per action gain, ancient kelp if you have enough rarity, and dangerous encounters as a time sink / bait source. | ||
| − | + | The times per action are the same as in Open Ocean but the node success chance is lower. A +3 [[Pro Tacklebox]] with +2 [[:Category:Fisherman Set|fishing equipment]] and [[Glowbug Bait]] was enough for me to reach 100% chance in this zone at lv89. | |
| − | |||
| − | + | The issue with this zone you will run into is likely to be having a low bonus rarity, the delay penalties from encounters are not worthwhile without having the rarity needed to gather Ancient Kelp. This is due to kelp being needed to augment the fishing gear you should be wearing and giving +1 to all stats. | |
| − | + | To solve this you will either need to improve your gear or use higher tiers of bait. Saving mysterious bait for this stage is a good way to gather the initial kelp you need to start improving your fishing set. | |
| − | ' | + | Because it's a dangerous location you have an x% chance (shown in the fishing area info panel) of triggering [[Dangerous Encounters]]. This results in delays of up to 30s depending on your equipment. You don’t currently need to have high combat stats to be able to fish here but it is helpful to have the fishing set before fishing in Stormy Seas as well as having a [[Camo Cloak]] to reduce the likelihood of them occurring and the delay time itself. As the encounters drop bait you may even want to consider a [[Flamboyant Cape]] to increase the amount you run into however I wouldn’t recommend this. |
| − | + | This zone is one of the most important to have a Bag of Holding for especially if you have low rarity so you can maximize the amount of kelp you receive. | |
| − | ''' | + | '''Recommended:''' |
| + | Get a Camo Cloak. | ||
| + | Use myst bait where possible to gather the ancient kelp needed for +5 set (1650 total). | ||
| + | Augment your fishing gear every time you have enough to do so up to +5. | ||
| + | Aim for a Supreme Tacklebox. | ||
| − | + | ===Level 99+=== | |
| + | Congrats! You have now maxed fishing! | ||
| − | ' | + | At this point a lot of people vow never to touch the skill again but if for some reason you want to continue then spend this time saving up fishing shards to make the [[Ocean's Embrace]]. |
| − | + | After this, it's basically up to you. Check out other sections on this page such as the [[Fishing Guide#Specializing|specializing]] or [[Fishing Guide#Talents|talents]] sections. | |
| − | + | It wasn’t really relevant for most of the guide, but if you are going to main fishing you will want to get some [[Naturalist]] boots or gloves to start getting the ancient chests. These when opened have around a 10% chance to give you a component for the OE which are needed to craft base versions you will need if you augment it past +5. | |
| − | + | Around here, with the full set bonus, you may start benefiting from tentacle bait. Equip it and see what happens to your stats. | |
| − | + | Happy Fishing! | |
| − | + | ==Frequently Asked Questions== | |
| − | + | * I have enough Bonus Rarity for an item but it's not dropping? | |
| + | Annoyingly its not as simple as just reaching the minimum. The short version is you need to just have your rarity stat as high as you can over the minimum to make the drops more common. For information to do this see the [[Fishing Guide#Bonus_Rarity|Bonus Rarity section above]] | ||
| − | + | * What combat stats / gear do I need to fish in stormy seas? | |
| + | Surprisingly none, having gear and stats will reduce the length of the penalty though. Check out the [[Dangerous Encounters]] page for more info. | ||
==Miscellaneous Tips== | ==Miscellaneous Tips== | ||
| − | Fishing in | + | - Fishing in Stormy Seas and constantly crafting tentacle bait is a great source of crafting XP. |
| − | |||
| − | |||
| − | |||
| − | + | - Doing [[runecrafting]] with the fibers you fish has a chance to give [[Ancient_Cloth_Fragment|ancient cloth fragments]], key pieces for the fishing dungeon. Completing the dungeon is the only other source of [[Fishing_Shard|shards]]. | |
| − | + | - Fishing yield affixes can allow you to get 2 fish per gather action but this is not guaranteed. This stacks with the Fishy Fortune enchant for up to 4 fish if you're lucky. | |
| − | + | - [[Worm Composting Bin|Worm bins]] are an excellent source of crafting XP and preparing your fish to make them is also a good source of cooking XP. | |
| − | + | - Crafting components for the [[Ocean's Embrace]] out of fishing shards is very expensive compared to using the shards to augment the gear itself. Try to get needed pieces from Ancient Treasures instead. | |
| − | + | [[Category:Guides]] | |
Latest revision as of 09:23, 5 May 2025

This guide is intended to give advice on effectively reaching level 99 in Fishing, as well as a detailed explanation of the mechanics involved in the skill along with advice on gear, enchantments, and affixes in regards to different specialisations. A brief summary of how to max fishing is included directly underneath this paragraph, the guide is split into sections in the contents table below for those who are only interested in certain parts.
Any questions, feedback, or parts of this guide that are not clear? Feel free to post in the wiki channel in discord and I'll try to answer and update the guide.
Guide last updated: Version 0.22.1
Contents
- 1 TL:DR give me the summary for maxing fast
- 2 A not so brief overview of fishing
- 3 The UI
- 4 Bait
- 5 Areas
- 6 Chests
- 7 Fishing Gear
- 8 Enchantments
- 9 Buffs
- 10 Affixes
- 11 Talents
- 12 Achievements
- 13 Specializing
- 14 Okay, I want to read the detailed guide
- 15 Frequently Asked Questions
- 16 Miscellaneous Tips
TL:DR give me the summary for maxing fast
- Prioritize getting 100% node search and node gather chance in the following priority: potions (if you want to spend) > gear > affixes > enchantments.
- Use 1 piece of Jewelry with haste enchantments and the Cloak of Many Pockets / the Void (Use Camo Cloak in Stormy Seas).
- Always use the bait that provides the most reel power, if it doesn't reduce your success chances below 100%. (don't use tentacle bait until late game when equipping it does not reduce your overall sub-stats).
- Keep using the highest tier Tacklebox you can and augment it to at least +5. Try to enchant with Reinforced Line unless you absolutely need Pungent Bait to reach 100% chance.
- Affix priorities for an XP focus (if they are available for your tier of TB) are: Speedster Fishing > Prepared > Fishing Node Size > Reeling > Fisher > Instant Node Finding. If you still need to reach 100% prioritise Successful Fisher.
- Fish in the highest zone you can where failed attempts (or combat encounters in Stormy Seas) do not outweigh the XP gained per hour (This is hard to quantify for the guide but you can check this by resetting your loot log and toggling "rate" to check each zone for about 5 minutes). Don't fish in Stormy Seas without a Camo Cloak.
- Get the full fishing set as soon as you can (and augment it where possible to +5). If you're lucky you might get one off the market for cheap, otherwise complete its related quest at level 50 to get a prototype set. This gives you the set bonus stat increase (very good!) and 1/3 enchantments on the pieces.
- You will not be able to make the Ocean’s Embrace before maxing the skill unless you run a lot of Abandoned Academy Base dungeons, but if you want to keep fishing you will want to aim for it after getting to +5 on your gear
If you already know / don’t care about how fishing works you can skip to a relevant section using the contents menu on the top left of the page. If you’re new to fishing or just want to be a nerd and read about the mechanics more here’s…
A not so brief overview of fishing
Fishing is designed to be the most complex of the three gathering skills in game and is intended to require more investment than mining or foraging. It was the first skill to receive the node system that has been adapted for foraging, and has five sub-stats that influence the skill compared to mining and foraging only caring for effective skill level. On top of this, fishing is the only gathering skill in which you can fail an action, resulting in 0 items and 0 XP gained.
While mining and foraging are pretty easy to level up and gather resources without using any gear, fishing is the gathering skill where gear, buffs, and bait have the largest impact.
But why fish? Apart from just wanting to max out another skill, fishing provides:
- Fish - (obviously) for use in cooking.
- Fibers - The raw materials used in cloth weaving for crafting and augmenting magic gear. As well as augmenting your fishing equipment.
- Driftwood and Aquamarines - Components used in crafting and augmenting high tier magic gear, Dungeon Keys, and Tackleboxes.
- Fish Oil - Provided you have the oil spill enchantment, this makes fishing actions have a chance to also give you Fish Oil which is used when crafting Pyre Logs for heat. Skipping the need to Prepare caught fish for Fish Oil.
What makes fishing so different? In short, the node system and sub-stats. In long:
The node system
The node system has been confusing players ever since it was released. An easy way to think of it is that when you start fishing your player gets on a boat and sails for a certain amount of time to find a school of fish (a node). Then takes a different amount of time to catch one of those fish (a resource). After your player has caught everything in the area they have to sail onward to find another school of fish to catch (a new node). Available nodes in an area can be seen by clicking the i icon and then the nodes tab.
Bait Power
Bait power is used to calculate the time it takes you to find these nodes, the chance of succeeding in doing so, and the size of the node you find. Failing a search results in the biggest time losses in fishing and it is important to increase your bait power to reduce this. Luckily your chance to search will increase alongside your level and gear as well as with affixes and enchantments.
How to Increase Bait Power:
- Certain types of bait. (See the bait table).
- Fishing equipment / Tackleboxes and augmenting both of these.
It can also be supplemented with the following buffs and enchantments: Pungent Bait and to a lesser extent Deadliest Catch if your current bait is providing Bait Power.
Reel Power
Reel power is used to calculate the time it takes you to gather a resource from a node as well as the chance of succeeding in doing so. Reel power comes into play multiple times per node.
How to Increase Reel Power:
- Certain types of bait. (See the bait table).
- Fishing equipment / Tackleboxes and augmenting both of these.
It can also be supplemented with the following buffs and enchantments: Reinforced Line and to a lesser extent Deadliest Catch if your bait is providing Reel Power.
Bonus Rarity
Bonus rarity affects the type of node you can find as well as the type of resources gathered within that node. Meeting the minimum requirement for a node type / resource only unlocks it's chance to appear and doesn't make it a common find. If you are aiming for specific drops in the loot table from fishing you should try to increase your rarity above the minimum required as much as you are able to as well as equipping related enchantments, such as Fiber Finder. Being around 50 rarity over the minimum is a good point for semi-decent drop frequency.
How to Increase Bonus Rarity:
- Certain types of bait. (See the bait table).
- Fishing equipment / Tackleboxes and augmenting both of these.
It can also be supplemented with the following buffs and enchantments: Fishing Magnetism and to a lesser extent Deadliest Catch if your bait is providing Bonus Rarity.
The UI
Opening the fishing tab will show you three key sections:
Info Panel:
The box on the left of the screen. This shows you all of your current fishing related stats, such as your:
Effective Fishing Level:
This is what the game treats as your fishing level. Tackleboxes, fishing gear, and bait can increase this, slightly reducing the time needed to search and gather and increasing your success chance and bait preservation.
Bait Preservation Chance:
The chance that bait will not be removed from your tacklebox on a gathering action. Can be increased with the Bait Preservation enchantment, by using metal hook baits, and slightly by leveling Fishing.
Bait Power:
The strength of your bait, used to calculate the speed and chance of searching for a fishing node as well as it's size.
Reel Power:
Your fishing strength, used to calculate the speed and chance of gathering a resource out of the node.
Bonus Rarity:
This is used to calculate your chance of finding rarer fishing nodes and rarer resources from inside them.
Tacklebox
In the middle of the screen. Annoyingly and confusingly different from an equippable tacklebox. This is where you store your bait for use in fishing. There is no limit to the amount of bait you can store here and it is consumed from the top left slot first. You can click on bait inside to remove it as well as move the bait to the front of the tacklebox to be consumed first.
There is also a useful setting you can change to automatically move new bait you craft/acquire into the tacklebox if some is already inside.
You should always be using bait to fish. It's the main way to boost all fishing stats before you have late-game fishing gear, and as a result increases the XP and items you get per hour.
Fishing Zones:
On the right side of the screen. This is where you select a zone to fish in. Clicking the i icons in the top right will show what nodes you can find, what resources you can find inside them, what rarities they unlock at, and how big the nodes can be. The rarity shown is the minimum rarity, increasing it increases the odds of getting rarer nodes and items.
The icons and numbers at the bottom of each fishing location on the fishing screen will tell you the following information from left to right:
Level Required:
The fishing level required to unlock the fishing location. This does not include effective levels given to the player by fishing gear and bait.
Searching Time and Gathering Time:
Searching time is how long it takes your player to find a fishing node.
Gathering time is the time it takes for your player to gather one resource from that node.
Base Find Chance and Base Gather Chance:
Base Find Chance is your chance to find a fishing node after completing a search.
Base Gather Chance is your chance to fish up a resource from a node.
Experience per action:
This is the base amount of fishing experience you receive per catch. Rarer fishing nodes have XP multipliers that can award you up to 1.3x the shown amount, more information regarding this can be later on in the Areas section.
Bait
You will always want to use bait while fishing, especially so in the early game. Bait is easy to acquire compared to equipment upgrades and gives significant stat increases. Use bait while fishing by clicking on it in your inventory and selecting the option that says "move to tacklebox". You can have multiple types of bait in your tacklebox, however you will only use the first type. You can reorder bait in your tacklebox by clicking on it and selecting "Move to Front".
Bait is not consumed while searching for a node but its stats do affect the node you find. Bait is consumed with gather actions after finding a node, this includes failed attempts. Failing also reduces the node size by one, the fish got away...
The "best bait" to use is a hard question to answer, the short answer is it depends on what you are aiming for.
The slightly longer answer: If your node search chance is less than 100% go for bait power, otherwise you should go for reel. If you want to try and get the rarer drops from a zone, go for higher bonus rarity. If you want bait that lasts longer try and get metal hook baits.
Do not use Tentacle Bait until you are in late-game fishing, before then the 1.3 stat multiplier does not outscale the -30 bait and reel penalty. If when you equip it to the first slot in your tacklebox your stats go down its too early for you to use.
Nightcrawler, Glowbug, and Shrimp Tail are the early options, and are fairly easy to acquire thanks to the addition of worm bins. I think it's not worth spending the money on Earthworm from the general shop unless you're unable to get any other bait at all. My recommendation would be nightcrawler early on due to the higher bait power having the largest impact on fishing speed/success chance. If you can afford it (in terms of money and success chance), Smelly Meat as a nice all rounder with a slight boost to effective fishing level. If you have the crafting level and resources for it the 2 Fish Guts baits are also nice to use due to it being easy to craft more of with the fish you catch.
There are 13 types of bait available for fishing, these are:
 Earthworm Bait
 Fat Nightcrawler Bait
 Glowbug Bait
 Improved Hook Bait
 Smelly Fish Guts Bait
 Crustacean Meat Bait
 Hardened Hook Bait
 Alluring Lure Bait
 Writhing Tentacle Bait
 Mysterious Bait
Areas
Nodes without a minimum rarity can be found at any time in differing rates. In a few cases some resources shown as fishable inside a node will require a higher rarity to be gathered than needed to discover that node. If a specific item you want isn't dropping from a node you are not fishing with enough bonus rarity. Try to get around 50 rarity above the minimum if you are trying to farm a specific resource.
The rate of some nodes appearing is also increased by a multiplicative 10%-25% by the following enchantments: Fiber Finder, Junk Snagging, and Fishy Fortune.
Bonus Rarity must be above the minimum rarity shown below for nodes to start appearing, the higher above the minimum rarity you are the higher your chances are of finding the nodes. Nodes also have internal limits so even with 1,000,000 rarity you will still get the "worse" nodes appearing.
The first node in any zone will always be the one named after it. For example, the first node in Shallow Pond will always be "The Shallow Pond" to prevent actively switching between zones until a good node rolls.
It is not currently stated in game, but fishing in rarer nodes gives you up to a 1.3x bonus XP multiplier per action depending on the zone/node.
| Level | Zone | Exp | Recommended Gear | Min. Rarity | Node | Possible Loot | XP Mult | Enchantment |
|---|---|---|---|---|---|---|---|---|
| 1 | Shallow Pond | 20 | Novice Tacklebox | N/A | The Shallow Pond |      
|
1 | |
| Oop, All Shrimp! |
|
1 | ||||||
| Small Schools of Fish |
|
1.1 | ||||||
| Drifting Around |
|
1.1 |  Junk Snagging Junk Snagging
| |||||
| Shallow Flora | 
|
1.2 |  Fiber Finder Fiber Finder
| |||||
| 20 | Lazy River | 30 | Basic Tacklebox | N/A | The Lazy River |    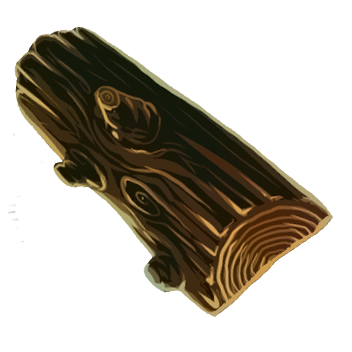
|
1 | |
| Migrating Schools |
|
1 | ||||||
| Riverbed Flora | 
|
1.3 | Fiber Finder
| |||||
| Drifting Debris |
|
1.3 | Junk Snagging
| |||||
| 25 | ANGY Bois | 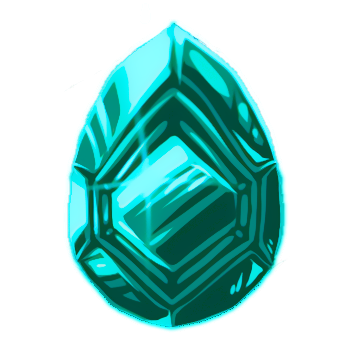
|
1.2 | |||||
| 50 | Still Lake | 60 | Advanced Tacklebox Fishing equipment |
N/A | The Still Lake | 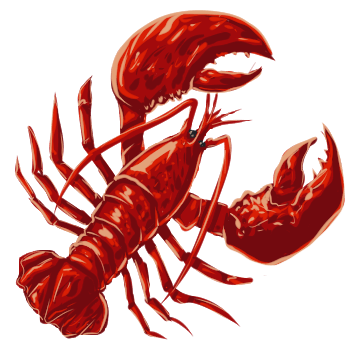 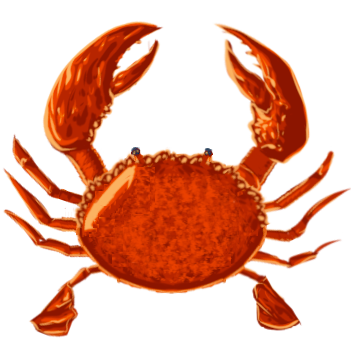 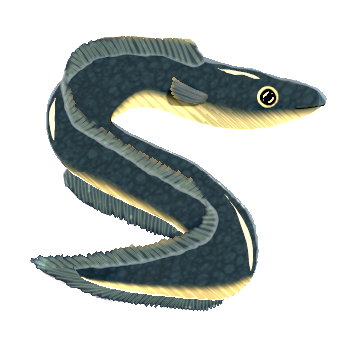
|
1 | |
| Cage Match | 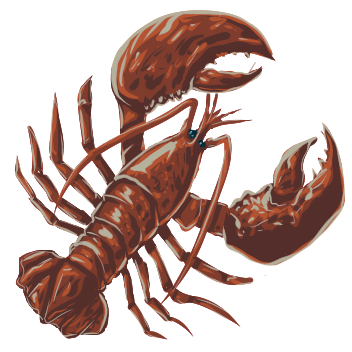
|
1.1 | ||||||
| Lake Flora | 
|
1.2 | Fiber Finder
| |||||
| Capsized Boat |
|
1.2 | Junk Snagging
| |||||
| 30 | Big Catch! |
|
1.2 | |||||
| 75 | Yedyod’s Cove |
|
1.3 | |||||
| 65 | Open Ocean | 90 | Pro Tacklebox / Supreme Tacklebox, Fishing equipment |
N/A | The Open Ocean | 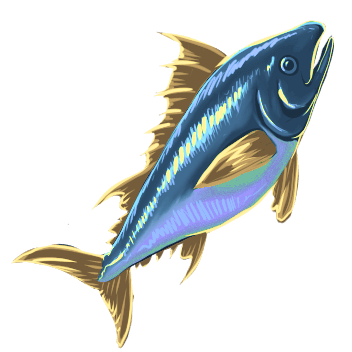 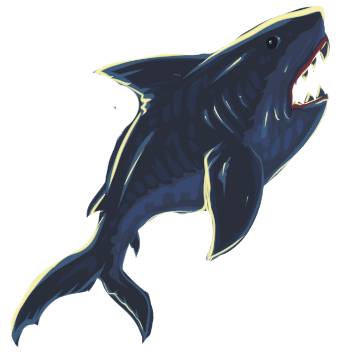    
|
1 | |
| Sharks Ate All The Tuna |
|
1 | ||||||
| Carefree Day | 
|
1.1 | ||||||
| Ocean Flora | 
|
1.1 | Fiber Finder
| |||||
| 25 | Shipwreck Bay |
|
1.1 | Junk Snagging
| ||||
| 50 | Almost Jurassic | 
|
1.2 | |||||
| Playtester’s Paradise |
|
1.2 | ||||||
| 75 | Ghost Ship |
|
1.2 | Junk Snagging
| ||||
| 100 | Is that a tentacle? |
|
1.3 | |||||
| 85 | Stormy Seas | 100 | Supreme Tacklebox / Ocean's Embrace, Fishing equipment |
N/A | The Stormy Seas |
|
1 | |
| Eye of the Storm |
|
1 | ||||||
| Deep Sea Flora | 
|
1.1 | Fiber Finder
| |||||
| 50 | World’s End |
|
1.2 | |||||
| 75 | Endless Vortex |
|
1.2 | |||||
| 100 | INFO’s Stand |
|
1.3 | Junk Snagging | ||||
| Common Encounter |  Swordfish Swordfish
|
     [?] [?]
|
N/A | |||||
| Rare Encounter |  Ascended Ascended
|
 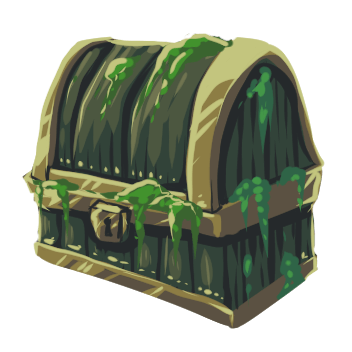  [?] [?]
|
N/A |
Dangerous Encounters
Stormy Seas is a dangerous location. While fishing there, a fight with a Swordfish or Ascended will occasionally be simulated and appear as a "Danger Simulation" node. This will delay you from searching for the next node from anywhere between 12 to 90 seconds depending on your fishing set bonus and equipped weapons Strength / Intellect / Dexterity (offhand and other equipment slots are ignored for this purpose). This penalty persists even if you swap to another zone to try and escape it. The Camo Cloak can be used to reduce this delay by 20% and also reduce the chance of one occurring by 50%. For more information on the mechanics of these encounters check out the Dangerous Encounters page.
Chests
While fishing there is a low chance for one of two types of treasure chests to be gathered at the same time as any item. These are the Sunken Treasure and Ancient Treasure. By wearing gear with the naturalist enchantment you can increase the rate in which you get chests and greatly increase the chance that it is the ancient variant.
Chests can give fibers, gems, Soul Fragments, and talismans. In the early game these are especially useful.
The Ancient Treasure is always worth opening if you care about augmenting the Ocean's Embrace. This is because there is around a 3% chance for each legendary tool piece to drop per ancient treasure, an item needed for crafting the additional copies of the Ocean's Embrace. The greater chest can also rarely give ancient cloth fragment, the material needed to craft the Abandoned Academy Base key that gives fishing shards upon completion.
The quest to get your first Ocean's Embrace requires 9000 fishing shards, and also unlocks the crafting recipe to make more for augmenting (as past +5 augmenting requires base versions of the item). If you are lucky and get a gear piece out of an ancient treasure you have saved yourself around 75 hours of fishing due to the base cost of these pieces being 900 shards.
Fishing Gear
There are two types of fishing gear. The Fisherman's skilling set and Tackleboxes.
Fisherman's set
The Fisherman's Set's crafting recipe is locked behind the quest "Fishing Set Quest". You will need to be level 50 before you can start this quest and upon completion you will receive 1000 shards and a prototype fisherman's set.
The prototype set has the same set bonus as the craftable version and has the same enchantments but at level 1 instead of level 3. You can craft the scrolls needed to fill the missing slots and make the enchantments level 3 or replace them with different enchantments entirely (if they can be applied to the fishing set). You can also reset the name of the items so they are not called prototypes. As of the time of writing this they are treated in game as the same item.
Additionally, only the recipe is level locked. If you have the cash, and someone is selling one, you can purchase a set from the market and wear it at level 1.
| Fishing Gear | Enchantment |
|---|---|
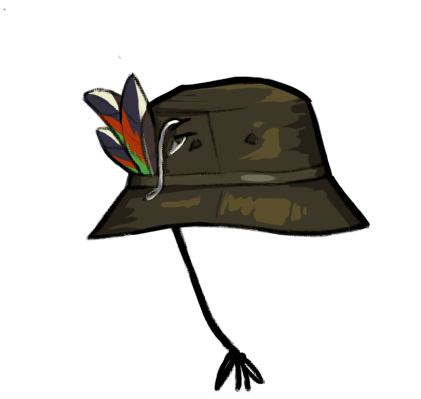 Fisherman's Bucket Hat Fisherman's Bucket Hat
|
Bait Preservation 3 |
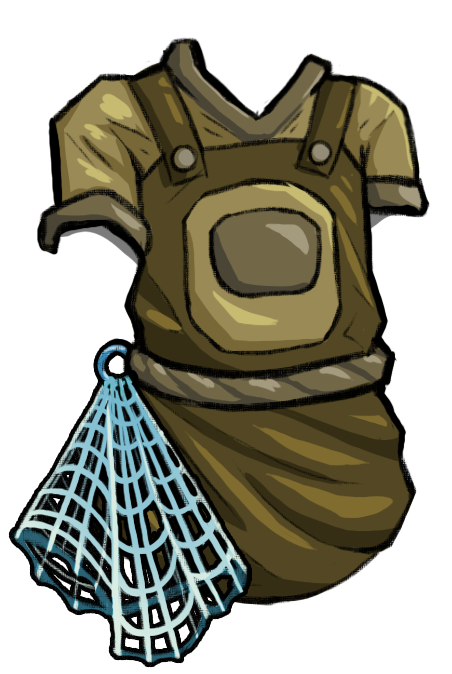 Fisherman's Smock Fisherman's Smock
|
Reinforced Line 3 |
 Fisherman's Waders Fisherman's Waders
|
Pungent Bait 3 |
| Prototype Fisherman's Bucket Hat | Bait Preservation 1 |
| Prototype Fisherman's Smock | Reinforced Line 1 |
| Prototype Fisherman's Waders | Pungent Bait 1 |
The fisherman's set is a must have item for fishing. The set bonus from wearing all 3 pieces, "Master Fisherman", increases all of your base fishing stats (before bait bonuses) by 15% and reduces the time delay of Dangerous Encounters.
The set bonus also states that it reduces the damage taken and increasing damage done in "dangerous gathering locations", this results in the reduced delay of dangerous encounters but also buffs your character when they are fighting in skilling dungeons such as the Abandoned Academy Base to deal 25% more damage and take 25% less damage.
Each piece can be augmented to give +1 to all fishing stats for the cost of some fibers and fishing shards.
You can replace the enchantments on the gear. This is important to do if you have one of the same enchantments on your tacklebox as enchantments do not stack across gear and you are effectively wasting a level 3 enchantment if you do not replace it.
There is a fourth piece that adds to the set bonus, the legendary tacklebox Ocean's Embrace. We will cover this below in...
Tackleboxes
Tackleboxes are the tool used for fishing. Like pickaxes and hatchets, tackleboxes can be equipped and will give the player stat boosts towards fishing. By doing the gathering tutorial quest, you can get the first tier of tacklebox for free. Due to how integral the substats of fishing are to the time taken and XP gained, you should be upgrading your tacklebox as soon as possible every time you reach the level requirements to equip the next tier, as well as affixing them if you want to progress quickly. If you want to save money at the lower levels, you can avoid enchantments. However, they are powerful bonuses to have on a tacklebox.
The highest tier of tacklebox you can craft is the legendary Ocean's Embrace. This is locked behind the Master difficulty quest "Legendary Tacklebox", and requires you to either clear or turn in a key for the Abandoned Academy Base Dungeon as well as turning in 9,000 Shards to receive your first one. Like all legendary tools this is intended for end game skilling, as a result you will likely have maxed out fishing by the time you can acquire this.
Ocean's Embrace gives the highest increase to base fishing stats as well as unlocking a stronger version of the Fisherman's Set bonus buff, "Legendary Angler". This gives the player a 30% buff to all fishing stats (before bait bonuses) and reduces damage taken and increases damage done in Dangerous Encounters and skilling dungeons (such as the Abandoned Academy Base) by 50%.
| Tacklebox | Fishing Level | Bait Power | Reel Power | Bonus Rarity |
|---|---|---|---|---|
 Novice Tacklebox Novice Tacklebox
|
3 | 15 | 5 | N/A |
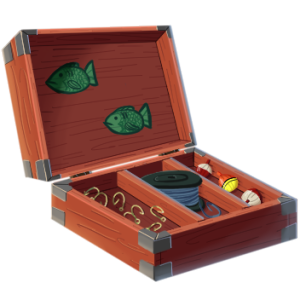 Basic Tacklebox Basic Tacklebox
|
6 | 20 | 10 | 3 |
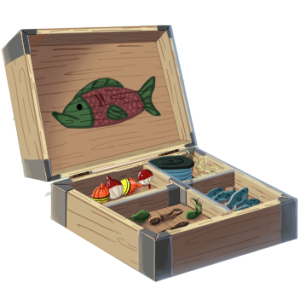 Advanced Tacklebox Advanced Tacklebox
|
9 | 25 | 15 | 6 |
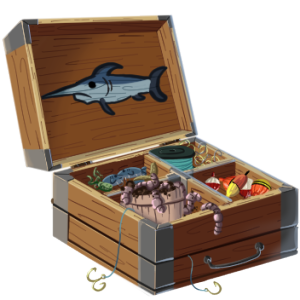 Pro Tacklebox Pro Tacklebox
|
12 | 30 | 20 | 10 |
 Supreme Tacklebox Supreme Tacklebox
|
15 | 35 | 25 | 15 |
 Ocean's Embrace Ocean's Embrace
|
60 | 60 | 60 | 60 |
Other Useful Gear
In addition to the above here are other pieces of gear that are useful when fishing:
- Bag of Holding: depending on the version you have, this gives up to a 45% chance to force the max quantity of a resource when gathering. This only affects fibers and aquamarines by default as fish do not roll a range without any yield affixes.
- Newbie / Dwarven Adventurer's Backpack: (for Adventurers boon) Extra shards are very useful, using this in place of the bag of holding will allows you to gain more shards (at the cost of slower fishing and fewer resources) for augmenting fishing gear or getting shards for an Ocean's Embrace sooner.
- Cloak of Many Pockets / the Void: 1-2 extra levels of haste depending on the cloak. Faster fishing = faster XP, no downsides to using these outside of stormy seas if you can afford them.
- Camo Cloak: Only applicable to Stormy Seas, decreases the chance of a encounter by 50% and reduces delay by 20%. Works out as a better time save than the haste cloaks. Plus augmenting it gives you an extra +1 to fishing sub-stats.
- Flamboyant Cape: The opposite of the Camo Cloak, increases encounter chance by 50% and reduces delay by 10%. Not recommended for fishing, will result in more bait from more fights in Stormy Seas and some slightly better drops but not worth the time cost. Also gives fishing stats with augmenting.
- Prismatic Ring: (offers +1 fishing level, bait, reel, and rarity per aug) This can have Haste, Gathering, or Scholar. Haste is a must have. Gathering will help you get more items. Scholar will help you get more shards.
- A strong weapon: Dangerous Encounters delay is reduced based off your weapons Strength / Intellect / Dexterity (among other things), if your delay with a Camo Cloak is above 12 seconds you should be able to reduce it with a better weapon.
Enchantments
Listed below are some relevant enchantments for fishing that can go on your fishing set, tacklebox, jewelry or other gear. Enchantments, of course, do not stack across gear.
My recommendations, in order, are:
- Ring / Necklace:
- Gloves / Boots:
- Fishy Fortune - For increasing the amount of fish you get. Boosts nodes with good fish drops.
- Junk Snagging - Good for increasing driftwood and aquamarine drops. Works best with metal baits. Boosts nodes with driftwood and aquas
- Prolonging - If you frequently use potions you should get this to make them last longer.
- Naturalist - Chests are good mostly until you build up a decent stockpile of tool parts.
- Fiber Snagging - For more fiber at the cost of some fish. Better with metal hooks but only gives 1 random available fiber.
- fishing enchantment - If you don't have 100% success chance and want to free up affix/enchantment slots on your tacklebox then you can use this.
- Tacklebox:
- Reinforced Line - The best in slot if you only care about speed, more actions = more xp and resources.
- Fiber Finder - Great for people who want to gather more fiber. Boosts the rate of fiber nodes.
- Deadliest Catch - In some cases this may beat out Reinforced Line at the cost of higher bait usage
- Oil Spill - For people who want to get Fish Oil for heat/cooking without the annoying preparation.
- Bait Preservation - This can be helpful if your stats are low or you're using deadliest catch and you want to save bait. In my opinion its not worth the time loss you'd get from not taking reinforced line.
- Pungent Bait - Can be helpful if you're struggling to reach 100% chance
- Fishing Magnetism - Can be helpful if you're trying to gather a specific resource and cant make other upgrades yet.
- Archaeology - Only good if you hate fishing and want to get extra gold from other gathering skills. Put this on another tool!
- Fishing Set:
- Deadliest Catch - A good enchant to not have at full strength. Decent bait bonuses without too harsh of a bait preservation loss. At high levels this won't reduce it at all.
- Fishy Fortune - Take if not already on gloves/boots. Free fish.
- Oil Spill - Good if you're unsure of what else to take. Decent source of heat/money with a minor loss of fish.
- Junk Snagging - Great take if using metal baits. Aquamarines/Mystical Driftwood is a good source of money.
- Fiber Snagging - no matter what strength replacing a fish for 1 fiber is
- Archaeology - If not already on another tool the set is a decent place to put it if you don't need anything else more.
- Pungent Bait - Useful in early game, bait power becomes less useful the further you progress.
- Fishing Magnetism - Niche usecase, better off saving your reel power.
- Fiber Finder - Decent fiber boost but you'll either want this at full strength or not at all
- Bait Preservation - Useful in early game, eventually your stats make this irrelevant
- Reinforced Line - lowest priority because this should be on a larger slot item (tacklebox).
The default options for the fishing set are solid choices, especially when you get them at level 50. If you choose to add one of the fishing set's enchantments to your tacklebox make sure to replace the fishing set piece equivalent since they do not stack. (for example having reinforced line on a tacklebox makes the chest piece enchant worthless so you can swap it for fishy fortune or fiber finder instead). Towards the late game of fishing you will probably no longer need bait preservation.
- Any Other Tool: Putting Archaeology on any tool that isn't the tacklebox still gives access to the enchantment. Doing this allows you to make some extra gold on the side whilst fishing.
 Scroll Scroll | Slot | Level | Silver Amount | Rune Amount | Runes | Effect per scroll |
|---|---|---|---|---|---|---|
| tacklebox, fishingset | 14 | 200 | 30 | Nature, Water | Increases bait power by 3. | |
| gloves, boots, fishingset | 20 | 200 | 20 | Air, Water, Nature | 1% chance to guarantee looting fibers if any exist in the current fishing node. Chance is doubled when using metal hooks. Caps at 50% without a hook, otherwise 100%. | |
| gloves, boots, fishingset | 20 | 200 | 20 | Earth, Water, Nature | 1% chance to replace a caught fish with a random driftwood, or rarely an aquamarine, if it exists in the current fishing node. Chance is doubled when using metal hooks. Caps at 50% without a hook, otherwise 100%. Boosts chance of finding relevant tagged nodes by 10% and potentially unlocks new ones. | |
| tacklebox, fishingset | 23 | 300 | 40 | Earth, Water | Increases reel power by 3. | |
| tacklebox, fishingset | 33 | 400 | 40 | Earth, Water, Cosmic | Increases bonus rarity by 2 and decreases both bait and reel power by the same amount. Increases chance to find known rare nodes. | |
| ring, necklace | 37 | 500 | 50 | Mind, Cosmic, Nature | Automatically sells gathering and production items for 120% of their vendor price. Does not affect Crafting or stack with Scholar. | |
| tacklebox, fishingset, pickaxe, hatchet, miningset, foragingset | 41 | 500 | 50 | Earth, Water, Nature | Gives access to a secondary drop table while gathering with rewards and chances heavily scaling on enchantment strength. The best finds are only found in the hardest to reach zones! | |
| gloves, boots, fishingset | 44 | 500 | 50 | Earth, Water, Mind | 1% chance to double fish caught while fishing. Caps at 50%. Boosts chance of finding relevant tagged nodes by 10% and potentially unlocks new ones. | |
| gloves, boots, fishingset | 45 | 500 | 50 | Earth, Water, Mind | Increases fish catch chance by 2.5%. | |
| tacklebox, fishingset | 47 | 600 | 60 | Earth, Water, Chaos | Increases chance to preserve bait by 4%. | |
| gloves, boots | 49 | 600 | 60 | Air, Water, Cosmic, Nature | Increase your chance to gain chests as well as convert standard chests to their greater variants while gathering by 20%. | |
| tacklebox, fishingset | 50 | 600 | 60 | Earth, Water, Mind | Increases chance to find aquatic fibers by 25%. Significantly boosts chance of finding fiber related nodes by 25% and potentially unlocks new ones. | |
| ring, necklace | 64 | 800 | 70 | Earth, Fire, Water, Mind, Cosmic | Gain a 10% chance to find an extra resource while gathering. There is a 15% chance that a nature rune is consumed when it procs. Attempts to pull the rune from your inventory then ammo pouch if none found. | |
| tacklebox, fishingset | 69 | 800 | 70 | Earth, Water, Death | Gives a 7.5% chance to try and extract fish oil from a fish based on the fish's size. There is a chance that fish oil may not be created if the fish is too small. | |
| tacklebox, fishingset | 71 | 900 | 70 | Earth, Water, Blood | Increases bonuses from using bait by 5% but decreases bait preservation chance by 5%. Increases chance to find known rare resources. | |
| ring, necklace | 88 | 1300 | 110 | Mind, Chaos, Cosmic | Converts a gathered or produced item while Cooking, Fishing, Foraging, Mining, Runecrafting, or Smithing into a single skilling shard every 37.5 minutes on average. Can be further boosted through interactions with enchantments that cause instant action completion or increased main drop generation. | |
| ring, necklace | 94 | 2000 | 200 | Air, Mind, Chaos, Cosmic | Increases non-combat action speed by 4%. Caps at halving action time. Stacks with Empowered Haste. |
Buffs
The following are fishing related buffs you can receive from potions. While not required to effectively fish they will speed up the process, especially in the early game where stats are at their weakest. Recommended buffs are: Intuition and Reinforced Line. If not reaching 100% chance Fishing and Pungent Bait are incredibly useful.
| Name | Skill Affected | Description | Buff Gained From |
|---|---|---|---|
| Fishing (Enchantment)
|
Fishing | Increases fishing catch rate by 10%. | Honey |
| Fishing | Increases bonus rarity by 4 and decreases bait and reel power by the same amount. Increases chance to find known rare nodes. | Raw Magnetic Minnow | |
| Fishing | Increases reel power by 6. | Raw Tigerfish | |
| Fishing | Increases bait power by 6. | Seaweed | |
| Fishing | Adds 7.5% chance to try and extract fish oil from a fish based on the fish's size. There is a chance that fish oil may not be created if the fish is too small. | Raw Slippery Eel | |
| Fishing | Increases bonuses from bait by 10%, but decreases chance of bait preservation by 5%. Increases chance to find known rare resources. | Raw Great White Shark | |
| Mining, Foraging, and Fishing | Gain a 20% chance to find an extra resource while gathering. | Banana | |
 Intuition Intuition
|
Most activities | Increases experience gained by 10% while doing most things. | Sageberry |
Affixes
Be aware that affixes are costly to change once applied to an item. Look through the menus yourself or even hold off applying them to hard to acquire items until you understand what you want from them. Higher tier equipment have higher possible values for affixes than the lower tiers. This list is my opinions and based around late-game affixes, at lower levels its okay to only worry about affixing the tacklebox.
- Fishing Hat/Smock/Waders: "Speedster Fishing" + "Fishing Yield" OR "Prepared"
Speedster Fishing is the best affix you can get for fishing gear. I personally think yield is more valuable than prepared in terms of getting more mats since it synergizes with Fishy Fortune. However if you want to min-max for speed/xp then prepared is the better pick. Even at lower levels I don't think its worthwhile to get other affixes as you will just have to replace them later.
- Cape: "Sneaky Gatherer" + "Gathering Shards".
More shards = more augs = more stats. These are the only two relevant affixes you can get for fishing on capes and you should be putting them on a Camo Cloak. "Dangerous Gatherer" exists but all you will really get out of it is more delays while fishing for little to no benefit.
- Necklace: "Quick Gatherer" (+ "Reeling" + "Fisher")
7-10% additive speed is a no-brainer. If you really want to min-max you can also get Reeling and Fisher for more elvls and Reel Power at the cost of not being able to use the production skill related affixes.
- Ring: "Ultimate Gatherer" + "Skillful" + "Gathering Yield"
Elvl multiplier and an XP multiplier are unquestionably the best for fishing. If you have a third slot I'd say "Gathering Yield" is more valuable than "Greater Chests". If you need more chests its better to run naturalist enchant and buff potions.
- Pendant: "Gathering Doubling" + "Greater Archaeology" (+"Fisher")
1-3% chance to double gathered item. "Greater Archaeology" is also nice to have as you should be fishing with archaeology on another tool for the bonus money. If you want to main fishing you can also add the Fisher affix for up to 2.5 elvls.
- Boots and Gloves: Only combat affixes available currently, not relevant for fishing but can be useful in skilling dungeons I guess.
- Tacklebox: "Speedster Fishing" > "Prepared" > "Fishing Yield"
Speedster Fishing and Prepared are must have picks for the tacklebox if they are available. "Fishing Yield" is great if you care more for resources and works with Fishy Fortune. If you don't have at least the "Supreme Tacklebox" and you also don't have 100% chance to search/gather through other means, you should prioritize getting "Successful Fisher" as the fastest time save you can get in the early game is lowering your chance to fail.
Why is Speedster Fishing the best affix? Speedster fishing gives you a chance after a search action (as long as it isn't your first node search of the zone) to set your gather speed to 0.33 seconds for the duration of that node, this results in more XP and items per hour overall.
Talents
There are currently 12 talents available for fishing, these are only usable after maxing fishing and some require other skills. Some don't even unlock until mastery 15.
- Gathering Master - Your mastery of gathering gives you a chance to gather more resources!
- Gathering Grandmaster - Your mastery of gathering gives you a chance to gather more resources!
These two are great for gatherers in general, it's Empowered Gathering so it doesn't even require nature runes.
- Fishing Prodigy - You're a natural at fishing! Increases your fishing effective level by 10.
Simple +10 to fishing elevel, decent time save with no drawback.
- Shrimp Student - Deep study of the true rulers of the sea has given you an insight to the fickle nature of the waters. Increases your effective fishing level by 30 but decreases your mining and foraging levels by 10.
Similar to above with the trade-off being slower mining and foraging. Still worthwhile if you mainly do fishing.
- Fishing Grandmaster - You're the uncontested master of fishing. Increases your fishing effective level by 5%.
Another level boost with no drawback. This ones a multiplier so it becomes more valuable the higher you augment your equipment.
- Fantastic Fiber Finder - Increases your Fiber Finder by 3.
- Oil Rig - Grants you 1 level of Oil Spill, giving you a 7.5% chance to try and extract fish oil from a caught fish.
These two will be dependent on what you want out of fishing. Fiber Finder is a decent boost to your fiber per hour but oil rig at level one is only a small amount of oil per hour. Even so it's a decent passive source without having to dedicate your tacklebox to it.
- It Belongs in a Museum - Grants you 1 level of Archaeology, giving you access to an additional loot table while Gathering.
Not the biggest buff considering end game you can have arch 8 on another tool but if you have the points to spare its a little extra gold per hour on the side.
- Rough Seas Fishing - Grants you 1 level of Fishing, increasing your fish catch chance by 2.5%.
Not really worth getting. Catch chance cannot go above 100% and by the time you even have this unlocked you should have been at 100% chance for 40 levels.
- Fishing Shard Mastery I-III - Grants you +1-4 levels of Fishing Shard Master, giving you up to +120% chance to generate an additional shard.
If you're fishing for the long haul these talents are a must have to make auging your gear less painful.
Achievements
There are a few achievements that give bonuses to fishing, listed below are the relevant achievements and how they benefit fishing. The majority of these are long term goals that give boosts, such as:
- Do Ya Membah - Plant or Harvest 10,000 Sageberry Bushes
- Grants +1 Intuition, 5% increased XP gain
- Academy Archaeologist - Clear the Abandoned Academy Base 100 times
- Grants +1 Archaeology and +1 Fishing Shard Master, more gold and +30% chance to gain an additional fishing shard.
- All Natural - Clear the Nature Atheneum 100 times
- Grants +1 Naturalist, increases chance of chests while fishing
- Total Mastery 100, 200, 300, 400, 500
- Grants +1 Lesser Intuition per achievement, 1%-5% increased XP gain
- Fishing Mastery 10
- Grants +1 Fishing Mastery, increases stats from boosts and equipment by 1%
- Fishing Mastery 25
- Grants an additional +2 Fishing Mastery and +1 Fishy Fortune, increases stats from boosts and equipment by 2% and a 1% chance to double fish caught.
- Fishing Mastery 50
- Grants an additional +4 Fishing Mastery and +1 additional Fishy Fortune, increases stats from boosts and equipment by 4%. For a total increase of 7% as well as a total 2% chance to double fish caught by this point.
Specializing
This section exists as a rough guide of key enchants/talents to pick to focus on a specific resource, any missing slots can be filled with enchantments of your choice (Personally, I run a hybrid build that focuses on aquamarines and fish oil with prolonging) You will always want to use haste as well as the Camo Cloak in Stormy Seas and the Void Cloak everywhere else.
Fish
The default option, focusing on enchants that only buff sub-stats to increase your speed along with using gathering while fishing results in the same drop distribution as normal.
Fishing Gear:
- Deadliest catch (slight bonus at the cost of bait preservation, can also take bait pres to counteract)
- Pungent Bait (slight boost to node size and search speed)
Tacklebox:
- Reinforced Line
Gloves/Boots:
- Fishy Fortune
Necklace/Ring:
- Haste
- Gathering
Bait:
- Reel based - Hardened Hook / Tentacle / Smelly Fish Guts
Avoid:
- Enchantments that reduce your reel power - Fishing Magnetism.
- Enchantments that increase non fish nodes - Fiber Finder, Junk Snagging.
Driftwood / Aquamarines
The only real difference between this and fish is that you would want Junk Snagging on gloves or boots and to use metal hook bait. You can run Fishy Fortune as well for more fish alongside the increased wood/aquas and to increase the rate of nodes with aquamarines (INFO's Stand).
Fishing Gear:
- Deadliest catch (slight bonus at the cost of bait preservation, can also take bait pres to counteract)
- Pungent Bait (slight boost to node size and search speed)
Tacklebox:
- Reinforced Line
Gloves/Boots:
- Junk Snagging
- Fishy Fortune
Necklace/Ring:
- Haste
- Gathering
Bait:
- Metal Baits - Hardened Hook / Alluring Hook
Avoid:
- Enchantments that reduce your reel power - Fishing Magnetism.
- Enchantments that increase non fish nodes - Fiber Finder, Junk Snagging.
- Non-metal baits - they halve the chance of Junk Snagging
Oil
Equipping Oil Spill enchant gives a base 8% chance per enchant level to try and extract fish oil from a fish based on the fish's size. On an Ocean's Embrace this equals a 60% chance. This chance is not guaranteed and is less likely the smaller the fish is. More information can be found on the Oil Spill page.
Fishing Gear:
- Deadliest catch (slight bonus at the cost of bait preservation, can also take bait pres to counteract)
- Pungent Bait (slight boost to node size and search speed)
- Reinforced Line
Tacklebox:
- Oil Spill
Gloves/Boots:
- Fishy Fortune
Necklace/Ring:
- Haste
- Gathering
Bait:
- Reel based - Hardened Hook / Tentacle / Smelly Fish Guts
Avoid:
- Enchantments that reduce your reel power - Fishing Magnetism.
- Enchantments that increase non fish nodes - Fiber Finder, Junk Snagging.
Fiber
Equipping Fiber Finder enchant increases chance to find fibers by 25% per enchant level, On an Ocean's Embrace this equals an increased 200% chance. Doing this does not replace all fish. You can also take this further by equipping boots or gloves with the Fiber Snagging enchantment to replace some fish with more fiber.
Fishing Gear:
- Deadliest catch (slight bonus at the cost of bait preservation, can also take bait pres to counteract)
- Pungent Bait (slight boost to node size and search speed)
- Reinforced Line
Tacklebox:
- Fiber Finder
Gloves/Boots:
- Fiber Snagging
Necklace/Ring:
- Haste
- Gathering
Bait:
- Metal Baits - Hardened Hook / Alluring Hook
Avoid:
- Enchantments that reduce your reel power - Fishing Magnetism.
- Enchantments that increase non fiber nodes - Fishy Fortune, Junk Snagging.
XP
For an XP focus there isn't really a lot you can do other than increasing your stats as much as possible. There is some merit to caring more about Bonus Rarity as rarer nodes have an XP multiplier but this is not worth chasing at the cost of Reel Power. Make sure to equip Junk Snagging and Fishy Fortune to increase the odds of the 1.3x zone in stormy seas. There is a ring affix that gives you an XP multiplier, aside from that you will just want to use Intuition potions and fish in Stormy Seas. Scholar is a good enchantment to use over gathering in this case as the extra shard rate will mean you can upgrade your gear faster.
Fishing Gear:
- Deadliest catch (slight bonus at the cost of bait preservation, can also take bait pres to counteract)
- Pungent Bait (slight boost to node size and search speed)
- Fishy Fortune
Tacklebox:
- Reinforced Line
Gloves/Boots:
- Junk Snagging
- Prolonging
Necklace/Ring:
- Haste
- Scholar
Bait:
- Metal Baits - Hardened Hook / Alluring Hook
Avoid:
- Enchantments that reduce your reel power - Fishing Magnetism.
Shards
Pick one of the above and use scholar instead of gathering. As well as a Dwarven Backpack instead of a Bag of Holding. Shards are based on real time so action speed does not affect them, don't forget to get the bonus shard affix on your cape.
Chests
Pick one of the above and use a pair of Naturalist boots/gloves. Naturalist potions can also help you out.
Okay, I want to read the detailed guide
Intro
This isn’t intended to be the best or the fastest route to maxing fishing. This is just a general guide that I wrote as I was fishing on a fresh account in the seasonal mode that was testing the new XP curve for 1.0. I will be making updates to this if I come across anything else or anything is changed for the launch of 1.0. Since writing this there are now new baits available as well as 2 new enchantments for boots / gloves. I will be revising this as I play through v1.0
Doing nothing but fishing to 99 is entirely possible but not recommended. There are a lot of roadblocks in terms of gear progression you would have to grind skills or spend money for. This will of course be different if you are not playing on iron man or if the market is well stocked with items and gear. The optional sections in each section will typically be things you can achieve by spending money on the market to level faster.
The common theme you will see throughout this guide is increasing all 4 fishing stats where possible and boosting your success chance to 100%, which in turn reduces your action times and improves your chances to succeed. All this will improve the rate at which you get XP.
I have money to burn
I made this guide without using the market and there are a few steps you can take to progress even faster covered here. It all depends on how much money you want to sink into the skill to do so. If the following suggestions are within your budget then you will want to:
- Buy the highest slot boots or gloves you can afford and wear and add the Fishing enchant to them. If you do this and you can reach 100% success chance without the tacklebox affix refer to the affix section and affix your tacklebox accordingly.
- Buy the highest slot necklace or ring you can afford and add the haste enchantment to one, jewelry also has beneficial affixes. (see affixes)).
- Buy the Cloak of Many Pockets / the Void (Camo Cloak in Stormy Seas).
- Keep buying smelly meat / hardened hook bait to use unless you need more bait power to reach 100% success chance.
- Buy the highest tier of tacklebox you have the fishing level to be able to equip and augment it to at least +5 and affix.
- You can buy the fishing equipment to wear from the start and it will greatly help you if you can convince someone with the shards to sell you one.
I didn't really use buffs in my play-through because I didn't want to bother managing them but you can buy / cook potions for Reinforced Line and Pungent Bait. The Fishing buff from Honey can also be useful for boosting your success chance but you will need so much of it that its an expensive way to improve your chances compared to just getting the affix/enchant.
Level 0
There are a few "side-quests" we can do to reduce the pain of early game fishing before we start. The biggest time sink involved in fishing is failing an action (especially a node search), which is fairly common early on. Increasing our success chance is the biggest time save we can make to improve our XP per hour.
Recommended:
The first thing you’re going to want to do is all the tutorial quests. These will give you the Tier 1 tools for skills as well as some XP to start off with.
You’re also going to want to make 25 Basic Runic Dust so that you can get the "Successful Fisher" affix on your Apprentice Tacklebox from the quest rewards. If you get a particularly bad roll you can make more dust and scrap to re-roll this once or twice but don’t obsess over getting a perfect roll.
Buy / Farm / Gather 100 or so bait of any type.
If possible you also want to try and get your crafting to at least level 5 first so that you are able to produce your own bait through either the Shrimp Tail Bait recipe or by Preparing fish into Filleted Fish and crafting worm bins. I cannot understate the importance of having bait, especially in the first 40 levels or so. It is the easiest source of fishing stats and by extension the easiest way to boost your success chance to save time.
Optional:
Augmenting your tacklebox to +4/+5 isn’t hard to do and gives a nice buff to your stats/chances/times.
You likely won’t have the enchanting level or materials to do so but putting Pungent Bait on the tacklebox will bump up the success chance too. Personally I’d save doing this for the second tacklebox.
Getting gloves / boots with Naturalist on them is a nice way to build up fibers early on by opening chests on the way to level 85 but can be a bit pricey for little pay off in the skill before 85.
Level 1 - 10
If you have no bait at this point the first thing you’ll want to do is get an initial buffer going (see bait section). If nothing else the bare minimum you want is the earthworm bait from the General Shop to reduce the chance of wasting time failing a search / gather.
The core loop you do at this stage is pretty simple since there's only one fishing zone. Fish in the Shallow Pond > turn shrimp into Shrimp Tail Bait > use shrimp bait to fish in the shallow pond. Shrimp bait also gives bonus rarity which improves your chances of finding better nodes such as the "oops! All shrimp!" node which helps feed into this loop.
You can also prepare caught Anchovies into Filleted Fish and make worm bins to farm for more bait. Anchovies can also be crafted into Fish Guts Bait but it's very expensive to turn 9 of them into 3 bait compared to a worm bin and requires a much higher crafting level.
If possible you want to try and always have at least 3/4 worm bins on your farm at this stage while you are fishing to make bait.
Recommended: Fish in Shallow pond Turn shrimp into shrimp tail bait Prepare anchovies and craft into worm bins
Optional: Save anchovies for quests that can accept them
Level 11 - 20
See level 1-10. The only thing you need to think about after reaching level 10 is whether you want to invest time / money into the next tier of tacklebox. If you do, try to augment it to at least the point where it has more stats than your previous one (typically +2/3). Augmenting to +5 would be best. Don’t forget to get the success chance affix.
Optional: Craft a Basic Tacklebox, affix with success chance, enchant with Pungent Bait at some point, augment to +5
Level 21 - 30
I found that even with a lower success chance moving up to the next zone immediately is more XP per hour. The only problem you run into at this stage is you no longer get shrimp or anchovies. If you level your cooking this isn't a huge problem and you can continue to make worm bins however the only other option that isn't the market is leveling crafting to make fish guts and doing so only gives 3 bait per craft which isn't great. If you don’t have a good surplus of bait / worm bins before switching zones you will run out. Staying in Shallow Pond for a few levels is still a decent option and is what I did at this stage
Recommended: Craft a Basic tacklebox, affix with success chance, enchant with pungent bait, augment to +5 Fish in Shallow Pond to build bait before moving to Lazy River
Optional: Equip a bag of holding to start stocking up on fibers for gear augments Augmenting this to +4 will give you a +1 to all fishing stats
Level 31 - 40
At this point you do want to move on to Lazy River if you haven’t already. The next tier of tacklebox is available and is of course an upgrade for faster fishing however I used the second tacklebox until level 50 with no issues. The Advanced Tacklebox comes with an additional enchant and affix slot. If you want to save dust you can randomly roll the second slot after getting the success chance affix again but I would recommend getting a + yield affix if you can so you can make more bait from more fish.
Even having a yield affix doesn’t guarantee extra resources though so a bag of holding at this point will help you out more.
There's only really one "bad" option for random rolling, the bonus rarity is the least impactful affix you can get at this stage but even that will still help you with getting better drops.
Optional: Equip a Advanced Tacklebox, affix with success chance if needed, augment to +5 and enchant with Pungent Bait if you still aren’t at 100% success chance otherwise take Reinforced Line for faster gather times. If you have a yield affix equip a Bag of Holding
Level 40 - 49
Same core loop as in 31 - 40, still stuck in Lazy River.
Optional: Equip a Pro Tacklebox, around this tier you probably no longer need the success chance affix after you augment it. If this is the case refer to the affix section Enchant with Reinforced Line if you only care for XP otherwise refer to the enchantments section.
Level 50
This is such a huge break-point for fishing that I made it an entire section. At level 50 you can start the fishing set quest. You should accept this as soon as you can and get started on the quest requirements (10,000 fishing actions) upon completion you receive 1000 fishing shards and if you have level 50 crafting you are now able to craft the fishing set. With the reward shards and time taken to reach this step you will easily have enough shards to make all 3 pieces and you should prioritize doing so. Just wearing it gives you +12% bait preservation and 3 levels of Pungent Bait and reinforced line. Also you receive a flat 15% stat bonus (before bait bonuses) which is nice but not as impactful as it is later in the skill. The main thing at this stage is the inherent enchants.
These enchants do not stack with the tacklebox so if you haven't made one with more than 3 slots yet bear in mind that enchanting it will achieve nothing unless you replace the same enchant on the fishing gear. You could at this stage replace the Reinforced Line piece enchant with oil spill or fiber finder if you keep putting Reinforced Line on your tacklebox but until level 90 or so it's honestly not worth the loss of fish per hour.
Farming 2 worm bins is enough to be roughly self sustaining with the fishing sets bait preservation
Recommended: Level crafting to 50 and equip this set as soon as possible
Level 51 - 65
At level 50 you unlock the lake, this zone is double the XP per action with a minimal time increase and you should move into it as soon as you can. At this point you should be working towards making an Advanced Tacklebox at minimum if you haven’t already.
The issue with this zone is that the only catchable fish are not currently usable in crafting bait without preparing them into worm bins. Without relying on the market the only option you have is to level your cooking high enough to prepare them (lv38 min) bait sustainability really starts to struggle the most in this zone but the increase in XP is so large that you want to fish here regardless for faster leveling to the level 65 zone.
Depending on your gear you may even be able to reach 100% chance at this stage without using bait at all, while obviously slower than fishing with bait if you are reaching 100% the lost time is not as significant as the XP hit from fishing in a lower zone with bait and you can power through to 65 to get tuna and sharks that you can craft into fish guts.
Recommended: Equip an Advanced Tacklebox, affix with success chance if needed, enchant with Pungent Bait / Reinforced Line if you don't have the fishing set yet, augment to +5
Optional: Equip a Supreme Tacklebox, affixing this is expensive even if you randomly roll. You shouldn't need the success chance affix at this tier. I would randomly roll it and hope for the best, maybe even try a few randoms before augmenting if you feel like it.
Level 65 - 85
Open Ocean is available. You're able to craft Fish Guts Bait again in this zone but it's a bad amount compared to worm bins. Luckily at this stage you start to have enough Bait Preservation that crafting it doesn’t result in a net loss.
If you somehow have high bonus rarity at this point or use Mysterious Bait you can get tentacle meat from this zone but it's not really a resource worth aiming for at this stage. It’s not a great source of crafting XP with the rate you get it at and you are still at a stats disadvantage fishing with tent bait at this stage.
I did this stage with a t3 Tacklebox with no real issues because I didn't want to spend time grinding elsewhere but I would recommend making the Pro Tacklebox.
Recommended: Equip a Pro Tacklebox, enchant with Reinforced Line, augment to +5.
Level 85 - 99
The Stormy Seas zone is now unlocked. Basically the same as open ocean with a 10XP per action gain, ancient kelp if you have enough rarity, and dangerous encounters as a time sink / bait source.
The times per action are the same as in Open Ocean but the node success chance is lower. A +3 Pro Tacklebox with +2 fishing equipment and Glowbug Bait was enough for me to reach 100% chance in this zone at lv89.
The issue with this zone you will run into is likely to be having a low bonus rarity, the delay penalties from encounters are not worthwhile without having the rarity needed to gather Ancient Kelp. This is due to kelp being needed to augment the fishing gear you should be wearing and giving +1 to all stats.
To solve this you will either need to improve your gear or use higher tiers of bait. Saving mysterious bait for this stage is a good way to gather the initial kelp you need to start improving your fishing set.
Because it's a dangerous location you have an x% chance (shown in the fishing area info panel) of triggering Dangerous Encounters. This results in delays of up to 30s depending on your equipment. You don’t currently need to have high combat stats to be able to fish here but it is helpful to have the fishing set before fishing in Stormy Seas as well as having a Camo Cloak to reduce the likelihood of them occurring and the delay time itself. As the encounters drop bait you may even want to consider a Flamboyant Cape to increase the amount you run into however I wouldn’t recommend this.
This zone is one of the most important to have a Bag of Holding for especially if you have low rarity so you can maximize the amount of kelp you receive.
Recommended: Get a Camo Cloak. Use myst bait where possible to gather the ancient kelp needed for +5 set (1650 total). Augment your fishing gear every time you have enough to do so up to +5. Aim for a Supreme Tacklebox.
Level 99+
Congrats! You have now maxed fishing!
At this point a lot of people vow never to touch the skill again but if for some reason you want to continue then spend this time saving up fishing shards to make the Ocean's Embrace.
After this, it's basically up to you. Check out other sections on this page such as the specializing or talents sections.
It wasn’t really relevant for most of the guide, but if you are going to main fishing you will want to get some Naturalist boots or gloves to start getting the ancient chests. These when opened have around a 10% chance to give you a component for the OE which are needed to craft base versions you will need if you augment it past +5.
Around here, with the full set bonus, you may start benefiting from tentacle bait. Equip it and see what happens to your stats.
Happy Fishing!
Frequently Asked Questions
- I have enough Bonus Rarity for an item but it's not dropping?
Annoyingly its not as simple as just reaching the minimum. The short version is you need to just have your rarity stat as high as you can over the minimum to make the drops more common. For information to do this see the Bonus Rarity section above
- What combat stats / gear do I need to fish in stormy seas?
Surprisingly none, having gear and stats will reduce the length of the penalty though. Check out the Dangerous Encounters page for more info.
Miscellaneous Tips
- Fishing in Stormy Seas and constantly crafting tentacle bait is a great source of crafting XP.
- Doing runecrafting with the fibers you fish has a chance to give ancient cloth fragments, key pieces for the fishing dungeon. Completing the dungeon is the only other source of shards.
- Fishing yield affixes can allow you to get 2 fish per gather action but this is not guaranteed. This stacks with the Fishy Fortune enchant for up to 4 fish if you're lucky.
- Worm bins are an excellent source of crafting XP and preparing your fish to make them is also a good source of cooking XP.
- Crafting components for the Ocean's Embrace out of fishing shards is very expensive compared to using the shards to augment the gear itself. Try to get needed pieces from Ancient Treasures instead.