Difference between revisions of "Combat"
(changed enchantment section to a chart) |
LilMissMDK (talk | contribs) (→Healing: rephrasing and mentioning Set Bonus, resurrection, global buffs, moved the enchanting gear before the sentence discussing abilites) |
||
| (109 intermediate revisions by 34 users not shown) | |||
| Line 1: | Line 1: | ||
| − | [[File:Combat UI. | + | [[File:Combat UI (2025-04-20).png|480px|thumb|right|Combat UI]] |
| − | |||
| − | + | '''Combat''' is a game-play mechanic in which you fight enemies located within increasingly more difficult zones. A beginner's guide on combat can be found on the wiki page [[Combat Guide]] (outdated). | |
| − | == | + | = Skills = |
| − | There are | + | |
| + | There are six skills to level in combat: '''Constitution''', '''Attack''', '''Strength''', '''Defense''', '''Magic''' and '''Range'''. | ||
| + | |||
| + | == {{Img|Constitution|35|word=1|nolink=1}} == | ||
| + | |||
| + | '''Constitution''' is the skill that determines your maximum hit points. At level 1 you have a maximum of 30 hit points. | ||
| + | |||
| + | You gain Constitution experience when an enemy damages them. How much experience you receive is determined with the following formula: | ||
| + | |||
| + | <math>\max(1, \lfloor \frac{{\text{damage}}}{50} + \frac{{\text{mitigated}}}{25} \rfloor)</math> | ||
| + | |||
| + | == {{Img|Attack|35|word=1|nolink=1}} == | ||
| + | |||
| + | '''Attack''' determines your accuracy and your overall effectiveness when dealing damage. Attack experience is gained by dealing any form of damage. | ||
| + | |||
| + | == {{Img|Defense|35|word=1|nolink=1}} == | ||
| + | |||
| + | '''Defense''' determines your defenses and your overall effectiveness at mitigating and dodging damage. Defense experience is gained by mitigating damage from enemies. How much experience is gained is determined with the following forumula: | ||
| + | |||
| + | <math>\max(1, \lfloor \frac{{\text{damage}}}{25} + \frac{{\text{mitigated}}}{10} \rfloor)</math> | ||
| + | |||
| + | If you dodge an attack, the enemy's attack level is used as mitigated damage, with damage dealt as 0. | ||
| + | |||
| + | == {{Img|Strength|35|word=1|nolink=1}} == | ||
| + | |||
| + | '''Strength''' determines your effectiveness when using melee skills. Strength experience is obtained when dealing damage with the associated skills. | ||
| + | |||
| + | == {{Img|Magic|35|word=1|nolink=1}} == | ||
| + | |||
| + | '''Magic''' determines your effectiveness when using magic skills. Magic experience is obtained when dealing damage with the associated skills. | ||
| + | |||
| + | == {{Img|Range|35|word=1|nolink=1}} == | ||
| + | |||
| + | '''Range''' determines your effectiveness when using range skills. Ranged experience is obtained when dealing damage with the associated skills. | ||
| + | |||
| + | = Equipment Statistics = | ||
| + | |||
| + | [[File:Equipment UI.png|480px|thumb|right|Equipment UI]] | ||
| + | |||
| + | Not only do your skills determine how effective you are in combat, your equipment does too. In order to make effective loadouts, you need to know how your equipment's statistics work. | ||
| + | |||
| + | == Offensive Statistics == | ||
| + | |||
| + | === Strength === | ||
| + | |||
| + | ('''''STR''''') Your melee offense stat. This directly translates to your melee damage output. | ||
| + | |||
| + | === Dexterity === | ||
| + | |||
| + | ('''''DEX''''') Your ranged offense stat. This directly translates to your ranged damage output. | ||
| + | |||
| + | === Intelligence === | ||
| + | |||
| + | ('''''INT''''') Your magic offense stat. This directly translates to your magic damage output. | ||
| + | |||
| + | === Critical Hit Chance === | ||
| + | |||
| + | ('''''Crit Chance''''') This is the chance that your attack hits critically every time you land a hit on your enemy. | ||
| + | |||
| + | === Critical Hit Multiplier === | ||
| + | |||
| + | ('''''Crit Mult''''') This is the value that your damage will be increased by if you land a critical hit on your enemy. | ||
| + | |||
| + | Example: Having a Crit Chance of 30% and a Crit Mult of 50% means that your maximum damage is increased 30% of the time by 50%. | ||
| + | |||
| + | === Accuracy === | ||
| + | |||
| + | ('''''ACC''''') Your accuracy is what decides your hit chance against the enemy. There are several different types of accuracy, where the types of abilities you use will be affected by those. | ||
| + | |||
| + | Example: Using the ability '[[Fire Ball]]' will make use of Magic Accuracy and Fire Accuracy. | ||
| + | |||
| + | == Defensive Statistics == | ||
| + | |||
| + | === Protection === | ||
| + | |||
| + | ('''''PROTECTION''''') This is your physical damage reduction. Any melee or ranged damage that an enemy hits you with will be reduced using this value. | ||
| + | |||
| + | === Resistance === | ||
| + | |||
| + | ('''''RESISTANCE''''') This is your magic damage reduction. Any magic damage that an enemy hits you with will be reduced using this value. | ||
| + | |||
| + | === Agility === | ||
| + | |||
| + | ('''''AGILITY''''') This value is used to calculate your dodge chance. The higher this value is, the less likely it is that an enemy will be able to hit you. | ||
| + | |||
| + | === Stamina === | ||
| + | |||
| + | ('''''STAMINA''''') This value determines a bonus to your maximum hit points. | ||
| + | |||
| + | == Affinities == | ||
| + | |||
| + | There are four combat styles you can choose from: | ||
| + | |||
| + | * '''Melee:''' Make use of melee weapons, such as scimitars and daggers. | ||
| + | * '''Magic:''' Make use of magic weapons, such as staffs and wands. | ||
| + | * '''Ranged:''' Makes use of ranged weapons, such as longbows and crossbows. | ||
| + | * '''Hybrid:''' Make use of two or more of the above skills with weapons that provide hybrid statistics, such as [[Shapeless Scythe]], providing both STR and INT. | ||
| + | |||
| + | Affinities are used in calculating your effectiveness for each subclass of combat, both for offense and defense. Affinities are added together from item to item. | ||
| + | |||
| + | For example, an [[Ancient Fire Amulet]] provides +15% Fire affinity, which would be added with the +35% fire affinity given by the [[Mantle of Flame]] to give a total fire affinity of +50%. | ||
| + | |||
| + | There are twelve affinities: | ||
| + | |||
| + | * [[File:Melee splash.png|20px]] Melee | ||
| + | * [[File:Magic splash.png|20px]] Magic | ||
| + | * [[File:Range splash.png|20px]] Range | ||
| + | * [[File:Stab splash.png|20px]] Piercing | ||
| + | * [[File:Crush splash.png|20px]] Blunt | ||
| + | * [[File:Slash splash.png|20px]] Slashing | ||
| + | * [[File:Fire_splash.png|20px]] Fire | ||
| + | * [[File:Ice_splash.png|20px]] Ice | ||
| + | * [[File:Nature_splash.png|20px]] Nature | ||
| + | * [[File:Chaos_splash.png|20px]] Chaos | ||
| + | * [[File:Poison_splash.png|20px]] Poison | ||
| + | * [[File:Lightning_splash.png|20px]] Lightning | ||
| + | |||
| + | == Enchantments == | ||
| + | |||
| + | There are various [[Enchanting|enchantments]] available to customize your [[equipment]] in a way that helps you in combat. Here's a list of enchantments you might find useful. | ||
| + | |||
| + | {{Enchantments|Combat}} | ||
| + | |||
| + | = Abilities = | ||
| + | |||
| + | You can use abilities to attack, defend, heal, or cause other effects in battle. | ||
| + | |||
| + | When on the combat screen before entering combat, there is a box filled with abilities that you can choose to use. You must have an auto-style ability that has no cooldown. You can then add other abilities. | ||
| + | |||
| + | These abilities can be item-specific or they can be universal abilities. Item specific abilities come with items you may have equipped. For example, epuipping [[Defender's Pendant]] gives the [[Bulwark (Ability)|Bulwark]] ability. | ||
| + | |||
| + | Universal abilities are abilities you can always use, no matter what. You can learn universal abilities by obtaining and consuming [[Ability Books]], which drop in dungeons. For example, obtaining and consuming the [[Invisibility]] ability book, will make this ability always available. | ||
| + | |||
| + | The maximum number of abilities you can have in your ability rotation can be increased by increasing your total number of combat levels. | ||
| + | |||
| + | == Ability Rotation == | ||
| + | |||
| + | Despite the name you will not actually rotate through the chosen abilities in order. Instead it is treated as a priority list. The first ability that's not on cooldown will be used. The rotation allows you to heavily customize your combat experience, with millions of different ability loadouts you can create. | ||
| + | |||
| + | = Healing and Death = | ||
| + | |||
| + | [[File:Combat food inventory nearly full.png|frame|Combat Food UI]] | ||
| + | |||
| + | == Healing == | ||
| + | |||
| + | While in combat, being hit and receiving damage from enemies is inevitable. Health is recovered by the following: | ||
| + | |||
| + | * Eating food is a common and immediate way to heal. Although many raw and prepared ingredients are edible, it is preferable to consume [[Cooking#All Recipes Table|cooked dishes]] for their higher hit point recovery. | ||
| + | |||
| + | * Food can be stored in a special '''Combat Food''' inventory found under the '''Equipment''' tab. With a maximum of 28 slots, each slot holds one food item (not a stack of food items). If using the AutoEat function during battle, food is eaten in order from top left to bottom right. | ||
| + | |||
| + | * Another strategy is to engage in battle during periods of global buffs (purchased in the [[Shrine of Toucan]]) conducive to healing such as [[Messy Eater]] which increases the amount of health received by food by 3%. | ||
| + | |||
| + | * Enchanting gear with [[Healing]], [[Overhealing]], or [[Soul Stealing]] also promotes healing. | ||
| + | |||
| + | * Certain abilities allow self healing such as the [[Forest's Embrace]] found on the [[Sylvan Staff]]. By wearing the associated pieces of armor (ie. those with Forest's Embrace) as a set, this activates the set bonus for improved buff amounts. | ||
| + | |||
| + | * Having a team member with the [[Bandage Friendly]] or resurrection abilities active during battle will also heals you and other allies present. | ||
| + | |||
| + | When you finish or leave a zone, elite challenge or dungeon, your health is fully restored. | ||
| + | |||
| + | == Death == | ||
| + | |||
| + | Should your remaining hit points reach 0, death occurs and a respawn timer starts. Then you cannot continue to battle before this timer runs out. During solo combat in a normal (non-dungeon and non-elite challenge) zone, this means the difficulty of the area you're in will be reset to 0 or the minimum starting difficulty set before entering the zone. | ||
| + | |||
| + | If you are in a dungeon or elite challenge, hopefully the remaining party members can continue towards the final confrontation, otherwise the dungeon run ends uncompleted and no dungeon victory loot is awarded. | ||
| + | |||
| + | = Locations = | ||
| + | |||
| + | You can fight enemies in combat zones, dungeons, or during elite challenges. | ||
| + | |||
| + | == Difficulty == | ||
| + | |||
| + | Each combat area has a difficulty that you can set, the default is 0 for every area. | ||
| + | |||
| + | A more difficult area means a greater challenge to stay alive, but also an increased chance to receive more and better loot. You can increase this by setting the difficulty before you enter the combat zone, or by [[augmenting]] your [[Dungeon Key|dungeon key]] or [[Elite Scroll|elite challenge scrolls]]. | ||
| + | |||
| + | == Zones == | ||
| + | |||
| + | Zones are areas that provide you with an endless stream of enemies which you will fight in waves. Every 50 waves, the difficulty of the area you're in goes up by 1. At the same time, the loadout associated to that area is reloaded, which means that if you have food in your loadout, your Combat Food inventory will be refilled when the difficulty goes up. | ||
| − | |||
{| class="wikitable" | {| class="wikitable" | ||
| − | !Zone | + | ! Zone |
| − | !Lowest | + | ! Lowest Recommended<br>Combat Levels |
| − | + | ! Recommended<br>Combat Style | |
| − | + | |- | |
| − | + | | [[Farm]] | |
| − | + | | style="text-align:center" | 1–5 | |
| − | + | | Any Skill | |
| + | |- | ||
| + | | [[Caves]] | ||
| + | | style="text-align:center" | 5–10 | ||
| + | | Any Skill | ||
| + | |- | ||
| + | | [[City]] | ||
| + | | style="text-align:center" | 10–20 | ||
| + | | Magic | ||
| + | |- | ||
| + | | [[Fallen Academy]] | ||
| + | | style="text-align:center" | 25–50 | ||
| + | | Range or Melee | ||
|- | |- | ||
| − | |[[ | + | | [[Lava Maze]] |
| − | | | + | | style="text-align:center" | 20–40 |
| − | | | + | | Range |
|- | |- | ||
| − | |[[ | + | | [[Corrupted Lands]] |
| − | | | + | | style="text-align:center" | 40–60 |
| − | | | + | | Melee |
|- | |- | ||
| − | |[[ | + | | [[Valley of Giants]] |
| − | | | + | | style="text-align:center" | 60–90 |
| − | | | + | | Melee |
|- | |- | ||
| − | |[[ | + | | [[Overgrown Woods]] (Duo Zone) |
| − | | | + | | style="text-align:center" | 25–50 |
| − | | | + | | Range |
|- | |- | ||
| − | |[[ | + | | [[Enchanted Armory]] (Duo Zone) |
| − | | | + | | style="text-align:center" | 40–70 |
| − | | | + | | Magic |
|- | |- | ||
| − | |[[ | + | | [[Elven Encampment]] (Duo Zone) |
| − | | | + | | style="text-align:center" | 50–75 |
| − | | | + | | Range |
|- | |- | ||
| − | |[[ | + | | [[Chaos Wastes]] (Duo Zone) |
| − | | | + | | style="text-align:center" | 90+ |
| − | | | + | | Magic |
|} | |} | ||
| − | == | + | == Dungeons == |
| + | |||
| + | Dungeons are instances in which a group of players can band together to defeat the monsters within. After battling waves of enemies, a final boss awaits with the promise of treasure and accolades. | ||
| + | |||
| + | To enter a dungeon, a key is required. These keys can be [[Crafting|crafted]] and upgraded through [[Augmenting|augmentation]] which will make the dungeon more challenging and the riches more enticing. | ||
| + | |||
{| class="wikitable" | {| class="wikitable" | ||
| − | ! | + | ! Dungeon |
| − | ! | + | ! Key |
| − | ! | + | ! Lowest Recommended<br>Combat Levels |
| − | + | ! Recommended<br>Combat Style | |
| − | + | ! Max Group Size | |
| − | |||
| − | |||
| − | |||
| − | |||
| − | |||
| − | |||
| − | |||
| − | |||
| − | |||
| − | |||
|- | |- | ||
| − | |[[ | + | | [[Goblin Settlement]] |
| − | |30 | + | | {{img|Torn Goblin Settlement Map|35|35|word=1}} |
| + | | style="text-align:center" | 30+ | ||
| + | | Any Style | ||
| + | | style="text-align:center" | 3 | ||
|- | |- | ||
| − | |[[ | + | | [[Dark Fortress]] |
| − | | | + | | {{img|Dark Fortress Key|35|35|word=1}} |
| + | | style="text-align:center" | 50+ | ||
| + | | Any Style | ||
| + | | style="text-align:center" | 3 | ||
|- | |- | ||
| − | |[[ | + | | [[Ancient Barrows]] |
| − | | | + | | {{img|Cursed Spade|35|35|word=1}} |
| + | | style="text-align:center" | 50+ | ||
| + | | Melee/Ranged | ||
| + | | style="text-align:center" | 2 | ||
|- | |- | ||
| − | | | + | | [[Overgrown Castle]] |
| − | | | + | | {{img|Castle Map|35|35|word=1}} |
| − | | | + | | style="text-align:center" | 50+ |
| + | | Any Style | ||
| + | | style="text-align:center" | 4 | ||
|- | |- | ||
| − | |[[ | + | | [[Palace of Flame]] |
| − | | | + | | {{img|Burning Feather|35|35|word=1}} |
| + | | style="text-align:center" | 60+ | ||
| + | | Range/Magic | ||
| + | | style="text-align:center" | 2 | ||
|- | |- | ||
| − | |[[ | + | | [[Giant's Keep]] |
| − | | | + | | {{img|Giant's Keep Key|35|35|word=1}} |
| + | | style="text-align:center" | 75+ | ||
| + | | Any Style | ||
| + | | style="text-align:center" | 5 | ||
|- | |- | ||
| − | | | + | | [[Eye of the Storm]] |
| − | | | + | | {{img|Ancient Pyramid|35|35|word=1}} |
| − | | | + | | style="text-align:center" | 75+ |
| + | | Range | ||
| + | | style="text-align:center" | 5 | ||
|- | |- | ||
| − | |[[ | + | | [[Elder Ruins]] |
| − | | | + | | {{img|Elder Lockstone|35|35|word=1}} |
| + | | style="text-align:center" | 75+ | ||
| + | | Range | ||
| + | | style="text-align:center" | 5 | ||
|- | |- | ||
| − | | | + | | [[The Maelstrom]] |
| − | | | + | | {{img|Ancient Maelstrom Orb|35|35|word=1}} |
| − | | | + | | style="text-align:center" | 90+ |
| + | | Any Style | ||
| + | | style="text-align:center" | 5 | ||
|- | |- | ||
| − | |[[ | + | | [[RISE OF INFO]] |
| − | | | + | | {{img|RISE OF INFO|35|35|word=1}} |
| + | | style="text-align:center" | 99+ | ||
| + | | Any Style | ||
| + | | style="text-align:center" | 50 | ||
|- | |- | ||
| − | | | + | | [[Dwarven Research Station]] |
| − | | | + | | {{img|Dwarven Research Key|35|35|word=1}} |
| − | | | + | | style="text-align:center" | Master/Legendary Gathering Gear |
| + | | Master Miner | ||
| + | | style="text-align:center" | 1 | ||
|- | |- | ||
| − | |[[ | + | | [[Nature Atheneum]] |
| − | | | + | | {{img|Heart of the Oak|35|35|word=1}} |
| + | | style="text-align:center" | Master/Legendary Gathering Gear | ||
| + | | Master Forager | ||
| + | | style="text-align:center" | 1 | ||
|- | |- | ||
| − | |[[ | + | | [[Abandoned Academy Base]] |
| − | | | + | | {{img|Abandoned Academy Scroll|35|35|word=1}} |
| + | | style="text-align:center" | Master/Legendary Gathering Gear | ||
| + | | Master Fisherman | ||
| + | | style="text-align:center" | 1 | ||
|- | |- | ||
| + | | [[Master Chicken's Kitchen]] | ||
| + | | {{img|Prismatic Pudding|35|35|word=1}} | ||
| + | | style="text-align:center" | Master/Legendary Gathering Gear | ||
| + | | Master Chef | ||
| + | | style="text-align:center" | 1 | ||
|} | |} | ||
| − | + | == Elite Challenges == | |
| − | + | Elite challenges are challenging instanced experiences in regular combat zones. | |
| − | + | To enter such a challenge you need an [[Elite Scroll]]. These scrolls drop during combat in regular zones and can be found in [[chests]]. | |
| − | |||
| − | + | Augmenting scrolls will increase the challenge and the amount of loot gained from it. Completing a challenge with an augmented scroll will also give you a permanent [[Treasure Hunter]] buff for that zone. | |
| − | + | (TH means the Treasure Hunter buff) | |
| − | + | {| class="wikitable sortable" | |
| − | + | ! Scroll | |
| − | + | ! Source | |
| − | + | ! Recommended Level/Style (Scroll+0) | |
| − | = | + | ! Encounter During Challenge |
| − | + | ! Permanent TH Gained In<br>(Completed scroll level +1 or higher) | |
| − | + | |- | |
| − | + | | {{img|Cluster-Cluck|45|word=1}} | |
| − | + | | [[Chicken]] in [[Farm]] | |
| − | + | | 75+, Any | |
| − | + | | [[Ot_to's Prized Hen]] | |
| − | + | | [[Farm]] | |
| − | + | |- | |
| − | <br | + | | {{img|Stew Stained Page|45|word=1}} |
| − | + | | [[Goblin]] in [[Farm]], [[Caves]], or [[Goblin Settlement]] | |
| − | + | | 75+, Any | |
| − | + | | [[Big Gobbo]] | |
| − | = | + | | [[Caves]] |
| − | + | |- | |
| − | + | | {{img|Black Knight's Trial|45|word=1}} | |
| − | = | + | | [[Black Knight]] in the [[City]] |
| − | + | | 75+, Magic | |
| − | + | | Elite Black Knight | |
| − | + | | [[City]] | |
| − | + | |- | |
| − | + | | {{img|Taproot Scroll|45|word=1}} | |
| − | + | | [[Spriggan]] in [[Living Forest]] or [[Nature Atheneum]] | |
| − | + | | 75+, Range/Magic | |
| − | + | | [[Elder Spriggan]] | |
| − | + | | [[Sacred Grove]] | |
| − | + | |- | |
| − | + | | {{img|Demonic Trial|45|word=1}} | |
| − | + | | [[Greater Imp]]/[[Lesser Demon]]/[[Greater Demon]] in<br>[[Caves]]/[[Lava Maze]]/[[Deep Pit]] | |
| − | + | | 75+, Range | |
| − | + | | Elite Lesser/Greater Demon | |
| − | + | | [[Lava Maze]] | |
| − | |||
| − | |||
| − | {| | ||
| − | |+ | ||
| − | |||
| − | |||
| − | |||
|- | |- | ||
| − | | | + | | {{img|Stormy Sea Scroll|45|word=1}} |
| − | | | + | | [[Sunken Treasure]]/[[Ancient Treasure]], Combat in [[Stormier Seas]] |
| − | | | + | | 75+, Any |
| + | | Elite Swordfish | ||
| + | | [[Stormier Seas]] | ||
|- | |- | ||
| − | | | + | | {{img|Corroded Scroll|45|word=1}} |
| − | | | + | | [[Infected Naga]]/[[Bone Giant]] in [[Corrupted Lands]] |
| − | | | + | | 75+, Melee |
| + | | Elite Infected Naga/Bone Giant | ||
| + | | [[Corrupted Lands]] | ||
|- | |- | ||
| − | | | + | | {{img|Giant Scroll|45|word=1}} |
| − | | | + | | Giants in [[Valley of Giants]] |
| − | | | + | | 75+, Melee |
| + | | Elite Giant <br>''33% chance between Fire/Ice/Moss'' | ||
| + | | [[Valley of Giants]] | ||
|- | |- | ||
| − | | | + | | {{img|Shapeless Scroll|45|word=1}} |
| − | | | + | | [[Chaos Giant]]s and [[Chaotic Abomination]]s in [[Chaos Wastes]] |
| − | | | + | | 90+, Magic |
| + | | Elite Chaos Giant | ||
| + | | [[Chaos Wastes]] | ||
|- | |- | ||
| − | | | + | | {{img|Enchanted Armory Scroll|45|word=1}} |
| − | | | + | | Glass Knights, Rangers and Mages in the [[Enchanted Armory]] |
| − | | | + | | 75+, Any |
| + | | {{?}} | ||
| + | | [[Enchanted Armory]] | ||
|- | |- | ||
| − | | | + | | {{img|Fallen Academy Scroll|45|word=1}} |
| − | | | + | | Corpse Eaters and Dark Mages in the [[Fallen Academy]] |
| − | | | + | | 75+, Melee/Range |
| + | | {{?}} | ||
| + | | [[Fallen Academy]] | ||
|- | |- | ||
| − | | | + | | {{img|Overgrown Woods Scroll|45|word=1}} |
| − | | | + | | Wild Boars and Wolves in the [[Overgrown Woods]] |
| − | | | + | | 75+, Melee |
| + | | {{?}} | ||
| + | | [[Overgrown Woods]] | ||
|- | |- | ||
| − | | | + | | {{img|Elven Encampment Scroll|45|word=1}} |
| − | | | + | | Elven Knights, Warriors, Mages and Rangers in the [[Elven Encampment]] |
| − | | | + | | 75+, Any |
| + | | {{?}} | ||
| + | | [[Elven Encampment]] | ||
|} | |} | ||
| − | + | --- | |
| − | + | {{Navbar Skills}} | |
| − | |||
| − | |||
| − | |||
| − | |||
| − | |||
| − | |||
| − | |||
| − | |||
| − | |||
| − | |||
| − | |||
| − | |||
| − | |||
| − | |||
| − | |||
Latest revision as of 20:39, 23 April 2025
Combat is a game-play mechanic in which you fight enemies located within increasingly more difficult zones. A beginner's guide on combat can be found on the wiki page Combat Guide (outdated).
Skills
There are six skills to level in combat: Constitution, Attack, Strength, Defense, Magic and Range.
 Constitution
Constitution is the skill that determines your maximum hit points. At level 1 you have a maximum of 30 hit points.
You gain Constitution experience when an enemy damages them. How much experience you receive is determined with the following formula:
 Attack
Attack determines your accuracy and your overall effectiveness when dealing damage. Attack experience is gained by dealing any form of damage.
 Defense
Defense determines your defenses and your overall effectiveness at mitigating and dodging damage. Defense experience is gained by mitigating damage from enemies. How much experience is gained is determined with the following forumula:
If you dodge an attack, the enemy's attack level is used as mitigated damage, with damage dealt as 0.
 Strength
Strength determines your effectiveness when using melee skills. Strength experience is obtained when dealing damage with the associated skills.
 Magic
Magic
Magic determines your effectiveness when using magic skills. Magic experience is obtained when dealing damage with the associated skills.
 Range
Range
Range determines your effectiveness when using range skills. Ranged experience is obtained when dealing damage with the associated skills.
Equipment Statistics
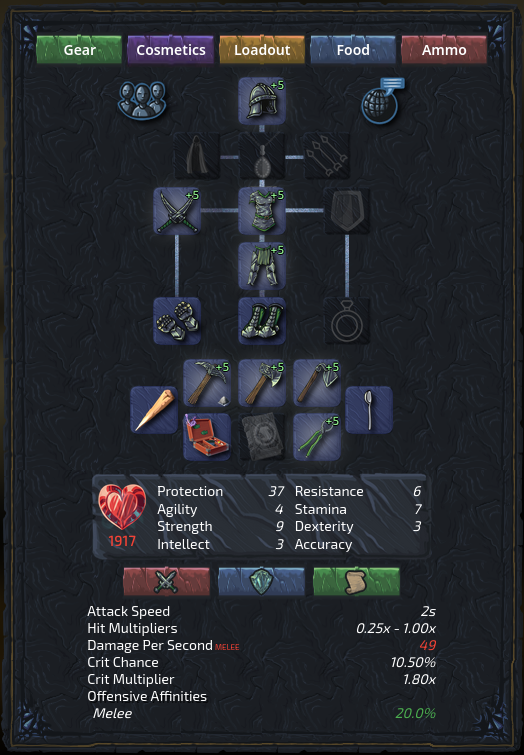
Not only do your skills determine how effective you are in combat, your equipment does too. In order to make effective loadouts, you need to know how your equipment's statistics work.
Offensive Statistics
Strength
(STR) Your melee offense stat. This directly translates to your melee damage output.
Dexterity
(DEX) Your ranged offense stat. This directly translates to your ranged damage output.
Intelligence
(INT) Your magic offense stat. This directly translates to your magic damage output.
Critical Hit Chance
(Crit Chance) This is the chance that your attack hits critically every time you land a hit on your enemy.
Critical Hit Multiplier
(Crit Mult) This is the value that your damage will be increased by if you land a critical hit on your enemy.
Example: Having a Crit Chance of 30% and a Crit Mult of 50% means that your maximum damage is increased 30% of the time by 50%.
Accuracy
(ACC) Your accuracy is what decides your hit chance against the enemy. There are several different types of accuracy, where the types of abilities you use will be affected by those.
Example: Using the ability 'Fire Ball' will make use of Magic Accuracy and Fire Accuracy.
Defensive Statistics
Protection
(PROTECTION) This is your physical damage reduction. Any melee or ranged damage that an enemy hits you with will be reduced using this value.
Resistance
(RESISTANCE) This is your magic damage reduction. Any magic damage that an enemy hits you with will be reduced using this value.
Agility
(AGILITY) This value is used to calculate your dodge chance. The higher this value is, the less likely it is that an enemy will be able to hit you.
Stamina
(STAMINA) This value determines a bonus to your maximum hit points.
Affinities
There are four combat styles you can choose from:
- Melee: Make use of melee weapons, such as scimitars and daggers.
- Magic: Make use of magic weapons, such as staffs and wands.
- Ranged: Makes use of ranged weapons, such as longbows and crossbows.
- Hybrid: Make use of two or more of the above skills with weapons that provide hybrid statistics, such as Shapeless Scythe, providing both STR and INT.
Affinities are used in calculating your effectiveness for each subclass of combat, both for offense and defense. Affinities are added together from item to item.
For example, an Ancient Fire Amulet provides +15% Fire affinity, which would be added with the +35% fire affinity given by the Mantle of Flame to give a total fire affinity of +50%.
There are twelve affinities:
Enchantments
There are various enchantments available to customize your equipment in a way that helps you in combat. Here's a list of enchantments you might find useful.
 Scroll Scroll |
Slot | Level | Silver Amount | Rune Amount | Runes | CollapseEffect per scroll |
|---|---|---|---|---|---|---|
 Scroll of Weakening Scroll of Weakening |
Helm, Body, Legs, Shield, Weapon | 4 | 100 | 20 | Air, Fire, Mind | Decreases the level requirements of the item by 1. |
 Scroll of Healing Scroll of Healing |
Shield, Combat-Amulet | 10 | 200 | 30 | Blood, Nature, Cosmic | Passive heal per tick increased by 20%. Increases health received from consumables by 10%. |
 Scroll of Fortitude Scroll of Fortitude |
Shield, Combat-Amulet | 68 | 800 | 70 | Blood, Chaos, Nature | Increases stamina by 10. |
 Scroll of Force Scroll of Force |
Shield | 79 | 900 | 80 | Blood, Death, Chaos | Gain 1% of your protection as strength. |
 Scroll of Overhealing Scroll of Overhealing |
Weapon | 11 | 200 | 30 | Air, Water, Death | Heal for 1% of overkill damage on a target. |
 Scroll of Accuracy Scroll of Accuracy |
Weapon | 28 | 400 | 40 | Blood, Death, Mind | Increases accuracy for all three combat styles by 3% multiplicatively. |
 Scroll of Critical Strike Scroll of Critical Strike |
Weapon | 52 | 600 | 60 | Blood, Death, Chaos, Cosmic | Increases critical chance and damage multiplier by 2.5%. |
 Scroll of Endless Ammo Scroll of Endless Ammo |
Cape, Weapon | 29 | 400 | 40 | Chaos, Nature, Mind | Gain a 17% chance to not consume ammo (resulting in 20% more uses from each ammo piece on average). Works on ranged projectiles, melee whetstones, and magic charms. |
 Scroll of Rune Reserves Scroll of Rune Reserves |
Cape, Weapon | 35 | 500 | 50 | Water, Chaos, Mind | Gain a 33% chance to not consume runes when using abilities (resulting in 50% more ability uses for the same rune cost). |
 Scroll of Reinforcement Scroll of Reinforcement |
Helm, Body, Legs | 13 | 200 | 30 | Death, Chaos, Mind | Increases agility by 12. |
 Scroll of Protection Scroll of Protection |
Helm, Body, Legs | 31 | 400 | 40 | Air, Earth, Cosmic | Increases protection by 10. |
 Scroll of Resistance Scroll of Resistance |
Helm, Body, Legs | 32 | 400 | 40 | Air, Fire, Cosmic | Increases resistance by 10. |
 Scroll of Recklessness Scroll of Recklessness |
Helm, Body, Legs | 80 | 1000 | 80 | Blood, Death, Chaos | Additively increases offensive magic, range, and melee affinity by 2.0% but reduces the respective defensive affinities by the same amount. |
 Scroll of False Equilibrium Scroll of False Equilibrium |
Helm, Body, Legs | 81 | 1000 | 80 | Blood, Death, Chaos | Increases maximum damage and decreases minimum damage by 1.5%. |
 Scroll of Patience Scroll of Patience |
Body, Legs | 82 | 1000 | 80 | Air, Water, Death | Slower abilities and attacks receive a maximum damage bonus scaling on attack speed. Scales off of ability speed, capping at 50% increase or decrease. |
 Scroll of the Treasure Hunter Scroll of the Treasure Hunter |
Gloves, Boots | 85 | 1200 | 100 | Chaos, Nature, Cosmic | Increases your chance of finding items from slain enemies by 3%. |
 Scroll of Prolonging Scroll of Prolonging |
Gloves, Boots | 58 | 700 | 60 | Nature, Mind | Gain a 20% chance to not consume a buff stack (resulting in 25% more uses from a buff on average). |
 Scroll of Enlightenment Scroll of Enlightenment |
Gloves, Boots | 73 | 900 | 70 | Air, Water, Chaos, Mind | Gain 1 more essence per action where essence is acquired. |
Abilities
You can use abilities to attack, defend, heal, or cause other effects in battle.
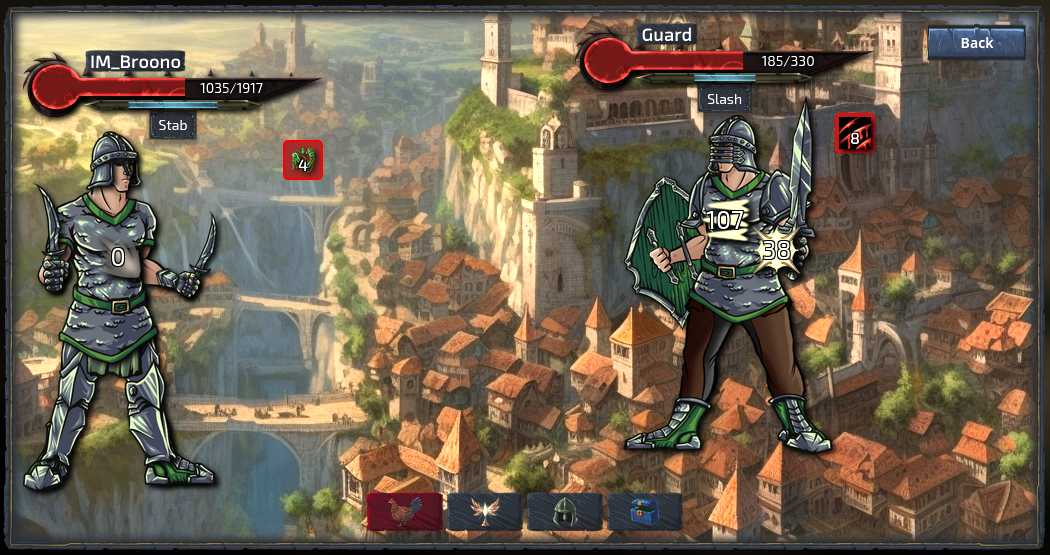
When on the combat screen before entering combat, there is a box filled with abilities that you can choose to use. You must have an auto-style ability that has no cooldown. You can then add other abilities.
These abilities can be item-specific or they can be universal abilities. Item specific abilities come with items you may have equipped. For example, epuipping Defender's Pendant gives the Bulwark ability.
Universal abilities are abilities you can always use, no matter what. You can learn universal abilities by obtaining and consuming Ability Books, which drop in dungeons. For example, obtaining and consuming the Invisibility ability book, will make this ability always available.
The maximum number of abilities you can have in your ability rotation can be increased by increasing your total number of combat levels.
Ability Rotation
Despite the name you will not actually rotate through the chosen abilities in order. Instead it is treated as a priority list. The first ability that's not on cooldown will be used. The rotation allows you to heavily customize your combat experience, with millions of different ability loadouts you can create.
Healing and Death
Healing
While in combat, being hit and receiving damage from enemies is inevitable. Health is recovered by the following:
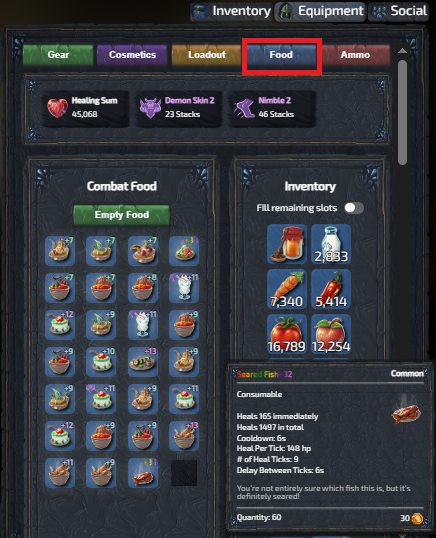
- Eating food is a common and immediate way to heal. Although many raw and prepared ingredients are edible, it is preferable to consume cooked dishes for their higher hit point recovery.
- Food can be stored in a special Combat Food inventory found under the Equipment tab. With a maximum of 28 slots, each slot holds one food item (not a stack of food items). If using the AutoEat function during battle, food is eaten in order from top left to bottom right.
- Another strategy is to engage in battle during periods of global buffs (purchased in the Shrine of Toucan) conducive to healing such as Messy Eater which increases the amount of health received by food by 3%.
- Enchanting gear with Healing, Overhealing, or Soul Stealing also promotes healing.
- Certain abilities allow self healing such as the Forest's Embrace found on the Sylvan Staff. By wearing the associated pieces of armor (ie. those with Forest's Embrace) as a set, this activates the set bonus for improved buff amounts.
- Having a team member with the Bandage Friendly or resurrection abilities active during battle will also heals you and other allies present.
When you finish or leave a zone, elite challenge or dungeon, your health is fully restored.
Death
Should your remaining hit points reach 0, death occurs and a respawn timer starts. Then you cannot continue to battle before this timer runs out. During solo combat in a normal (non-dungeon and non-elite challenge) zone, this means the difficulty of the area you're in will be reset to 0 or the minimum starting difficulty set before entering the zone.
If you are in a dungeon or elite challenge, hopefully the remaining party members can continue towards the final confrontation, otherwise the dungeon run ends uncompleted and no dungeon victory loot is awarded.
Locations
You can fight enemies in combat zones, dungeons, or during elite challenges.
Difficulty
Each combat area has a difficulty that you can set, the default is 0 for every area.
A more difficult area means a greater challenge to stay alive, but also an increased chance to receive more and better loot. You can increase this by setting the difficulty before you enter the combat zone, or by augmenting your dungeon key or elite challenge scrolls.
Zones
Zones are areas that provide you with an endless stream of enemies which you will fight in waves. Every 50 waves, the difficulty of the area you're in goes up by 1. At the same time, the loadout associated to that area is reloaded, which means that if you have food in your loadout, your Combat Food inventory will be refilled when the difficulty goes up.
| Zone | Lowest Recommended Combat Levels |
Recommended Combat Style |
|---|---|---|
| Farm | 1–5 | Any Skill |
| Caves | 5–10 | Any Skill |
| City | 10–20 | Magic |
| Fallen Academy | 25–50 | Range or Melee |
| Lava Maze | 20–40 | Range |
| Corrupted Lands | 40–60 | Melee |
| Valley of Giants | 60–90 | Melee |
| Overgrown Woods (Duo Zone) | 25–50 | Range |
| Enchanted Armory (Duo Zone) | 40–70 | Magic |
| Elven Encampment (Duo Zone) | 50–75 | Range |
| Chaos Wastes (Duo Zone) | 90+ | Magic |
Dungeons
Dungeons are instances in which a group of players can band together to defeat the monsters within. After battling waves of enemies, a final boss awaits with the promise of treasure and accolades.
To enter a dungeon, a key is required. These keys can be crafted and upgraded through augmentation which will make the dungeon more challenging and the riches more enticing.
| Dungeon | Key | Lowest Recommended Combat Levels |
Recommended Combat Style |
Max Group Size |
|---|---|---|---|---|
| Goblin Settlement |  Torn Goblin Settlement Map Torn Goblin Settlement Map
|
30+ | Any Style | 3 |
| Dark Fortress |  Dark Fortress Key Dark Fortress Key
|
50+ | Any Style | 3 |
| Ancient Barrows |  Cursed Spade Cursed Spade
|
50+ | Melee/Ranged | 2 |
| Overgrown Castle |  Castle Map Castle Map
|
50+ | Any Style | 4 |
| Palace of Flame | 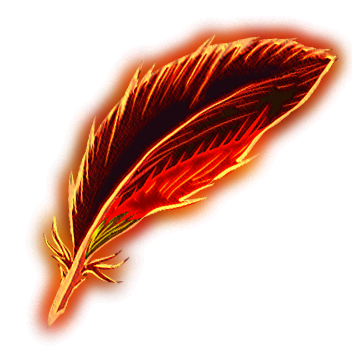 Burning Feather Burning Feather
|
60+ | Range/Magic | 2 |
| Giant's Keep | 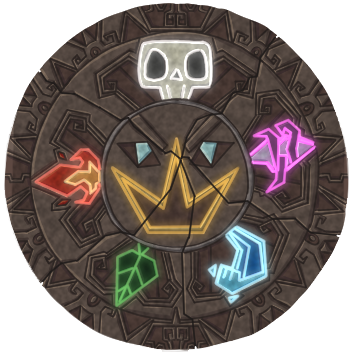 Giant's Keep Key Giant's Keep Key
|
75+ | Any Style | 5 |
| Eye of the Storm | 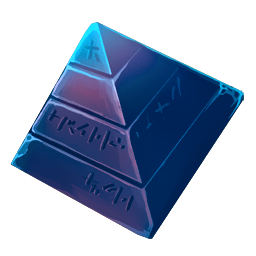 Ancient Pyramid Ancient Pyramid
|
75+ | Range | 5 |
| Elder Ruins | 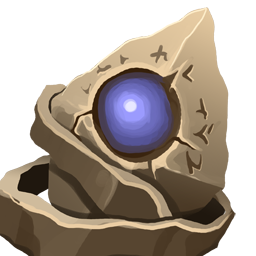 Elder Lockstone Elder Lockstone
|
75+ | Range | 5 |
| The Maelstrom |  Ancient Maelstrom Orb Ancient Maelstrom Orb
|
90+ | Any Style | 5 |
| RISE OF INFO |  Rise of Info Rise of Info
|
99+ | Any Style | 50 |
| Dwarven Research Station |  Dwarven Research Key Dwarven Research Key
|
Master/Legendary Gathering Gear | Master Miner | 1 |
| Nature Atheneum |  Heart of the Oak Heart of the Oak
|
Master/Legendary Gathering Gear | Master Forager | 1 |
| Abandoned Academy Base |  Abandoned Academy Scroll Abandoned Academy Scroll
|
Master/Legendary Gathering Gear | Master Fisherman | 1 |
| Master Chicken's Kitchen |  Prismatic Pudding Prismatic Pudding
|
Master/Legendary Gathering Gear | Master Chef | 1 |
Elite Challenges
Elite challenges are challenging instanced experiences in regular combat zones.
To enter such a challenge you need an Elite Scroll. These scrolls drop during combat in regular zones and can be found in chests.
Augmenting scrolls will increase the challenge and the amount of loot gained from it. Completing a challenge with an augmented scroll will also give you a permanent Treasure Hunter buff for that zone.
(TH means the Treasure Hunter buff)
---
| CollapseSkills (Experience Table) | |
|---|---|
| Gathering | |
| Production | |
| Magic | |
| Combat |
|


 Cluster-Cluck
 Stew Stained Page
 Black Knight's Trial
 Taproot Scroll
 Demonic Trial
 Stormy Sea Scroll
 Corroded Scroll
 Giant Scroll
 Shapeless Scroll
 Enchanted Armory Scroll
 Fallen Academy Scroll
 Overgrown Woods Scroll
 Elven Encampment Scroll
 Mining
 Fishing
 Enchanting